Navettes (Orange Blossom Cookies)

IMG_1459

A couple of years ago, Steve and I visited Cyprus for a few days. We rented a car and drove around, visiting some of the villages that have been experiencing a renaissance, after many years of neglect. Agrotourism has opened up investment opportunities and as a result old houses have been restored, traditional foods have resurfaced, and a few are even moving back to the villages, abandoning the cities.
IMG_3239

We were there around the end of April, which is a perfect time to go. The brutal heat of the summer hadn’t started yet and everything was in bloom. The mountainsides were solid green, broken by large patches of poppies and daisies. It was also the time when citrus trees were in late bloom. Orange and lemon orchards were everywhere. One day we were driving through a village with our windows down and as soon as we approached, we were immersed in the scent of orange blossoms.


IMG_3244

If you’ve never experienced walking through a blooming orange orchard, put it on your list of things to do. The scent is intoxicating. It resembles that of jasmin or honeysuckle but it’s less cloying, more like…well, what you would expect orange blossoms to smell like. But if you don’t have access to an orange orchard, you can have the experience by buying a bottle of orange blossom water. IMG_3248

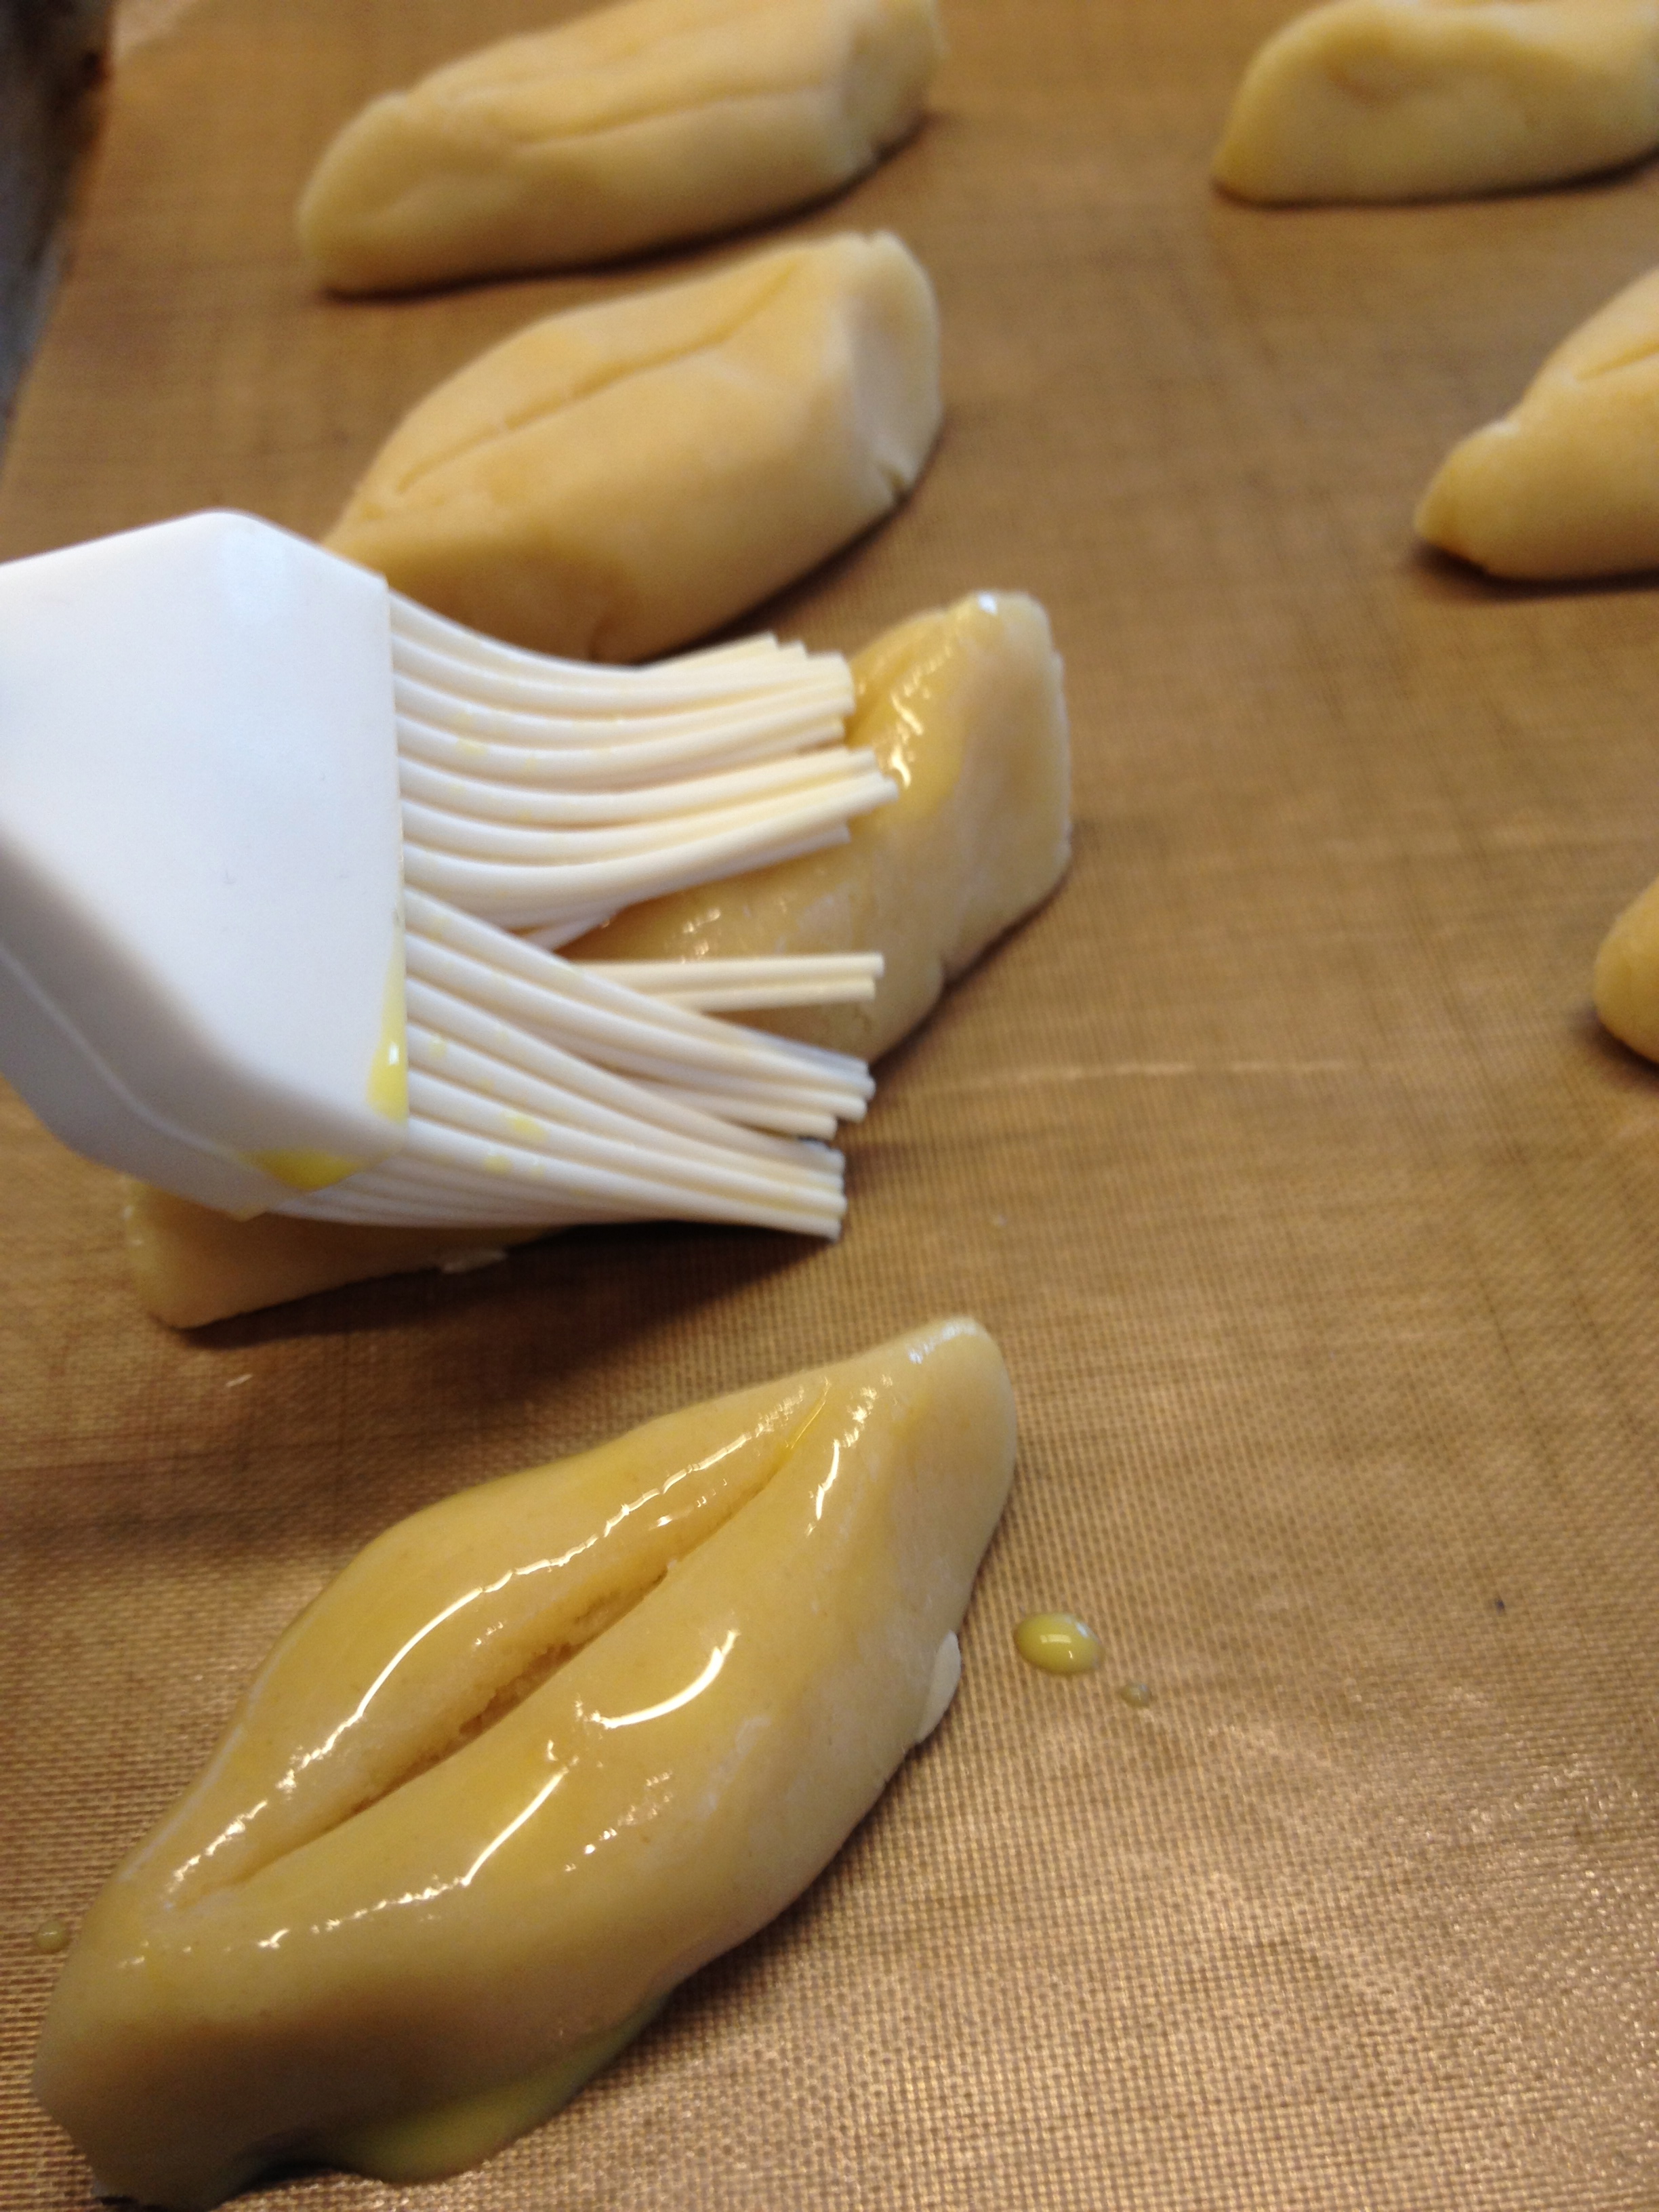
You’ll find orange blossom water in most middle eastern or italian food stores, or some large supermarkets like Whole Foods. It has a strong orange blossom flavor and aroma but it’s unsweetened. A little goes a long way. It also lasts for a really long time in the fridge. IMG_3249

There are many things you can do with it (like add a little in a fruit salad) but I have a couple of favorite recipes I can share with you. One is an ice cream that I will post later. The other one is a cookie from the south of France called navette. It means little boat (because of its shape, though they also look like lips to me) and its very simple to make, right in the food processor. The cookies will last for at least a couple of weeks in an airtight container, if you haven’t finished them off by then. The perfect pairing for them? Jasmine tea. Try it. It’s sublime.

Navettes: Orange Blossom Cookies – Adapted from Chocolate and Zucchini: Daily Adventures in a Parisian Kitchen

4 tablespoons (1/2 stick) unsalted butter at room temperature
1/2 cup sugar
1 large egg, lightly beaten
3 tablespoons orange blossom water
2 cups all-purpose flour
1/4 teaspoon salt
1 egg yolk, lightly beaten with 1 tablespoon water

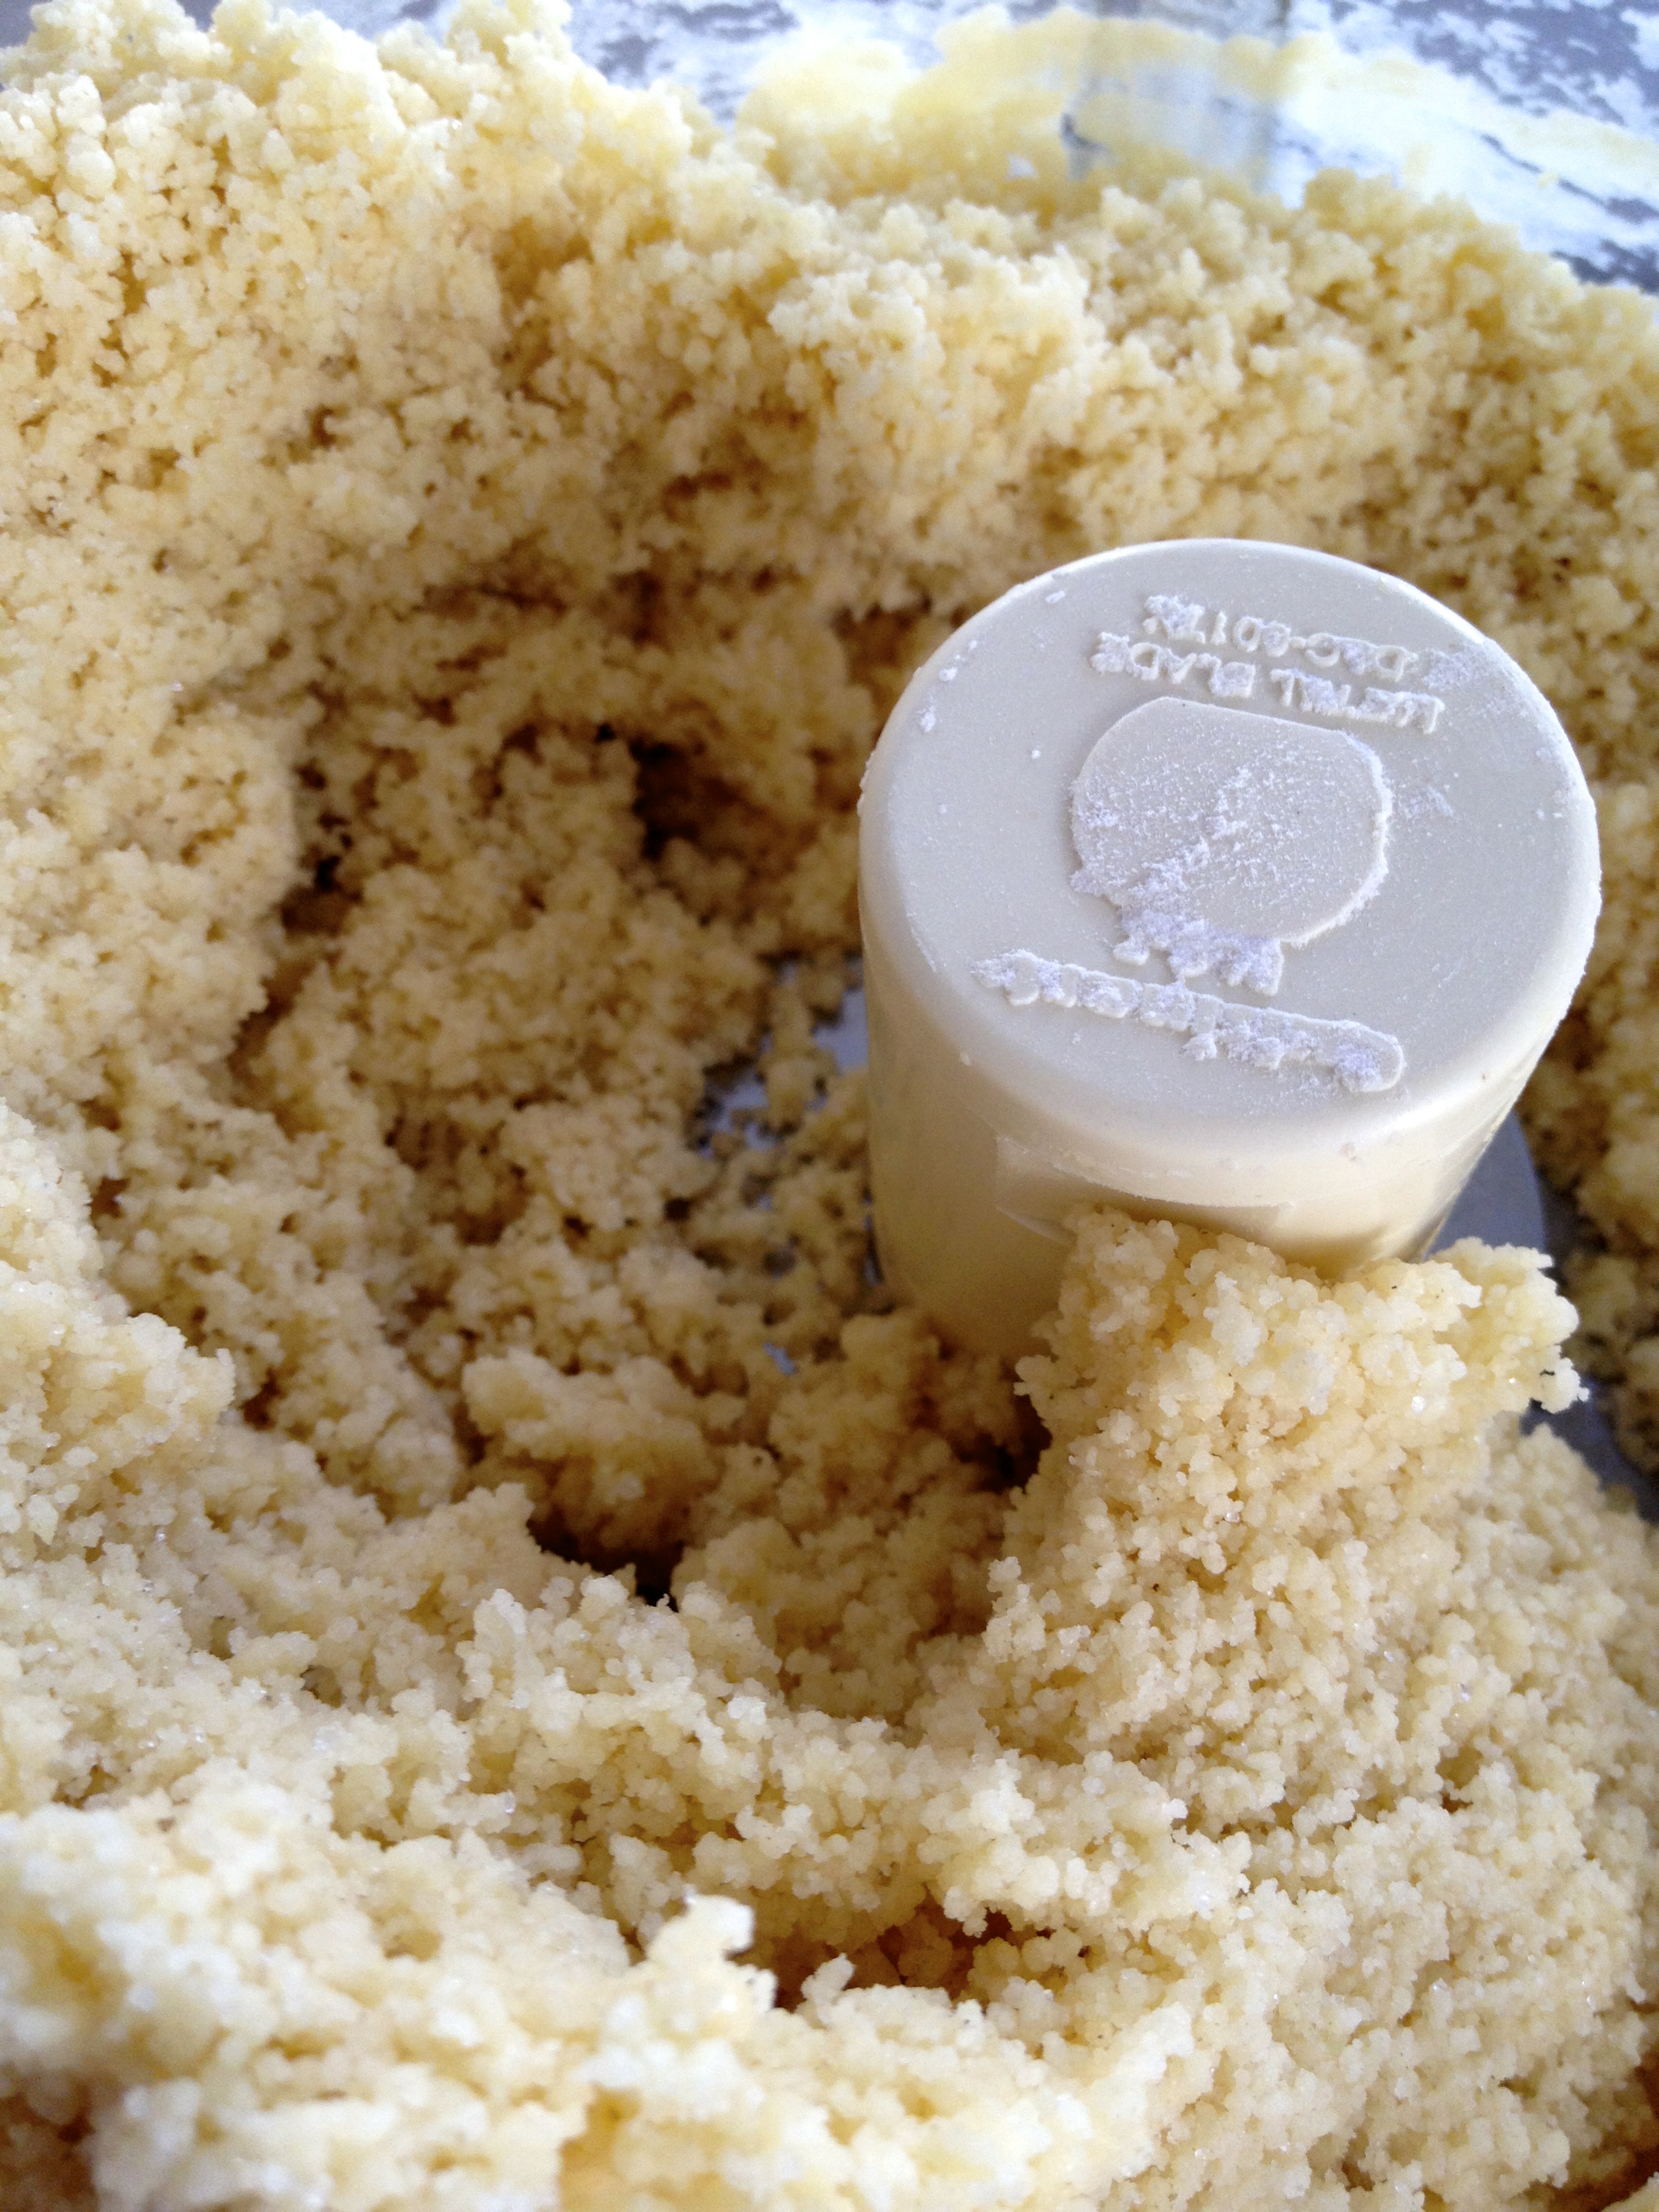
Combine the butter and sugar in a food processor and process a few seconds until they are fluffy. Add the egg and orange blossom water. Pulse a few times until everything is blended. Add all the flour and salt and process a few seconds until mixed. The mixture may be crumbly but if you take a little and press it between your fingers, it should come together.

Empty the dough on a lightly floured surface and knead it gently until it forms a ball. Add a little more flour if the dough is too moist, or a little ice-cold water, one teaspoon at a time, if it’s too dry. Divide the dough into two disks, wrap each half in plastic, and refrigerate for at least an hour, or up to a day.

Preheat the oven to 350F and line a baking sheet with parchment paper. Take one disk of dough out of the refrigerator and divide it into 8 equal pieces. Roll each piece with the palm of your hand on the work surface until it forms a log, about 3 inches in length. If the log comes apart, just squeeze the pieces together. The logs don’t have to be perfect.

Cut the log in two with a knife so you have two 1 1/2 inch logs. Repeat with the other pieces until you have sixteen small logs. Pinch the ends of each small log and flatten the top slightly, to form a boat shape. With the tip of a butter knife, carve a deep slit lengthwise down the centre, not quite reaching the other side or the ends. Arrange the cookies on the baking sheet and repeat with the second half of the dough. The cookies don’t rise or expand so you can put  them fairly close to each other, though not touching.

Brush the cookies with the egg yolk mixture. Bake for 15 minutes, until golden and slightly browned at the tips. Transfer to a rack to cool completely. The dough can be frozen for up to a month. Defrost overnight in the refrigerator before forming and baking the navettes.

Thai Chili Vinaigrette

When I first came to the U.S., I was a bright-eyed 19-year-old with a suitcase and a thirst for exploration. The first few months of my life in Philadelphia as a freshman in college seem like a dream today. I was discovering so many cool and interesting things that I had never experienced before: Roller coasters; The Awesome Blossom deep fried onion at Chili’s; and heat. Not the radiator kind but the pepper one.

At the age of 19, I was so unaccustomed to hot food that ground black pepper was too hot for me. But it didn’t take me long to figure out that I liked heat and that with a little practice I could tolerate hot sauces and peppers. Today I relish them.

IMG_3237

My favorite hot pepper is the Thai red pepper. Not only because of its fruity, pleasant taste but also because of where its heat hits you. It’s concentrated at the very front of your mouth and the lips. After eating something with Thai red peppers in it, your lips prickle and buzz, like the aftermath of an extraordinary first kiss.

IMG_3234

This recipe is for a very basic vinaigrette that is in fact a common table condiment in Thailand called Nam-Pla Prik. It’s easy to make and it has the characteristic flavor combinations of Thai food: heat, salt, sweet, sour, and umami. It’s absolutely delicious tossed with roasted vegetables (like brussel sprouts or winter squash) and it transcends any fillet of fish that has been simply cooked in a sauté pan or in the oven.

IMG_3235

Thai chili vinaigrette

3 tablespoons fish sauce (adjust to your taste)*
2 tablespoons water
1 tablespoon rice vinegar (or rice wine vinegar)*
juice of 1/2 lime
2 tablespoons sugar
1 small garlic clove (or 1/2 large) pressed in garlic press or grated on microplane zester
1 Thai red chili (red bird’s eye chili), very thinly sliced, seeds and all**

* You can find fish sauce and rice vinegar in almost any supermarket, in the international foods section
** I usually buy a bunch of Thai red chilis and I keep them in a ziploc bag in the freezer (they keep for months). I slice one when I need it without even defrosting it first.

Combine all the ingredients in a bowl and whisk until combined and sugar has dissolved. Alternatively, you can put everything in a jar and shake until sugar is dissolved.

Extra sauce will keep in the fridge for a while.

Carrot Salad (with blueberries…maybe)

This isn’t much of a recipe. That is, the ingredients aren’t anything special and there are no strict measurements for them. But there are a few things that are important, and if you follow them, this simple combination of carrots, lemon juice, olive oil, and salt become something ethereal but snappy, light but hearty.

20130219-195014.jpg

This is what you do. Take carrots (here I took 6 small ones) and grate them using the small teardrop holes of the grater. This is important. The small teardrop holes shred the carrots into fine threads that are juicy but have just a tiny bit of bite to them. The result is a mushy pulp that makes you want to take another bite, and another, and another. I know it’s a pain and that the large holes take less time, but trust me on this one.

20130219-195841.jpg

Put the carrots in a bowl and add a generous splash of good olive oil (for the 6 small carrots I added 1 1/2 tablespoons) and a good amount of lemon juice. None of the bottled stuff. You need real juice from real lemons. And you need more than you probably think (I used 1 tablespoon here). Finally, you need salt (I added 3 good pinches of kosher salt). The result is sweet, sour, salty, and a little fatty, thanks to the oil.

20130219-200325.jpg

It should all end here, and it almost always does. But as I opened the fridge to put the half cut lemon back in, I saw the packet of fresh blueberries I had bought earlier and I though, what the hell. So in they went. And you know what? It worked great. Again, sweet, sour, salty, and fatty. Can’t go wrong. But if you don’t have blueberries, no worries. All you need is carrots, olive oil, lemon juice, and salt. Simple as that.
20130219-200648.jpg

Ice Cream Maker

So  you know the story where you have a boyfriend who’s really nice, uncomplicated, reliable, and brings you simple joy and happiness but then you meet this other guy who seems to have more of everything – he has “initiative” (he’s started several companies that have failed but he’s trying, any day now), a great body, and promises of a lifetime of amazing adventure, so you dump your simpler boyfriend for this better one, only to realize after a few months that he’s no better at all, really he’s all show and no substance and none of his promises have or will ever be kept, so you go back to your nice first boyfriend who takes you back and everything is good with the world again? You know that story?

Well, it happened to me, except instead of with boyfriends, it happened to me with ice cream makers.

Ok, let’s get one thing straight. There will be several ice cream recipes in this blog. And if you are one of those people (like I used to be) who are completely dumbfounded by the phrase “freeze in an ice cream maker according to the manufacturer’s instructions” at the end of recipe, then here is the solution: buy an ice cream maker. It’s really, really simple. And cheap.

Back to the story. When I first started making ice creams and sorbets, I bought this simple ice cream maker,the Cuisinart ICE-21 Frozen Yogurt-Ice Cream & Sorbet Maker.
IMG_2197It’s the kind that requires that you keep the bowl in the freezer at all times and take it out whenever you want to make ice cream. But one day, I got it in my head that I wanted a better and fancier one. So, I bought this one:

IMG_2199I’m not even giving you the link to this one because I don’t want to encourage you to buy it. It was expensive (almost $300) but it had the one thing my old one didn’t: a compressor. So I didn’t have to keep a bowl in the freezer and I could make a batch of ice cream whenever I wanted. Plus I could make two batches back to back if I wanted since the compressor would keep the bowl cold.

I think you see where this is going. My original, simpler ice cream maker was quiet, fast (ice cream was ready in about 20 minutes), cheap ($50 on Amazon), and made smooth, delicious ice cream and sorbet (speed is important in ice cream making, in order to avoid crystals forming in it, which make it icy). But I threw it away for this monster that ended up being heavy, expensive, really loud, slow (45 minutes or more for ice cream), and almost never made a good batch of ice cream.

So, I went back to Amazon and bought another one of my original ice cream maker and put the other one in a closet, until I give it away.

And as far as saving space in my freezer? Well, the bowl, being a bowl, is empty inside. So, I put things in it to minimize the space wasted. Like, for example, bread cubes I save from leftover homemade bread, which I use to make bread pudding (recipe to come).

IMG_2196So, if you don’t have one, go and buy it at Amazon. And then, make a batch of Malted Milk Ice Cream.

Cranberry-Pistachio Yogurt Cake

My favorite food magazine used to be Gourmet. I loved it because it was serious about food but not pretentious. It approached food as more than just nourishment. It appreciated its many dimensions and roles in our lives and did it all with fun, class, and a hell of a lot of great recipes and advice.

And for the last ten years of its life, it was headed by Ruth Reichl, one of my food idols. I always joke that if I run into her somewhere, I will turn into a blithering idiot or a twelve-year-old-girl-meeting-Bieber, and will probably just end up muttering “I vav you” or something incomprehensible like that.

IMG_2187

Anyway, when Condé Nast announced in 1999 that they were shutting down Gourmet, I was really upset. But even worse was the accompanying announcement that they were putting all their resources in Bon Appétit,  a magazine that ranked just above Cooking Light or The Rachel Ray Show in my eyes. So, I kept my last issue of Gourmet, complained for a while, and then went on with my life.

But then in 2010, they changed the editor-in-chief of Bon Appétit to Adam Rapoport and something happened. The magazine became more interesting, more useful, more joyful about food. In other words, it became more like Gourmet.

IMG_2190

To make a long story short, I subscribed to it and I now devour it every month (though I still miss Gourmet). This recipe is a variation on a recipe that appeared in Bon Appétit in May 2012 for a French Yogurt cake. It’s a brilliant recipe (a variation of one that has existed in France for decades). It’s simple to make (just two bowls and a whisk), it’s delicious, and it’s infinitely adjustable.

IMG_2191

My version here is one of our favorites. It combines the lemony goodness of the cake, with sweet-tart cranberries, and the crunch of pistachios. I make it probably twice a month, let it cool, slice it, and freeze the slices in pairs of two. Whenever we want, we take two slices out at night and leave them overnight on the counter to thaw. They make an excellent breakfast.
IMG_2193

Cranberry-Pistachio Yogurt Cake – Adapted from Bon Appétit

1 1/2 cups all-purpose flour, plus more for dusting
2 teaspoons baking powder
3/4 teaspoon kosher salt (or 1/2 teaspoon table salt)
1 cup sugar
finely grated lemon zest of one lemon (preferably organic/unsprayed)
3/4 cup whole-milk Greek yogurt*
1/2 cup vegetable oil
2 large eggs
1/2 teaspoon vanilla extract
1 cup of fresh or frozen cranberries, very coarsely chopped
1/3 cup shelled pistachios, coarsely chopped

* I use one 7 oz small container of FAGE Total greek yogurt

Preheat oven to 350°. Coat a 8 1/2 x 4 1/4-inch loaf pan with a little vegetable oil. Dust with flour and tap out excess.

Whisk 1 1/2 cups flour, baking powder, and salt in a medium bowl. Add chopped cranberries and mix with a spoon.

Using your fingers, rub sugar with lemon zest in a large bowl until sugar is moist. Add yogurt, oil, eggs, and vanilla extract; whisk to blend. Fold in dry ingredients just to blend. Don’t overmix.

Pour batter into prepared pan and smooth top. Sprinkle chopped pistachios and very gently press them with palm of your hand so that they adhere to the batter. Bake until top of cake is golden brown and a tester inserted into center comes out clean, about 55-60 minutes.

Let cake cool in pan on a wire rack for 15 minutes. Invert onto rack; let cool completely. The cake can be made 3 days ahead. Store airtight at room temperature.

Horseradish

Last summer, we were walking through one of the food markets in our neighborhood when I noticed a stall that sold horseradish. That’s it. Just horseradish, the prepared kind, that comes in a jar. And there were two versions: beet horseradish and citrus horseradish.

The woman selling it asked us if we wanted to try it. “Yes!” I exclaimed, a little too eagerly. I love horseradish. I love the kick and earthiness combination that nothing else gives you like horseradish. This citrus version that I tried was all that and more. By introducing orange and lemon in there it added dimensions of sourness and sweetness that made it pretty much irresistible.

HorseradishNeedless to say, we bought a jar and went through it pretty quickly. We put it on fish, eggs, pork, you name it. I’ve had fantasies of making a horseradish ice-cream, but it hasn’t happened yet.

The brand is called ish (get it?) and you can buy it on their website here. Or you can look for them in the outdoor markets of New York.

Malted Milk Ice Cream

IMG_2185

There are some things that I like to say I have a problem with. One of them is chocolate. I have a problem with chocolate. As in, once I take a bite of chocolate I am consumed by an uncontrollable, insane desire to keep eating it. It’s a problem. Really.

I also have a problem with malt. Or more precisely, malted milk powder. You know, the stuff that’s inside Maltesers  (if you’re European) or the extremely inferior Whoppers (if you’re American). My problem gets even worse because malted milk powder is often combined with chocolate (see Maltesers and Whoppers above).One bite can drive me into a kind of Zombie-like, straight-out-of-the-walking-dead behavior.

IMG_2183 IMG_2184

So when I saw the recipe for Malted Milk Ice Cream in David Lebovitz’s amazing book “The Perfect Scoop,” I knew I had to make it. And I did. And it was good. Really, really good. So good, I’ve made it more than a dozen times ever since.

IMG_2186

So here it is. But if you make it and can’t stop eating it, I will not be held responsible.

Malted Milk Ice Cream – Adapted from “The Perfect Scoop” by David Lebovitz
Makes about 1 1/2 quarts (1 1/2 liters)

2 1/2 cups (625 ml) heavy cream
1/2 cup (125 ml) whole milk
pinch of salt
3/4 cup (150g) sugar
1/4 teaspoon vanilla extract
2/3 cup (90 g) malted milk powder*
6 large egg yolks
2 cups (350 g) malted milk balls, coarsely chopped**

* I buy mine online from King Arthur Flour
** Maltesers are the best here but if you can’t find them, you can use Whoppers

In a large bowl, whisk together 2 cups of the heavy cream, the vanilla, and the malted milk powder. Set a mesh strainer over the bowl and set aside.

In a separate medium bowl, whisk together the egg yolks. Meanwhile, in a medium saucepan, warm the milk and the remaining 1/2 cup of the heavy cream along with the sugar and salt, stirring until the sugar dissolves. Slowly pour the warm milk mixture in the egg yolks while whisking constantly. Pour the whole thing back into the saucepan and stir it constantly over medium heat until it thickens and coats the back of the spatula. Make sure to scrape the bottom of the saucepan as you stir.

Pour the mixture over the mesh strainer into the bowl with the cream and malt. Stir to combine. Cool the mixture by either putting the large bowl in an ice bath and stirring or by putting in the fridge.

Once the mixture is chilled, freeze it in your ice cream maker according to the manufacturer’s instructions. As you take the ice cream out of the machine, fold in the chopped malted milk balls.