Stone Fruit Cobbler

DSC03259

We’ve done quite a lot of traveling around France over the years. We have always preferred to stay either in a chambres d’hôtes (a bed & breakfast) or, if we are traveling with a group of friends, a gîte (an entire house). Without a doubt, one of our favorite things about staying in a bed & breakfast has always been the breakfast part. The bed part is rarely good. The mattresses are often old and either lumpy and soft or hard as a rock. And the pillows are almost always square. Yes, square. The French use square pillows. Which means that the bottom of the pillow comes under your shoulders. And that makes for a really uncomfortable night of sleep. We’ve actually considered traveling with our own pillows but we don’t want to carry that much luggage.DSC03257

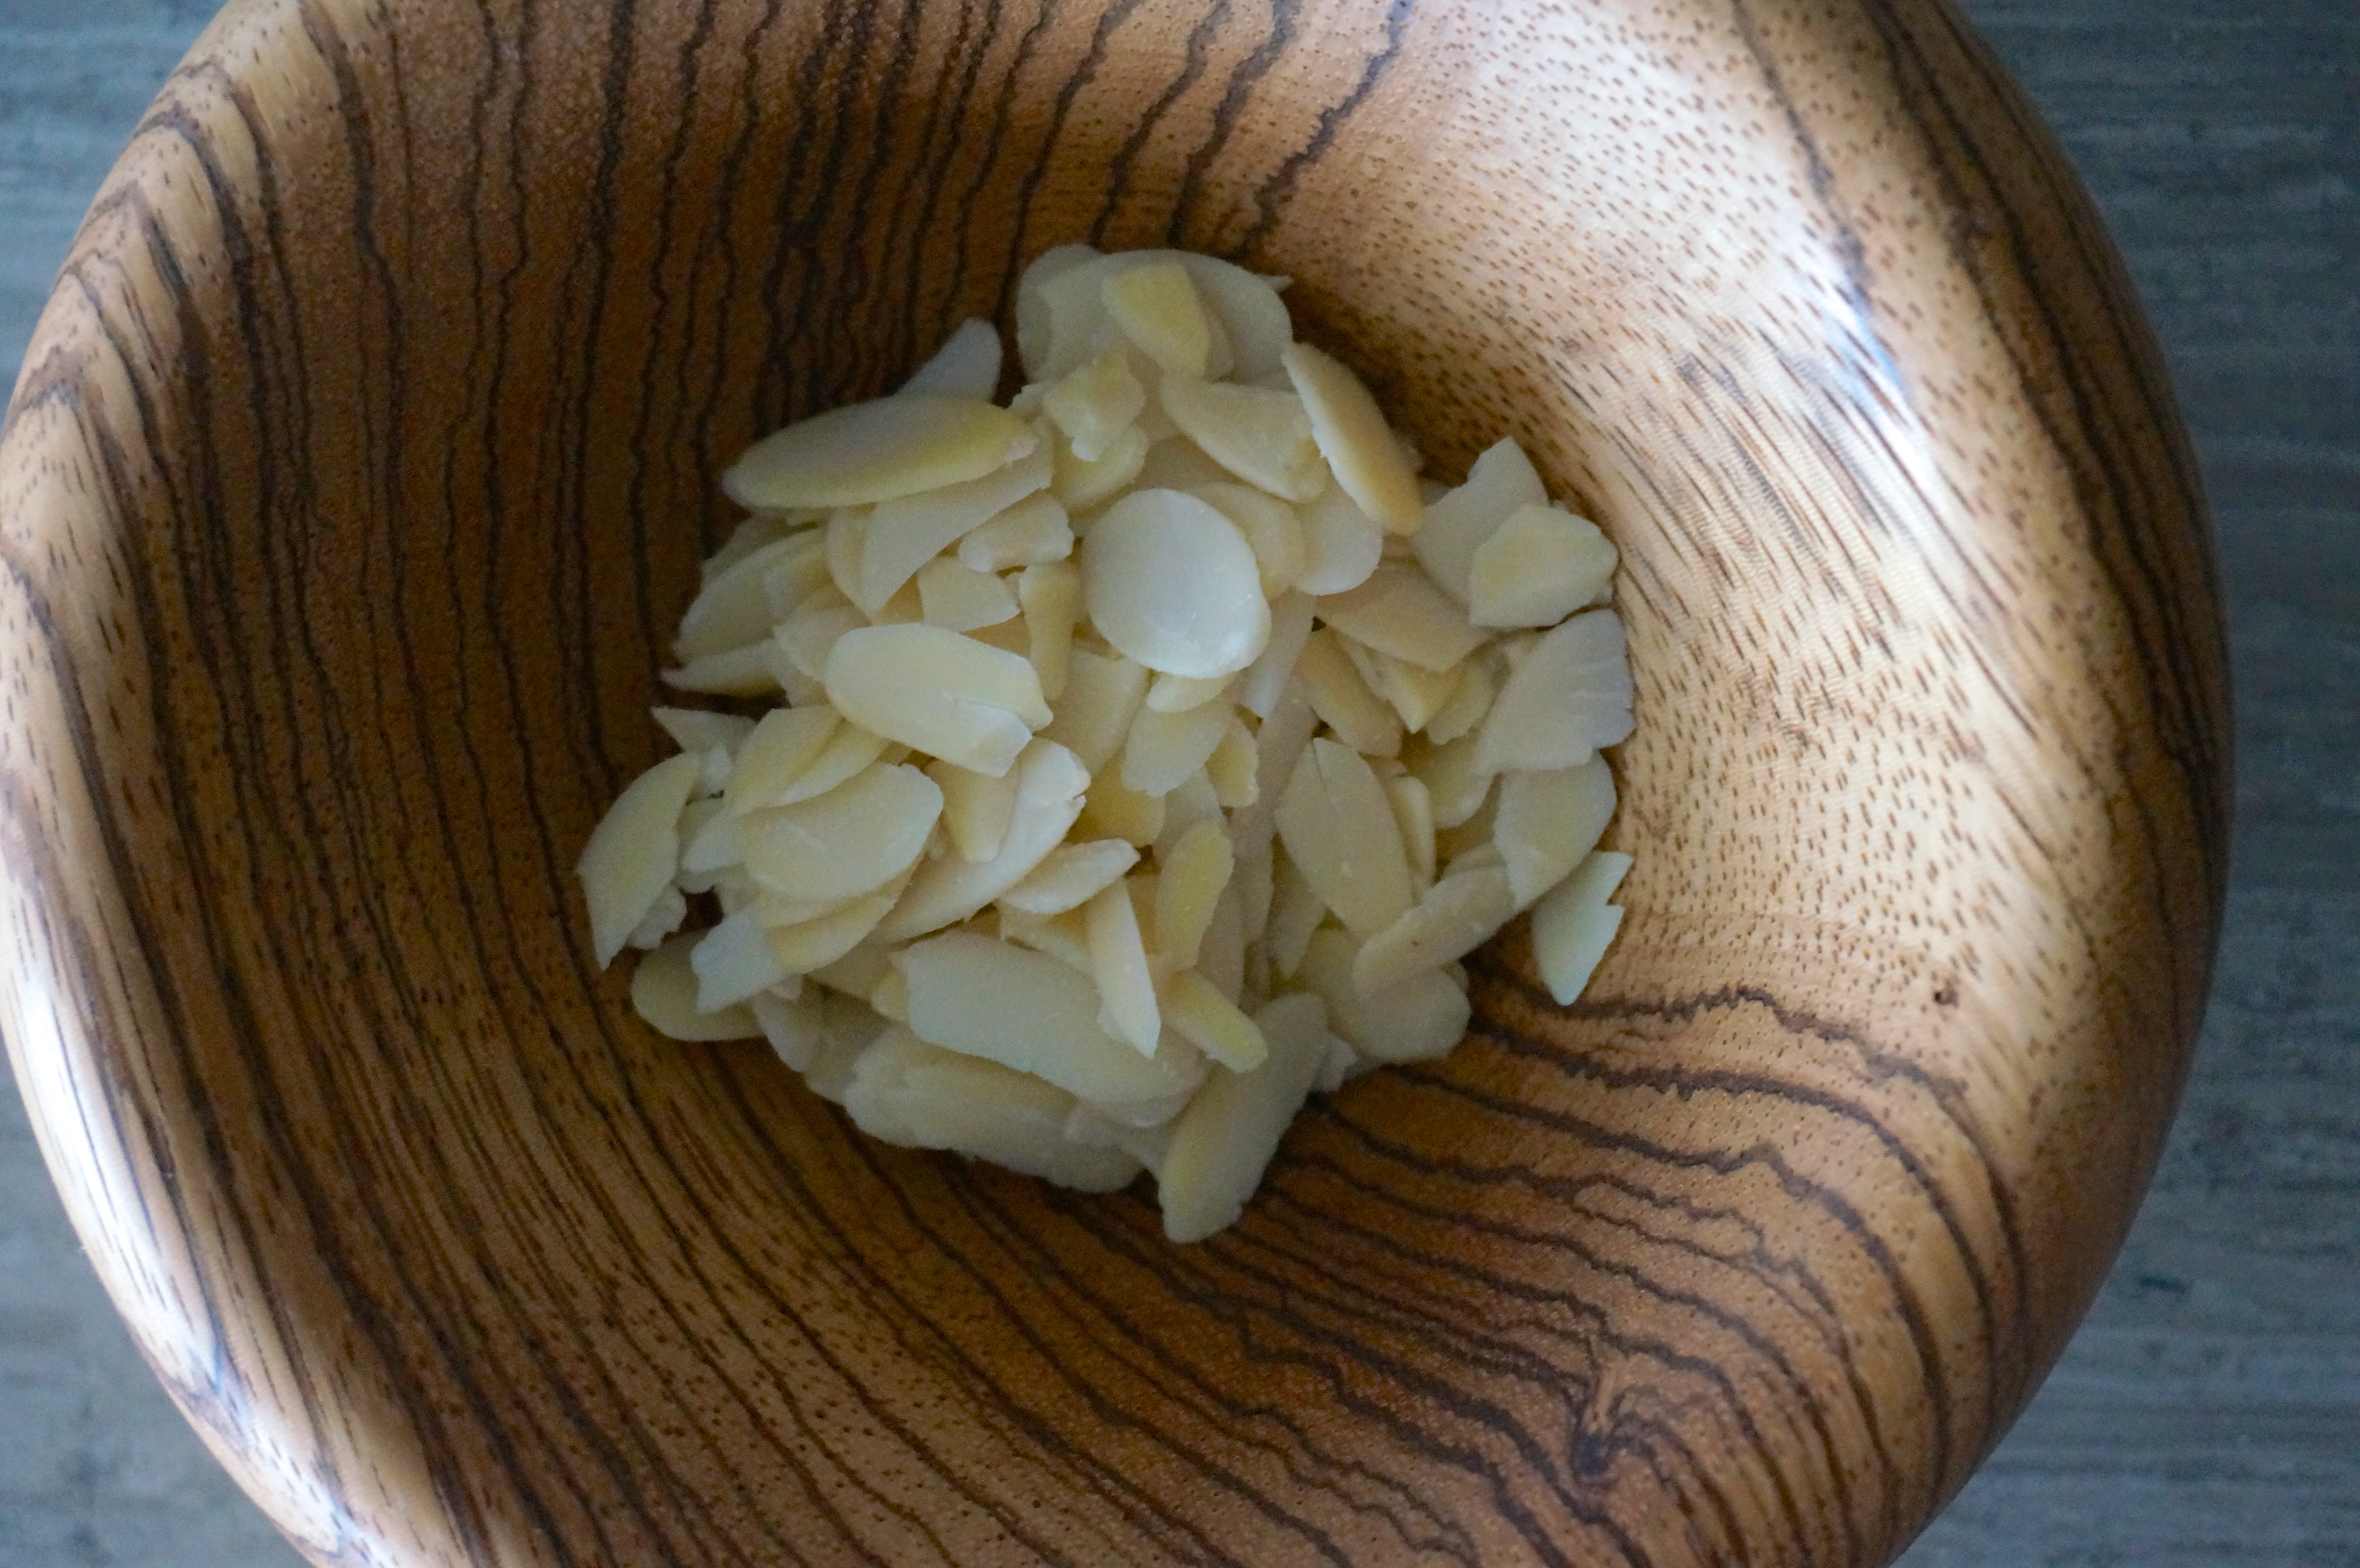
Anyway, back to the breakfast part. It is always a rather rich affair, with fresh bread, salted butter, homemade jams, fruits or fruit salad, baked goods, cheeses, and whatever else the owners have either prepared or acquired from their local market. I remember one B&B in the Loire valley that had the most amazing homemade jams. I still dream about their peach and rosemary jam. As you may already know, breakfast is very important to Steve and me. We wake up hungry, hungry! One of our friends has a funny photo that she took on our last trip when we were all staying at a B&B in Normandy. Steve and I are at the big dining table that is covered with untouched breakfast food. We are the first ones there, sitting ramrod straight in our chairs, staring straight ahead at the camera, looking incredibly hungry and anxious. It’s obvious we are thinking “why are they not down yet? when are we going to eat? we are so hungry.” DSC03251

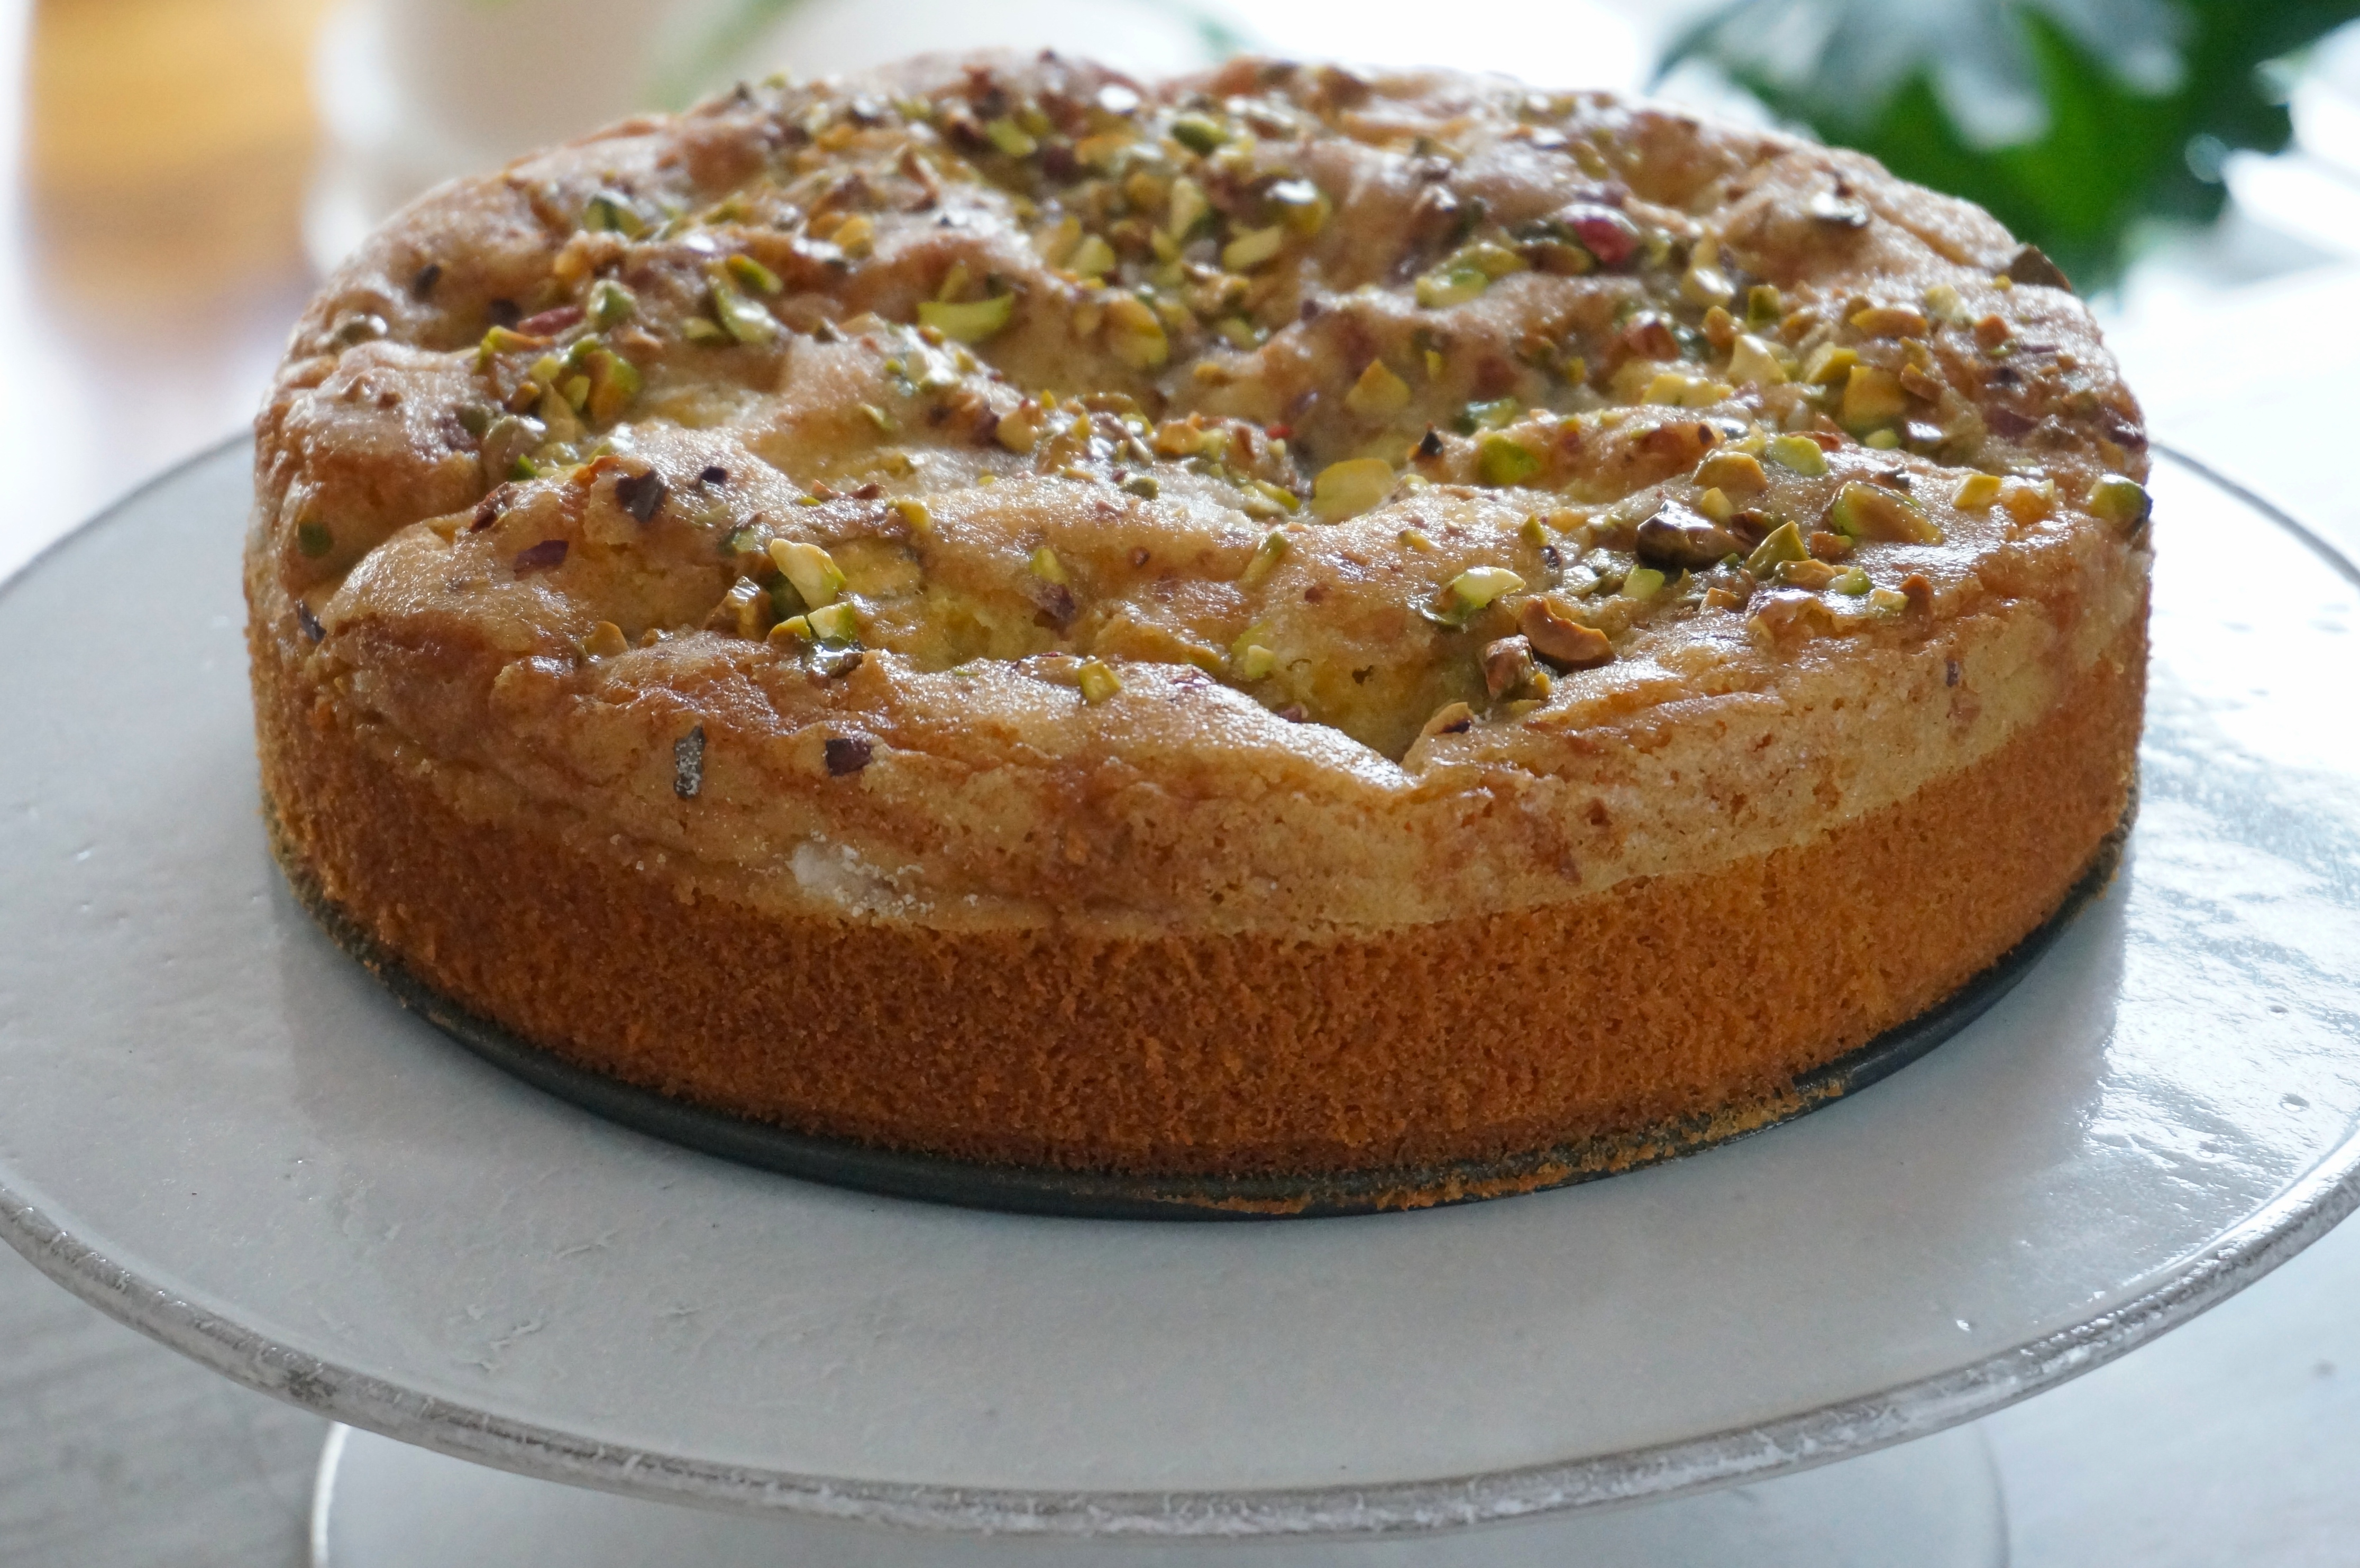
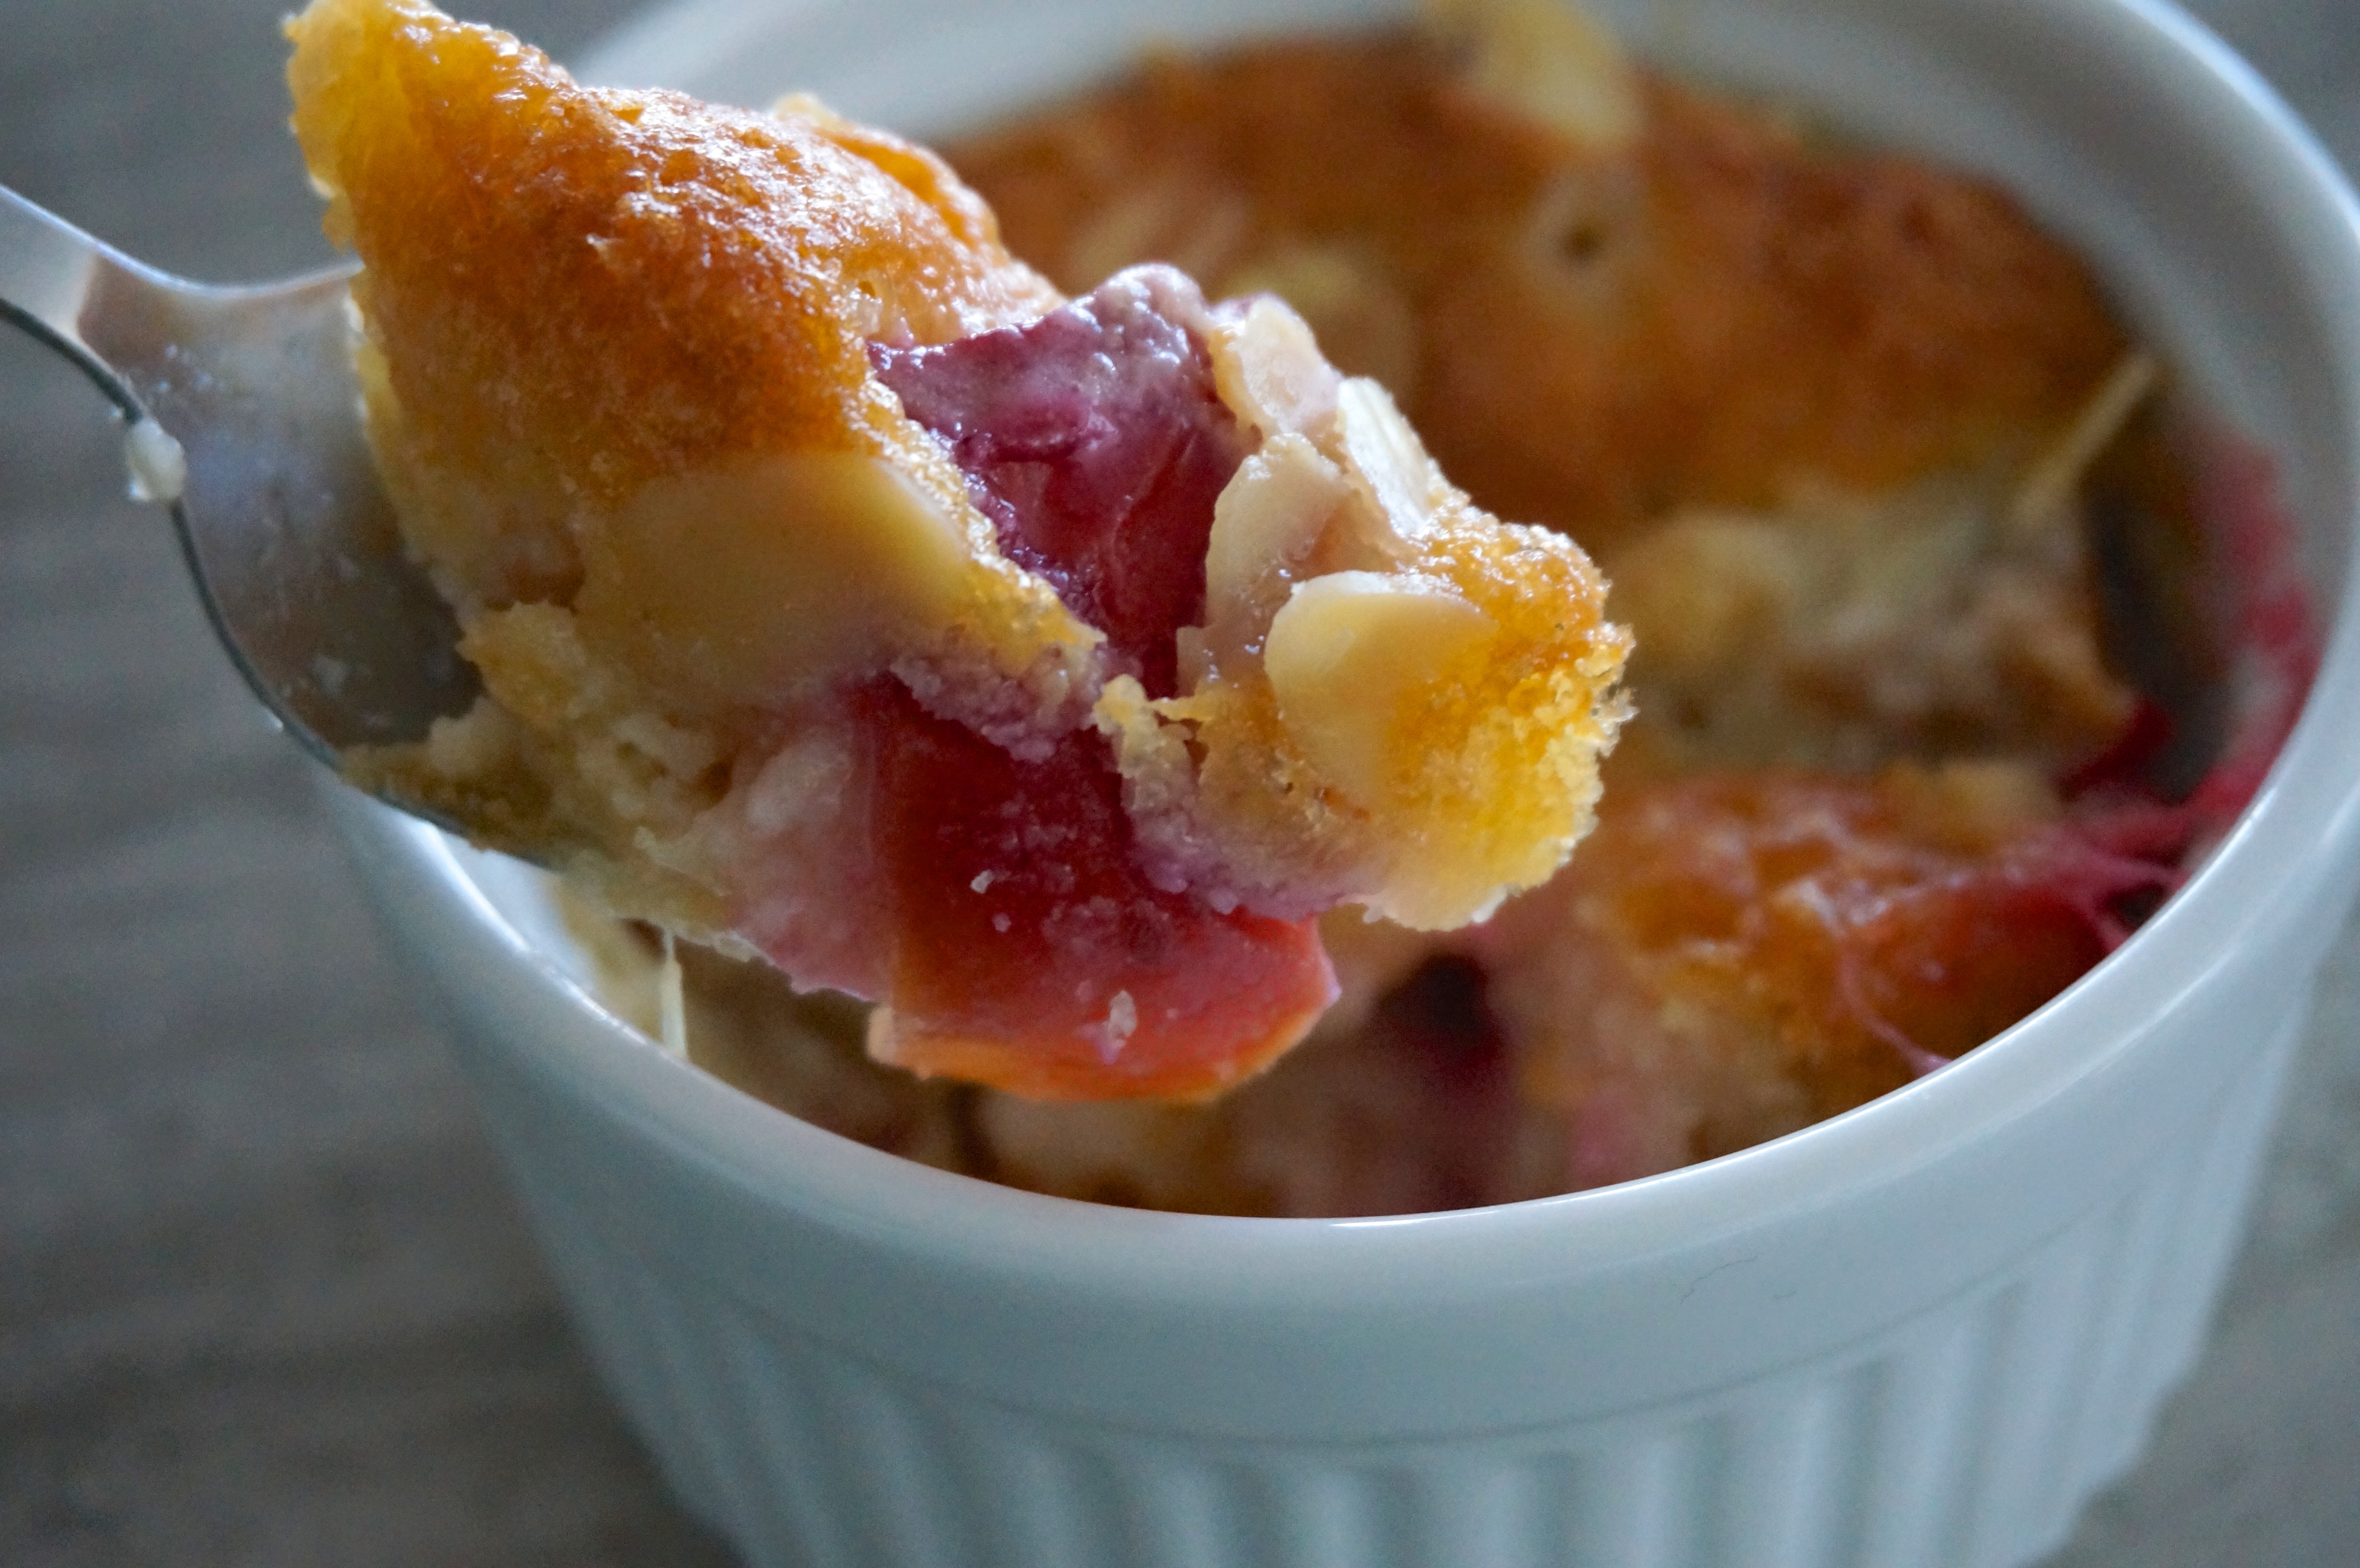
This stone fruit cobbler is the type of dish that would be typical at this kind of breakfast. It’s quick to make and it uses few ingredients and seasonal fruit. It can be made in advance and kept in the fridge, ready to be presented to the two hungry American tourists that are sitting at the table by themselves, looking like they are ready to devour everything.

DSC03246


Stone Fruit Cobbler – Slightly adapted from Bon Appétit

Note: If stone fruit is not in season, you can use other fruits like apples or berries.

Ingredients:

3 pounds peaches, nectarines, or plums, each cut into 6 wedges (or 1″ pieces if using ramekins)
½ cup granulated sugar
2 tablespoons all-purpose flour
¼ teaspoon kosher salt
1 tablespoon kirsch (clear cherry brandy) or other fruit brandy (optional)
½ tablespoon orange flower water (optional)
½ cup all-purpose flour
¾ teaspoon baking powder
¼ teaspoon kosher salt
½ cup (1 stick) unsalted butter, room temperature
3½ oz. almond paste
½ cup granulated sugar
3 large eggs, room temperature
½ cup sliced almonds, toasted in a dry skillet over medium heat until pale golden brown

Directions:

Toss peaches, granulated sugar, flour, salt, kirsch and orange flower water, if using, in a large bowl. Transfer to a 13×9” baking dish or split among 12 ramekins; set aside.

Preheat oven to 350°. Whisk flour, baking powder, and salt in a medium bowl. Using an electric mixer, beat butter, almond paste, and granulated sugar in a large bowl until light and fluffy, about 4 minutes. Add eggs one at a time, beating to blend after each. Mix in dry ingredients.

Drop dollops of batter over fruit (batter will even out during baking). Sprinkle with almonds. Place baking dish or ramekins on a rimmed baking sheet and bake until topping is golden brown and fruit juices are thick and bubbling, 50–60 minutes for13x9 dish or 45-50 minutes for ramekins. Let cobbler sit at least 20 minutes before serving. It will sink as it cools down.

Cobbler can be served slightly warm, at room temperature, or cold, straight out of the fridge. It can be served as dessert but it also makes a wonderful breakfast or brunch addition.

Double Chocolate Zucchini Bread

DSC03058

I am not a fan of the cherished American tradition of making desserts out of vegetables. I have never liked pumpkin pie. Sweet potato pie? Not for me. I’ll eat a slice of carrot cake but only because it’s usually covered in sugary, creamy frosting (though I did recently find this unfrosted recipe that I love). I think zucchini muffins are ok as a snack but as dessert? No way. It’s not because I don’t like the vegetables themselves. I love them. But only in savory dishes.

DSC03051

Maybe it’s an American vs. non-American thing. We tried to get our friends in Paris to have some pumpkin pie one year when we were celebrating Thanksgiving with them. They wouldn’t even touch it. For them, it was a double abomination. It was made out of pumpkin, a vegetable, and it included a healthy amount of cinnamon, a spice they associate with savory dishes and can’t understand why Americans put it in every dessert (I’m on the side of Americans on that one; I love cinnamon in desserts).

DSC03053

In any case, this is the time of year when people who are lucky enough to have vegetable gardens start to post pictures of all the zucchini they are getting and asking for recipes to use it up. Inevitably, zucchini bread recipes start appearing left and right. I usually ignore them. But when I saw this recipe for double chocolate zucchini bread, I was curious. I mean double chocolate! I am happy to report that a couple of hour later I had made the first zucchini bread I love.

Now, let’s be honest here. This is a chocolate cake. No, a double chocolate cake. The zucchini is a minor player. Really minor. You won’t even know it’s there. But heck, if you want an excuse to justify eating a slice of moist, rich, luscious chocolate cake, tell people this is a zucchini bread and that it’s actually “good for you.” And then walk away before they ask to try a bite out of your own slice.

DSC03065

Double Chocolate Zucchini Bread – Slightly adapted from The Kitchn

Ingredients:

1/2 vegetable oil
1 cup (7 ounces) granulated sugar
2 large eggs
2/3 cup (1 ounce) cocoa powder
1 teaspoon vanilla extract
1/4 teaspoon salt
2 teaspoons baking powder
2 cups coarsely grated zucchini
1 1/3 cups (6 ounces) all-purpose flour
1/2 cup semisweet chocolate chips

Directions:

Butter and flour an 8×5-inch loaf tin then preheat the oven to 350°F.

In a medium bowl, whisk together the cocoa, salt, baking powder, and flour.

In a large bowl, whisk together the oil, eggs, vanilla, and sugar until combined. Stir in the zucchini until combined.

Add dry ingredients to the wet ingredients and fold until combined (do not overmix). Fold in the chocolate chips.

Transfer the batter to the loaf tin and spread out using a spatula or the back of a spoon. Bake for 60 to 70 minutes until the cake has risen and a toothpick inserted into the center of the loaf comes out without batter on it (the toothpick might just have some melted chocolate on it from the chocolate chips).

Let the cake cool in the pan for 10 minutes before turning out onto a wire rack to finish cooling completely.

Pickled Watermelon Rind

DSC03238

I confess that in my goal to post on this blog every week, I sometimes have to share recipes that I simply like, instead of recipes that I absolutely, positively, totally ADORE! It’s just not possible to find a new recipe every week that is a life changer. But once in a while, I do find a recipe that results in something so delicious, so interesting, so enticing, that I can’t wait to share it with anyone who’s willing to listen.

This is one of those recipes. Pickled watermelon rind is nothing new,  though it’s somewhat new to me. Where I grew up, a traditional desert was watermelon rind that had been preserved in a heavy sugar syrup. It was always kept in the fridge and served ice cold in the hot summer months. It has always been one of my favorites.

DSC03093

So when I saw this recipe for pickled watermelon rind in Bon Appétit, I was a little put off by the idea of a pickled version of one of my favorite desserts. So I ignored it. But then, the wonderful guys of the Bitten Word blog made it and they gushed about it so much that I decided to give it a try myself.

It was an easy process. Peel the rind, cut it into pieces, cook it for a little while in the pickling liquid, and pour everything in a glass jar. A few hours in the fridge and Steve and I took our first bite of the golden-green-red cubes. We didn’t say a word for a few seconds and then we both started laughing and crying out “oh my god! this is so amazing!”

Yes, it’s that good. It’s sweet and sour and a tiny bit spicy, with that distinct flavor of the star anise to round everything out. And the texture is simply miraculous. Each bite goes from crunchy to soft, while always incredibly juicy. It’s a great side dish to heavily spiced or spicy foods, goes great with seafood, or as a little starter snack before dinner. Though I would probably even consider having it as dessert.

DSC03230

Pickled Watermelon Rind – Slightly dapted from Bon Appétit

Ingredients:

About 4 lbs of watermelon
1 large (or two small) thai red chile, cut in half lengthwise, seeds removed
1 1″ piece peeled ginger, thinly sliced
2 star anise pods
4 teaspoons kosher salt
1 teaspoon black peppercorns
1 cup sugar
1 cup unseasoned rice vinegar
1/2 cup water

Directions:

Using a vegetable peeler, remove tough green rind from watermelon; discard.

Slice watermelon in about 1″ thick slices. Cut away all but ¼” flesh from each slice; reserve flesh for another use. Cut rind into 1″ pieces. (You should have about 4 cups.)

Bring chile, ginger, star anise, salt, peppercorns, sugar, vinegar, and ½ cup water to a boil in a large saucepan, stirring to dissolve sugar and salt. Add watermelon rind and return to a boil; reduce heat and simmer until just crisp tender (this will take anywhere between 5 and 15 minutes; use a fork or knife to test a piece). Remove from heat and let cool, setting a small lid or plate directly on top of rind to keep submerged in brine, if needed.

Transfer rind and liquid to an airtight container (I used a 3 cup – 24 oz mason jar); cover and chill at least 12 hours.

DO AHEAD: Watermelon rind can be pickled 2 weeks ahead. Keep chilled.

Stuffed Eggplant with Lamb and Pine Nuts

DSC02663

There are some dishes that just don’t photograph well. This is one of them. No matter how much I tried to make it pretty, it comes out like a brown and black mess when I take its picture. I guess I could have sprinkled some fresh parsley on it or nestled a few lemon wedges between the eggplant pieces in order to give it some color. But I decided not to. It’s not necessary. Because no matter what the photos look like, this is one of the best dishes you will ever taste. It is, by far, my favorite recipe out of Jerusalem: A Cookbook. And that says a lot. I love just about every recipe in that book.

DSC02640

For starters, it’s an easy eggplant recipe. I don’t know why, but as soon as I see a recipe that calls for salting eggplant pieces and letting them drain in a colander before cooking them, I have an instant reaction of “no way!” I just don’t have the patience for that. The great thing about this recipe is that it simply calls for cutting the eggplant down the middle, scoring the flesh and brushing it with olive oil. From that point on, it just cooks in the oven for a long time, at first on its own and then covered with the ground meat mixture, until it becomes melt-in-your-mouth soft.

DSC02652

If I’ve learned one thing out of this amazing cookbook (and I’ve learned a lot), it is the power of the holy trinity of Middle Eastern spices: cumin, paprika, and cinnamon. When combined, they produce an intoxicating mix that is sweet (from the paprika), earthy (from the cumin), and spicy (from the cinnamon), all at the same time. Along with onions, pine nuts, and parsley, they turn the ground lamb “stuffing” of this dish into something entirely exotic but wonderfully comforting as well.

DSC02666


Stuffed Eggplant with Lamb and Pine Nuts – From Jerusalem: A Cookbook

Ingredients:

4 medium eggplants 
(about 2 pounds/1.2 kg), halved lengthwise
6 tablespoons/90 ml olive oil
1 teaspoon ground cumin
1 tablespoon sweet paprika
1 tablespoon ground cinnamon
2 medium onions (12 ounces/340 grams in total), finely chopped
1 pound/500 grams ground lamb
7 tablespoons/50 grams pine nuts
2/3 ounces/20 grams flat-leaf parsley, chopped
2 teaspoons tomato paste
3 teaspoons superfine sugar
2/3 cup/150 ml water
1 tablespoon freshly squeezed lemon juice
1 teaspoon tamarind paste
4 cinnamon sticks
Salt and freshly ground black pepper

Directions:

Preheat the oven to 425°F/220°C. Place the eggplant halves, skin side down, in a roasting pan large enough to accommodate them snugly. Brush the flesh with 4 tablespoons of the olive oil and season with 1 teaspoon salt and plenty of black pepper. Roast for about 20 minutes, until golden brown. Remove from the oven and allow to cool slightly.

While the eggplants are cooking, you can start making the stuffing by heating the remaining 2 tablespoons olive oil in a large frying pan. Mix together the cumin, paprika, and ground cinnamon and add half of this spice mix to the pan, along with the onions. Cook over medium-high heat for about 8 minutes, stirring often, before adding the lamb, pine nuts, parsley, tomato paste, 1 teaspoon of the sugar, 1 teaspoon salt, and some black pepper. Continue to cook and stir for another 8 minutes, until the meat is cooked.

Place the remaining spice mix in a bowl and add the water, lemon juice, tamarind, the remaining 2 teaspoons sugar, the cinnamon sticks, and 1/2 teaspoon salt; mix well.

Reduce the oven temperature to 375°F/195°C. Pour the spice mix into the bottom of the eggplant roasting pan. Spoon the lamb mixture on top of each eggplant. Cover the pan tightly with aluminum foil, return to the oven, and roast for 1 1/2 hours, by which point the eggplants should be completely soft and the sauce thick; twice during the cooking, remove the foil and baste the eggplants with the sauce, adding some water if the sauce dries out. Serve warm, not hot, or at room temperature.

Watermelon Margarita

DSC03103

Remember when you were a kid and summers seemed endless? When school would come to an end and you couldn’t even imagine that it would ever start up again? My childhood summers were like that. They were also hot, incredibly hot. Temperatures would routinely get above 110° F but we had no air conditioning to fight the heat. Just standing fans that seemed to blow non-stop during the whole summer, providing us with little to no relief. There were ice cold bottles of Coca Cola, rose-flavored ice cream, and jiggly jello desserts. There was the beach, the one we saw very few times each year, even though we lived on an island. This was the time before highways, when a trip from our home, in the middle of the island, to the beach took a long time and required meticulous preparations by my parents. These summers were filled with the sounds of crickets in the quiet, dense, and damp air that you could cut with a knife. The slow, lazy mornings were interrupted by the man with the pickup truck, driving from neighborhood to neighborhood and shouting over his megaphone: “Watermelons! I got watermelons!” We heard him before we saw him and his truck slowly driving down the road, its cab filled to the brim with enormous green-and-white, misshapen globes. Their bright red flesh would often be that night’s dinner, along with a slice of bread and a piece of halloumi cheese.

This year’s summer seemed anything but endless. It hadn’t even begun back in late June when I could feel the stress of its end bearing down on me. The weather has been mild, pretty close to perfect. The AC has kept even the hottest days at bay. There were no crickets and no rose-flavored ice cream. But there was watermelon. Perhaps disguised as a cold margarita, it can help you accept the summer’s end a little easier.

DSC03098


Watermelon Margarita

Makes 2 drinks

Ingredients:

4 oz tequila
1.5 oz lime juice
1 oz Cointreau
fresh watermelon juice (see directions below)

Directions:

To make watermelon juice, blend cubes of watermelon flesh (you can leave the seeds in) in blender until smooth. You can pass it through a fine mesh sieve to remove the blended seeds if you want. Or leave it in the fridge and the small bits of seed will sink to the bottom. Or you can just leave them in the juice.

Pour tequila, lime juice, and Cointreau in a shaker with ice cubes. Shake for a few seconds and strain in two tall glasses with ice. Top with watermelon juice.

Lemon Cake with Raspberries and Pistachios

DSC03030

It seems to me that this year has given us an amazing berry season, at least in the Northeast. Not only for strawberries and raspberries, but this year we’ve eaten blackberries so sweet and juicy that it felt like we had never tasted real blackberries before. And the blueberries have been consistently great for weeks. I love this time of year, with all the amazing fruits and vegetables overflowing in market stands and grocery shelves. I always end up buying way too many so I’m always looking for ways to preserve the ones we’ll never manage to eat before they spoil. So, I end up making lots of jam in the summer, as well as some pickled vegetables.

DSC03028

This lemon cake with raspberries and pistachios is a fantastic way to use some of the beautiful raspberries of this season. When I saw the recipe in Bon Appétit, I was a little skeptical. I had already made a different raspberry cake with buttermilk and we were pretty happy with it. But I gave this recipe a try anyway. I’m so glad I did. This cake is spectacular! Its magic comes from the lemon syrup you brush on it as soon as it comes out of the oven. It soaks into the top part of the cake, so that when you eat it you get layers of sweetness and tanginess along with the distinctive floral taste of raspberries. And the pistachios and sprinkled sugar on top add a little crunch that makes the whole thing pop. And to top it all, it uses olive oil instead of butter, so it’s on the healthier side.

Believe me, you want to try this cake. It’s a total winner. And it also freezes beautifully (I freeze it in slices and defrost them on the countertop overnight), though it will probably disappear pretty quickly after it cools down.

DSC03024

Lemon Cake with Raspberries and Pistachios – Slightly adapted from Bon Appétit

Note: Do not be tempted to use less syrup than the recipe calls for. The cake needs it all.

Ingredients:

A little vegetable oil for greasing pan
1¾ cups all-purpose flour
1½ teaspoon baking powder
½ teaspoon kosher salt
4 large eggs
1¼ cups plus 2 Tbsp. sugar, separated
2 teaspoons vanilla extract
2 tablespoons finely grated lemon zest
1 tablespoon plus ¼ cup fresh lemon juice, separated
¾ cup olive oil
1 cup fresh raspberries (about 4 oz.)
3 tablespoons chopped pistachios

Directions:

Preheat oven to 350°. Lightly grease a 9” diameter cake pan or springform pan with vegetable oil. Whisk flour, baking powder, and salt in a small bowl.

Using an electric mixer, beat eggs and 1 cup sugar until light and fluffy, about 5 minutes. With mixer running, add vanilla, 1 Tbsp. lemon juice, and lemon zest then gradually add oil, mixing just until combined. Fold in dry ingredients.

Scrape batter into prepared pan and smooth top. Scatter berries over cake, then pistachios and 2 Tbsp. sugar. Bake cake until a tester inserted into the center comes out clean, 45–55 minutes.

While cake is baking, bring remaining ¼ cup sugar and remaining ¼ cup lemon juice to a boil in a medium saucepan, stirring to dissolve sugar; let lemon syrup cool.

Transfer hot cake (still in pan) to a wire rack and immediately brush with lemon syrup (use all of it). Let cake cool completely in pan.

Cake can be stored for two days, wrapped tightly at room temperature. It can also be frozen.

Pastitsio / Παστιτσιο (Makaronia tou Fournou / Μακαρονια του φουρνου)

DSC03006

We have a tradition. When I go back home to visit my family, my mom makes the foods of my childhood that I miss. There’s koupepia, grape leaves stuffed with meat and rice and cooked in a tomato sauce, there’s rabbit stewed in onions and red wine, and there’s always makaronia tou fournou, known as pastitsio in Greece.

DSC02999

Over the years, I’ve gotten recipes from my mom so that I could make these dishes myself whenever I wanted to. It’s not very easy. She has no written recipes and her measurements and directions don’t use American standards. When she says a cup of flour, she’s talking about a drinking glass she’s always used to measure. There are no exact times either. You may cook something until “it drinks its water,” meaning that the liquid evaporates, or until it katastithei, which means that its sauce thickens.

DSC03004

So, I do my best and transcribe the recipes as well as I can and when I come back to New York I try them out a few times until I get the exact measurements that result in a dish as close to my mom’s as possible. An additional problem is that the ingredients may be different or tough to find. That’s the case, for example, with this recipe for pastitsio. While almost everything is readily accessible in the U.S., the macaroni my mom uses is tough to find. Though, as I explain in the recipe, any round macaroni would work fine. For a while, I couldn’t find halloumi either, the cheese from Cyprus that’s made with sheep and goat milks and has salt and bits of mint in it. It’s famous for not melting, so you can grill it or sauté it in a pan, but here it’s grated and added to the dish. Fortunately, halloumi is now sold in all grocery stores.

DSC03001

So, here it is. My mom’s recipe for pastitsio or makaronia tou fournou. It’s not a difficult recipe, but it does have several steps. It’s a great project for a Sunday. If you are concerned about the quantity this recipe makes, after the pastitsio is cooked and cools down completely, you can cut it in portions and freeze them, wrapped in plastic. Whenever you want to eat it, defrost it in the fridge overnight and then reheat it in a 300° F oven for 15 minutes or until it’s warm through. Don’t microwave it because it will give it a strong egg taste.

I guarantee you that you will not regret making this dish. It’s a perfect combination of pasta, meat, and cream. I’ve been making it myself for years but my mom still makes it for me when I go home. After all, no matter how close my own pastitsio gets to my mom’s, hers is always better.

DSC03012

Pastitsio (Makaronia to Fournou / Μακαρονια του φουρνου)

Notes: The pasta my mom uses is Mezzani A. If you can’t find it, use any thick, tube-shaped pasta. The chicken bouillon cubes are essential, so don’t skip them or change them. My mom has always used the Maggi brand. Same goes for the halloumi cheese. It’s irreplaceable in the recipe. Fortunately, most grocery stores carry it.

Ingredients:

Meat layer:
1-1.5 lbs ground pork or chicken
2 tablespoons olive oil
1 small onion, chopped
7 oz (200 gr) diced tomatoes in juice (half of a 14.5 oz can)
½ cup chopped parsley
½ teaspoon cinnamon
1/2 chicken bouillon cube, crumbled
1/4 cup red (for pork) or white (for chicken) wine

Pasta layer:
1 lb mezzani pasta (see note)
1 whole halloumi cheese, finely grated
1 egg, lightly beaten
1 chicken bouillon cube, crumbled
1 tablespoon unsalted butter

Bechamel sauce:
8 tablespoons unsalted butter (or shortening, or combination of the two)
1/2 cup all purpose flour
1 liter milk
2 large eggs
1 whole halloumi finely grated
3 tablespoons unseasoned, dry breadcrumbs

Directions:

First, make the meat layer. Cook the onion in olive oil over medium high heat, stirring often, for about 4 minutes. Add ground meat. Cook for another 5 minutes, stirring often and breaking up any clumps. Add wine, salt and pepper, cinnamon, parsley, 1/2 maggi and tomatoes. Stir together and cook until almost all liquid has evaporated, about 12-15 minutes. Set aside and proceed with the rest of the recipe. DO AHEAD: Meat can be prepared up to 2 days ahead and stored in refrigerator, covered.

Then, make the pasta layer. If pasta is long, break into thirds, about 4 inches long. Cook pasta in plenty of unsalted water till al dente. Drain and return to pot. While still hot, add maggi, butter, and egg while stirring until the butter is melted. Add the halloumi. Stir well until everything is combined.

Put 3/4 of cooked pasta in bottom of 9 by 13 oval pan that is at least 2 ½ inches deep, then add meat and finally add remaining pasta on top.

Preheat oven to 350° F.

Make the bechamel. Melt butter in a medium pot over medium heat. When butter melts and begins to bubble, whisk in flour and cook, whisking frequently, until flour is cooked and just begins to turn darker in color about 5 to 6 minutes. Add all the milk at once, whisking continuously until thoroughly combined. Continue to simmer until thickened, about 10 minutes. Lightly beat eggs, temper them with a little of the hot thickened milk, and add carefully to béchamel, whisking constantly. Remove from heat. Add grated halloumi and stir well.

Spread bechamel on top of pasta and meat making sure to cover all the way to the edges. Smooth top with back of spoon. Sprinkle breadcrumbs on top and bake at 350° F for about an hour till top is golden brown.