Apricot Cherry Tart with Pistachio Frangipane

DSC03108

When I was little, there were many bakeries in our city where one could get bread and other essentials but there were only a few confectionaries (patisseries) that specialized in sweet things, like cakes and cookies. One of those was Hurricane. It’s probably the oldest confectionary still in existence in the city. It’s tucked away in the old part of town, a veritable hole in the wall, with enough room for five or six small tables that surround an ancient wood-and-glass case (the same one since I was a kid) that has always contained cookies for sale.DSC03089

Back then, Hurricane was considered fancy and it was rather expensive. Before I was even born, this was a place where ladies of high society would go for tea and cookies, served in real china by the family that owned it. For me, Hurricane has always been a bundle of memories. There was the smell of sugar and butter that reached out to the street and around the corner, driving me crazy with desire. There were the butter cookies with their tips dipped in chocolate sprinkles. There were the kok, a traditional dessert of thick pastry cream sandwiched between two cake-like cookies, with the top cookie covered in vanilla or chocolate glaze.DSC03090

But above all, I remember the varkoulles, or little boats. They consisted of a cookie shell in the shape of a small boat, filled with a frangipane filling. They tasted intensely of almonds and the shell gave a satisfying crunch when bit into, only to give way to the soft, almost creamy filling. They were my absolute favorites and they filled me with joy when my parents would buy them for us. It was probably with them that my love affair with frangipane started.

DSC03087

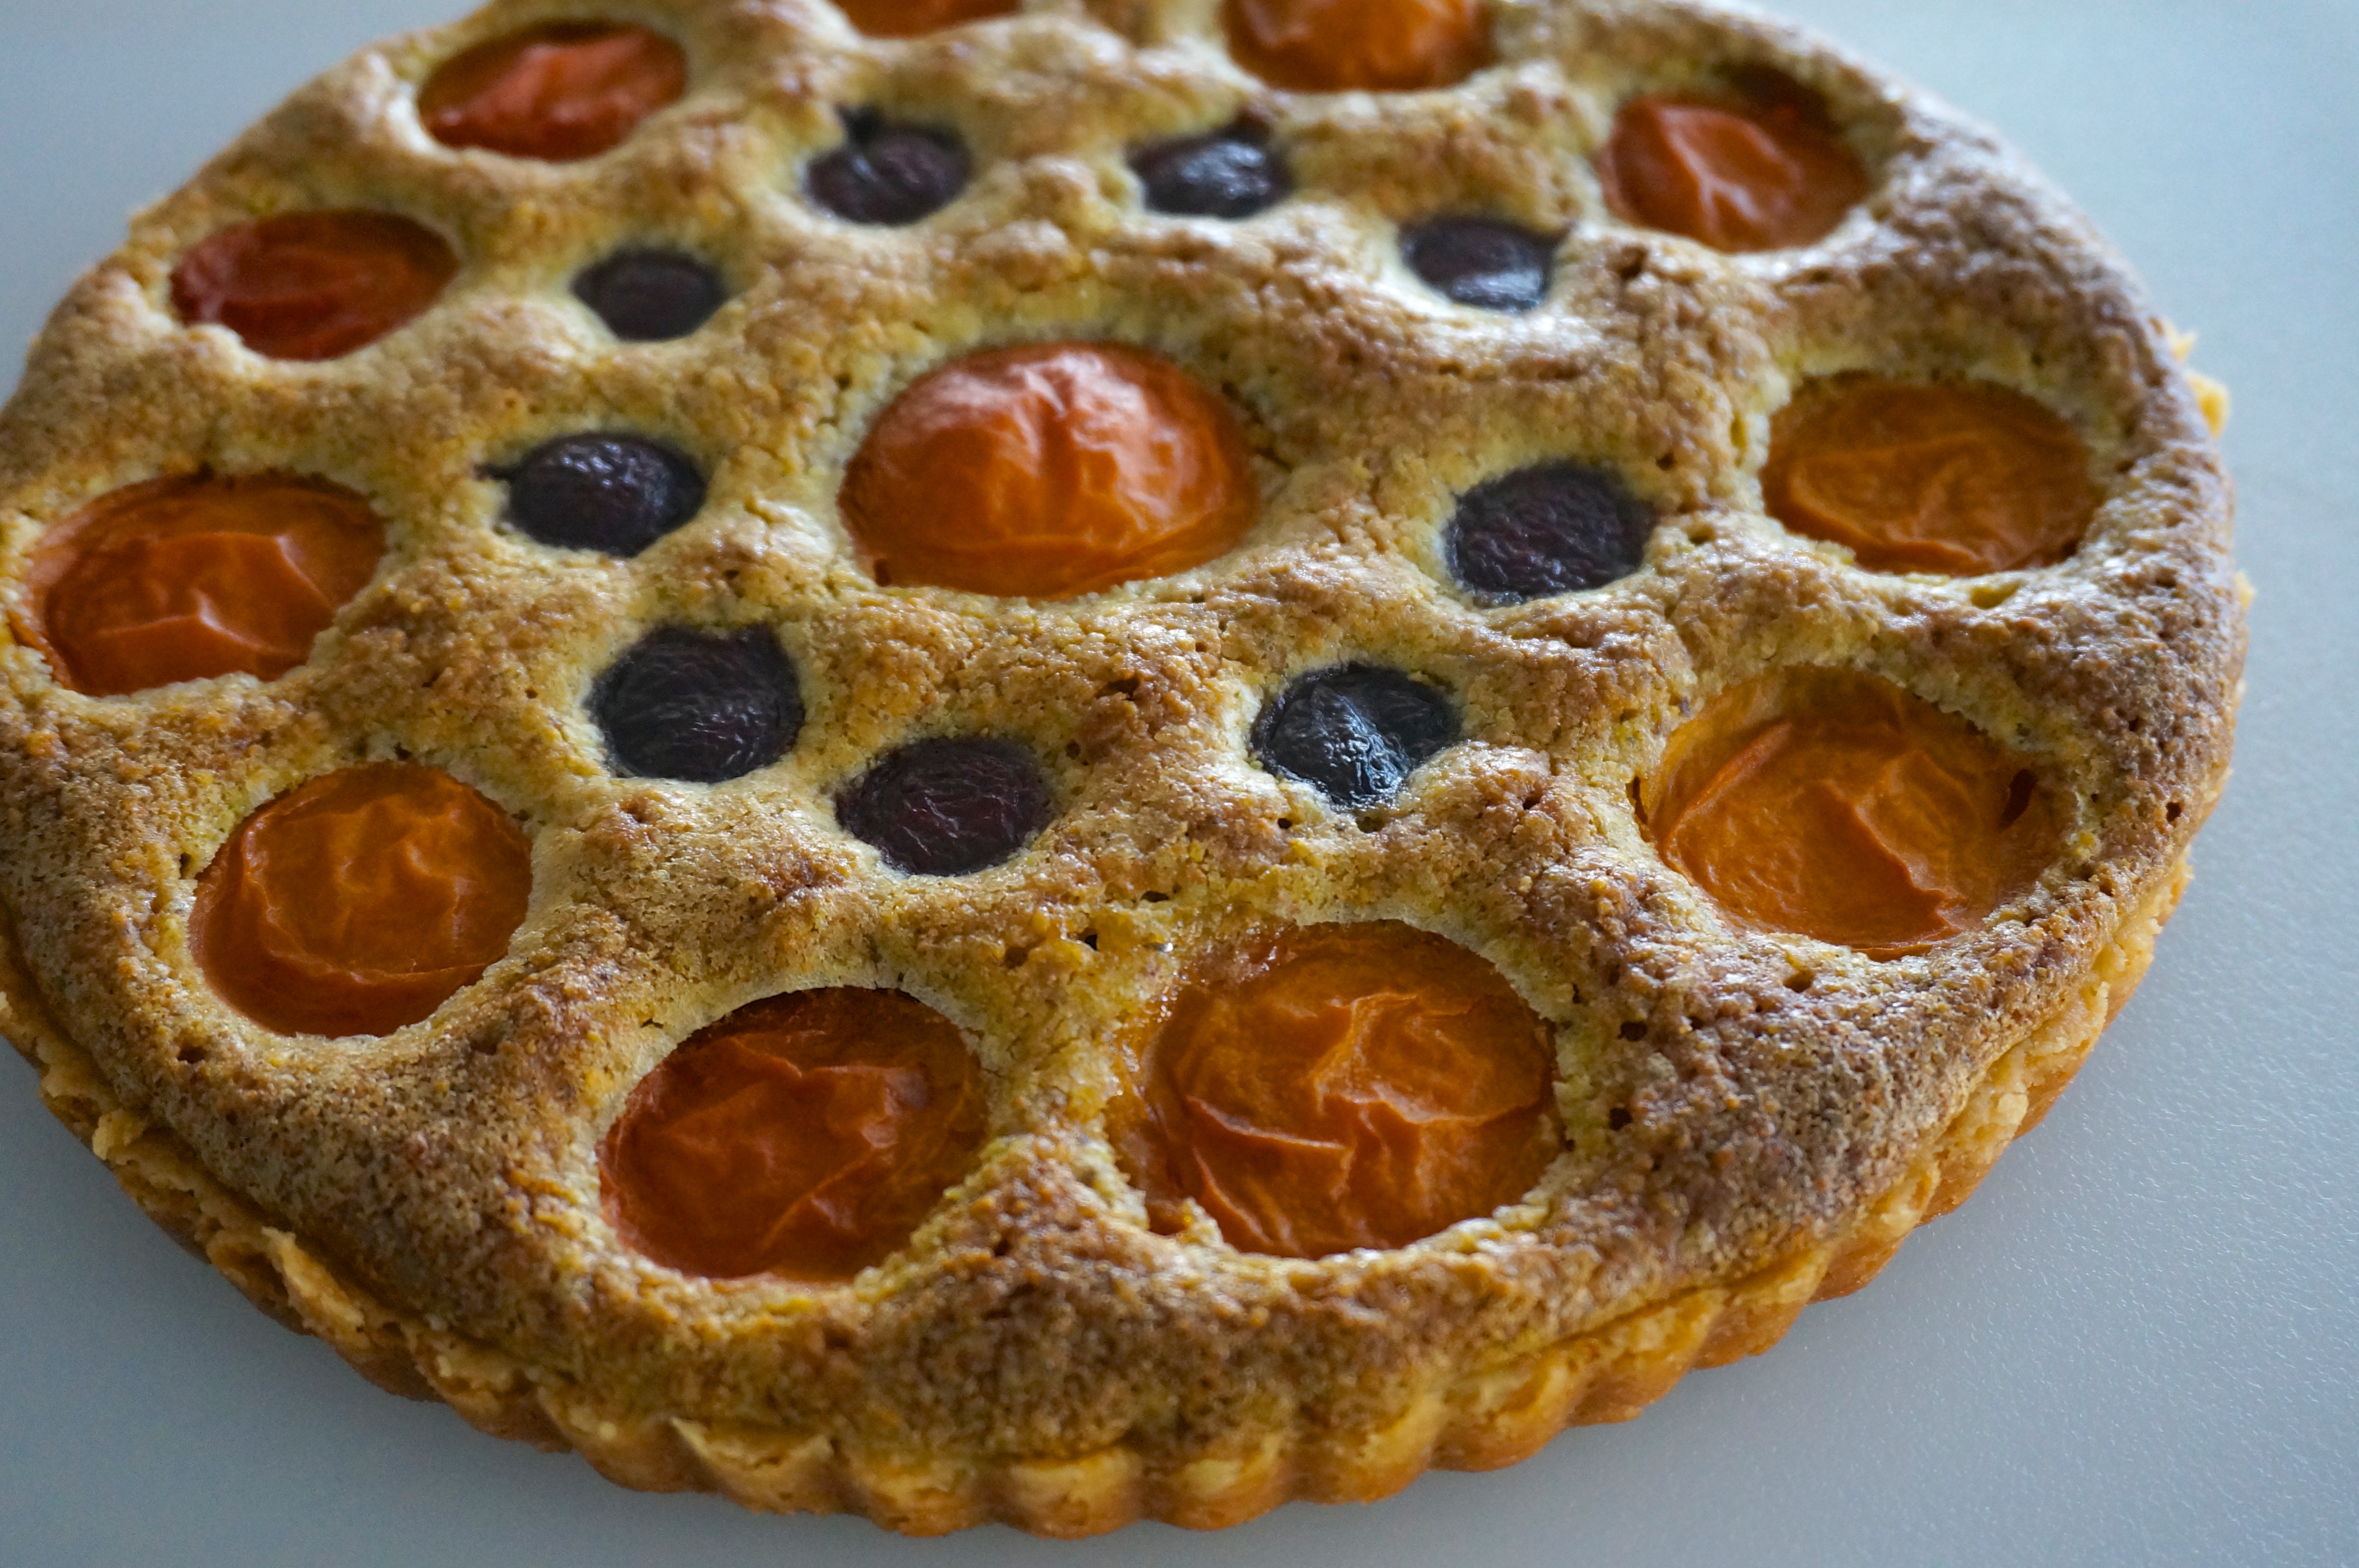
What’s there not to like? A mixture of nuts, sugar, flour, butter and eggs, at just the right ratio, bakes into a filling that is incredibly satisfying no matter what surrounds it. It’s what makes the French galette de rois, a traditional New Year’s pie made of puff pastry filled with frangipane, such a delightful treat. And it’s what makes this apricot cherry tart irresistible. And the fact that it is a single (food processor) bowl recipe makes it even better. If you don’t have apricots or cherries at hand, switch it up. Plums, apples, pears, or any fruit that’s not too juicy will do fine. If you don’t have pistachios, you can use almonds, which is the more traditional version of frangipane.DSC03117
Apricot Cherry Tart with Pistachio Frangipane – Adapted from Smitten Kitchen

Ingredients:

Crust
1 cup (125 grams) all-purpose flour
1/4 teaspoon table salt
1/4 cup (50 grams) granulated sugar
1/2 cup (4 ounces or 115 grams) cold unsalted butter

Filling
3/4 cup (a scant 4 ounces or 110 grams) shelled unsalted pistachios
1 tablespoon (10 grams) all purpose flour
Few pinches of sea salt
6 tablespoons (75 grams) sugar
5 tablespoons (70 grams) cold unsalted butter
1 large egg
1/4 teaspoon almond extract, 2 teaspoons brandy or another flavoring of your choice (optional)
8 firm-ripe apricots, pitted and cut in half
8 sweet cherries, pitted and cut in half
To finish
Powdered sugar or 1/4 cup apricot jam

Directions:

Heat your oven to 350 degrees F.

Make the crust: Combine the flour, salt and sugar in the bowl of a food processor. Cut the butter into chunks, and add it to the bowl, then run the machine continuously (don’t pulse) until the mixture forms large clumps. It might take 30 seconds to 1 minute for it to come together. Transfer the dough clumps to a 9 inch fluted tart pan with removable bottom and press it evenly across the bottom and up the sides. Place in the fridge for 30 minutes to allow the dough to rest (this will reduce shrinkage when you bake it). Bake for 15 minutes, until very pale golden. Let crust cool.

Make the filling: In the same food processor bowl (no need to clean it between these steps), grind your pistachios, sugar, flour and salt together until the nuts are powdery. Cut the butter into chunks and add it to the machine. Run the machine until no buttery bits are visible. Add any flavorings and egg, blending until just combined.

Spread filling over cooled crust. Place apricots and cherries cut side down onto the pistachio filing. Bake for 60 minutes, or until a toothpick inserted into the pistachio portion comes out batter-free. Let cool completely in pan.

To finish, you can make a shiny glaze for your tart by warming apricot jam in a small saucepan until it thins, and brushing this mixture over the top of the cooled tart. Or, you can dust it with powdered sugar.

Progressive Cherry Pitter

The Union Square market has been full of cherries the last couple of weeks, both the sweet and the sour kinds. Sweet cherries are great for eating but sour cherries are really great for two things: sour cherry jam and cherry pie. I made the jam two weeks ago and last week, for July 4th, was the pie’s turn.

IMG_2664

The only problem  with using cherries to make anything is that you have to first pit them. There are all kinds of opinions out there on what is the easiest way to do that (using a paper clip seems to be really popular) but I’m here to tell you that the absolutely best tool for the job is the Progressive International GPC-5000 Cherry-It Multiple Cherry Pitter.

If you want to make anything using cherries, you have to get one of these. You place four cherries in each of the four holes (there are four large holes for sweet cherries and four smaller one for sour cherries), press the white top down and presto! You have four cherries pitted in less than a second. The pitter stays folded for storage and it’s dishwasher safe. With it, I was able to pit two and a half pounds of cherries in less than 20 minutes. Which is actually a lot longer than it took our July 4th guests to finish up their cherry pie slices.

IMG_2661

Cherry Cream Scones

When we lived in midtown, Steve would sometimes stop by Amy’s Bread Bakery on his way home from work and pick up a couple of cherry cream scones. I don’t want to say that I squealed from joy when he entered the apartment carrying the telltale brown bag, but it was pretty close. We loved (and still do) those cherry cream scones. They looked and tasted rustic. They were sweet but with serious tones of something darker. The dried cherries were just tangy enough to counterbalance the richness of the dough and the coarse sugar toping gave a satisfying crunch with every bite.

IMG_2298

Well, just like everything else I love to eat, I decided that I just had to figure out how to make them myself. Many tastings had given me clues to the ingredients but they weren’t enough. I had to get the recipe. A quick search online revealed an Amy’s Bread cookbook that was available on Amazon. But I didn’t want to buy it just for this recipe. So, I clicked on the “Click to look inside” link which shows a few pages from a book, so you can sample it before you buy it.

IMG_2285

And wouldn’t you know it, there it was: the recipe for cherry cream scones. Except for one problem: Amazon gave me only the first page. That included the ingredients and some of the steps. I decided I could figure out the rest of the steps on my own. Turns out I couldn’t. My first attempt didn’t turn out so good.

IMG_2286

So back to Amazon I went and started clicking on “Surprise Me!” which gives you a random page from the book. A good 15 minutes later I landed on the second page of the recipe. Since then, Amazon has changed the pages they show from this book and now the entire recipe is available to anyone that looks at the book on the site.

I have made these scones too many times to count. I have taken them to friends who invited us to their country house for the weekend and I have made them in the middle of nowhere in France where we were spending New Year’s with a group of friends. Every time, they are a hit. And when we moved away from midtown two years ago and had no Amy’s Bread Bakery nearby, we were ok with that. We knew how to make our own.

Cherry Cream Scones – Slightly adapted from The Sweeter Side of Amy’s Bread

These aren’t your typical british scones, all round and perfect, dry and crumbly. They are misshapen and soft inside with a crusty exterior. What gives them their unique taste is the use of only cream (no butter) and only brown sugar (no white sugar).

3 1/2 cups (510 gr) all purpose flour
1 tablespoon and 1 teaspoon (20gr) baking powder
1 1/2 teaspoons kosher salt
1 cup (200 gr) light brown sugar
1 1/4 (200 gr) cups dried cherries*
2 2/3 cups (630gr) heavy cream
1 egg and 1 tablespoon of water for egg wash
turbinado sugar (or other coarse sugar; if not, you can use regular sugar but you won’t get that nice crunch)

* I buy the apple juice infused dried cherries from Whole Foods. Don’t use dried cherries that have any artificial flavoring in them. If you find dried sour cherries, they would be ideal.

Put racks on top third and bottom third of oven and preheat to 400° F. Line two 12×17 or 13×18 sheet pans with parchment paper.

In large bowl, whisk together flour, baking powder, and salt. Stir in brown sugar till evenly distributed (use your fingers to break up any clumps of sugar), then add dried cherries and stir again. Make a well in the middle of the mixture and pour all the cream in the well. Stir carefully with a spatula first and then with your hands until a soft, shaggy, and slightly sticky dough is formed.

IMG_2288

Divide dough in 2 pieces. Gently shape each piece into a round disk, about 2 inches thick. It’s ok if the disks aren’t smooth or perfect. Using a knife or dough scraper cut each disk into 6 wedges. Again, don’t worry about the wedges being perfect. As soon as they hit the hot oven, they will start to melt and fall apart anyway (remember, these are rustic scones, not perfect looking ones). Arrange 6 wedges on each pan. Leave space between them because they will spread and rise.

IMG_2290

Mix egg and 1 tablespoon of water in a small bowl and brush the tops of the scones. Sprinkle the tops of the scones generously with turbinado sugar. Don’t be timid with the sugar. As the scones spread and rise, the sugar will disperse over their surface. You want lots of it to provide a nice crunch.

IMG_2291

Place the two pans on each of the two racks and bake for 7 minutes. Rotate top and bottom pans and reduce to 350° F. Bake for another 10 minutes. Rotate pans again, top to bottom, and bake 15-20 min more. They should be dark golden brown and firm to the touch. If you want, you can test with a toothpick, which should come out clean. If they’re browning too quickly, you can turn the oven down to 325 F. Cool on a wire rack.


IMG_2295

These scones freeze beautifully. Once completely cool, place them in ziploc bags and put them in the freezer. To have them for breakfast, take out of the freezer the night before and leave uncovered on the countertop overnight.

Makes: 12 scones