Apple Cake

DSC03320

It’s been a hectic couple of weeks. Recovering from my hip surgery has been relatively easy but, as I wrote in my last post, I missed cooking since I was on crutches the whole time. We ordered out for dinner every night and we ended up getting tired of it pretty quickly. Last weekend, we decided that we would venture back into the kitchen together and make something. Steve would do most of the work and I would do as much of the prep work as my crutches would allow.

I was craving something sweet and comforting. Something that felt familiar and nourishing. We went with an apple cake.
DSC03332

My mom always made two kinds of apple cake when I was a kid: a bundt cake with chunks of apple inside and an upside down apple cake. I don’t actually have either of the recipes that my mom used to use, but a few weeks ago, the incomparable Deb Perelman of Smitten Kitchen posted a recipe for an apple cake that her mom always made. We thought we’d give it a try.

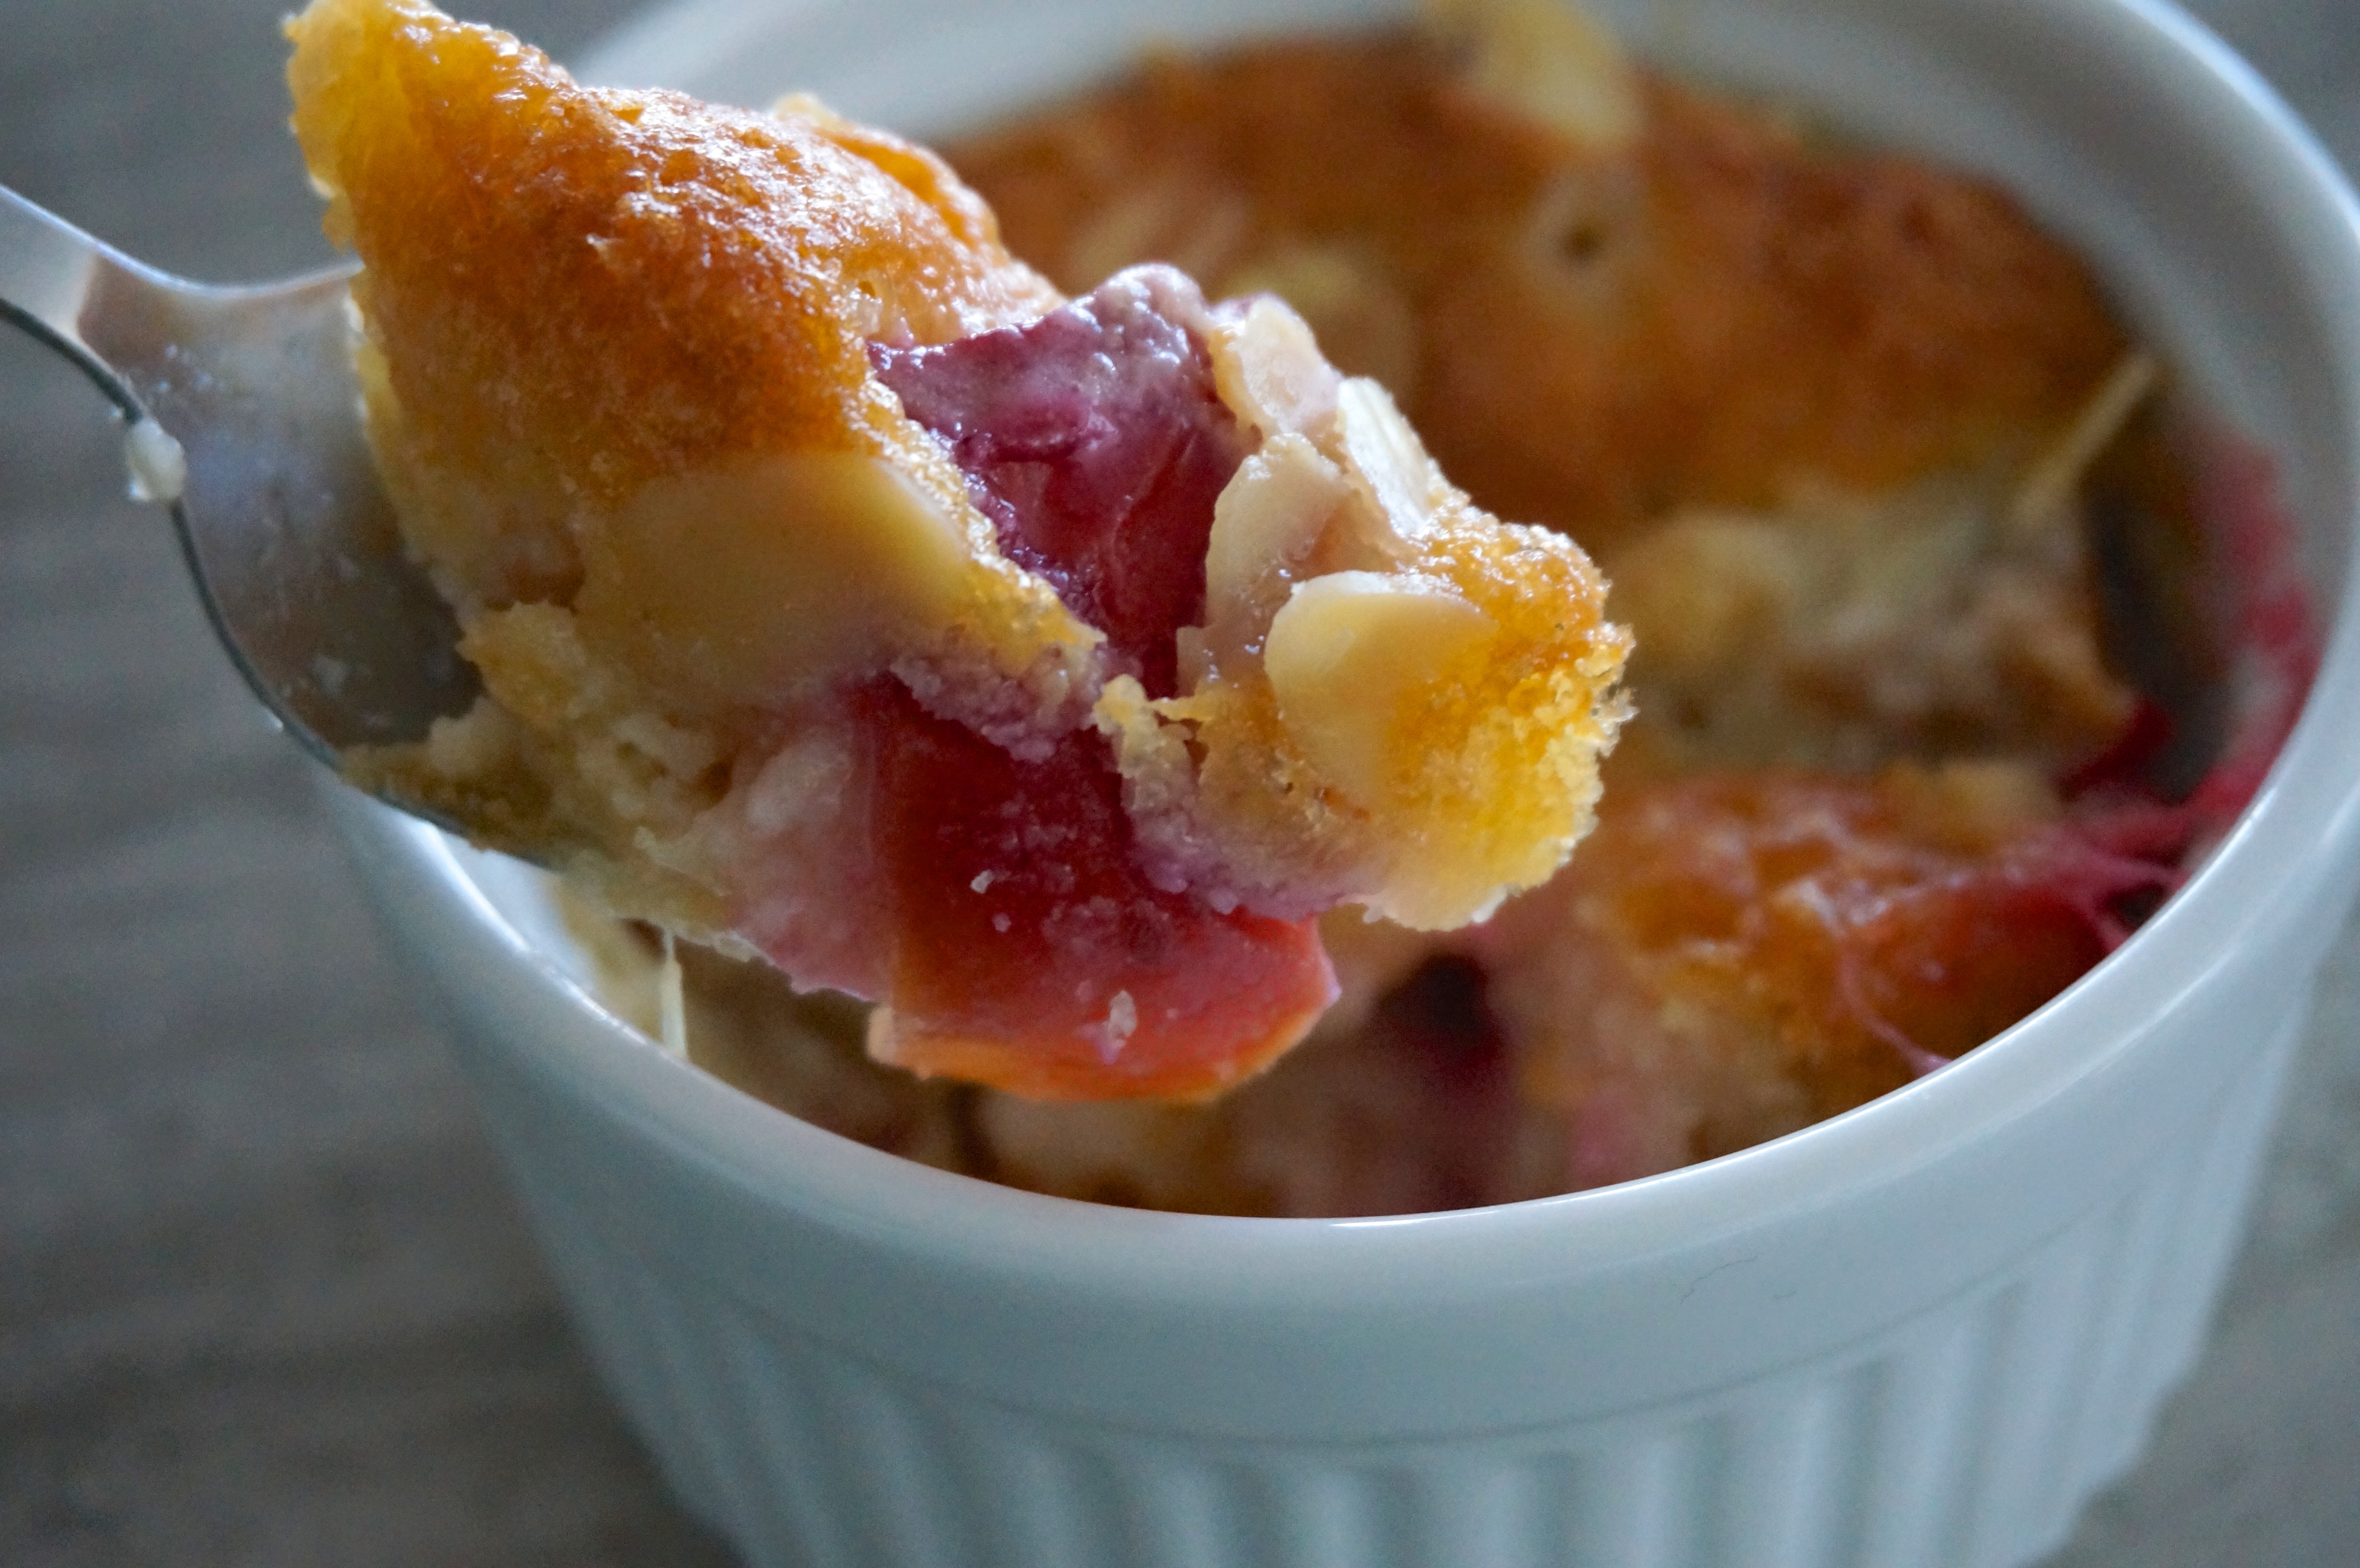
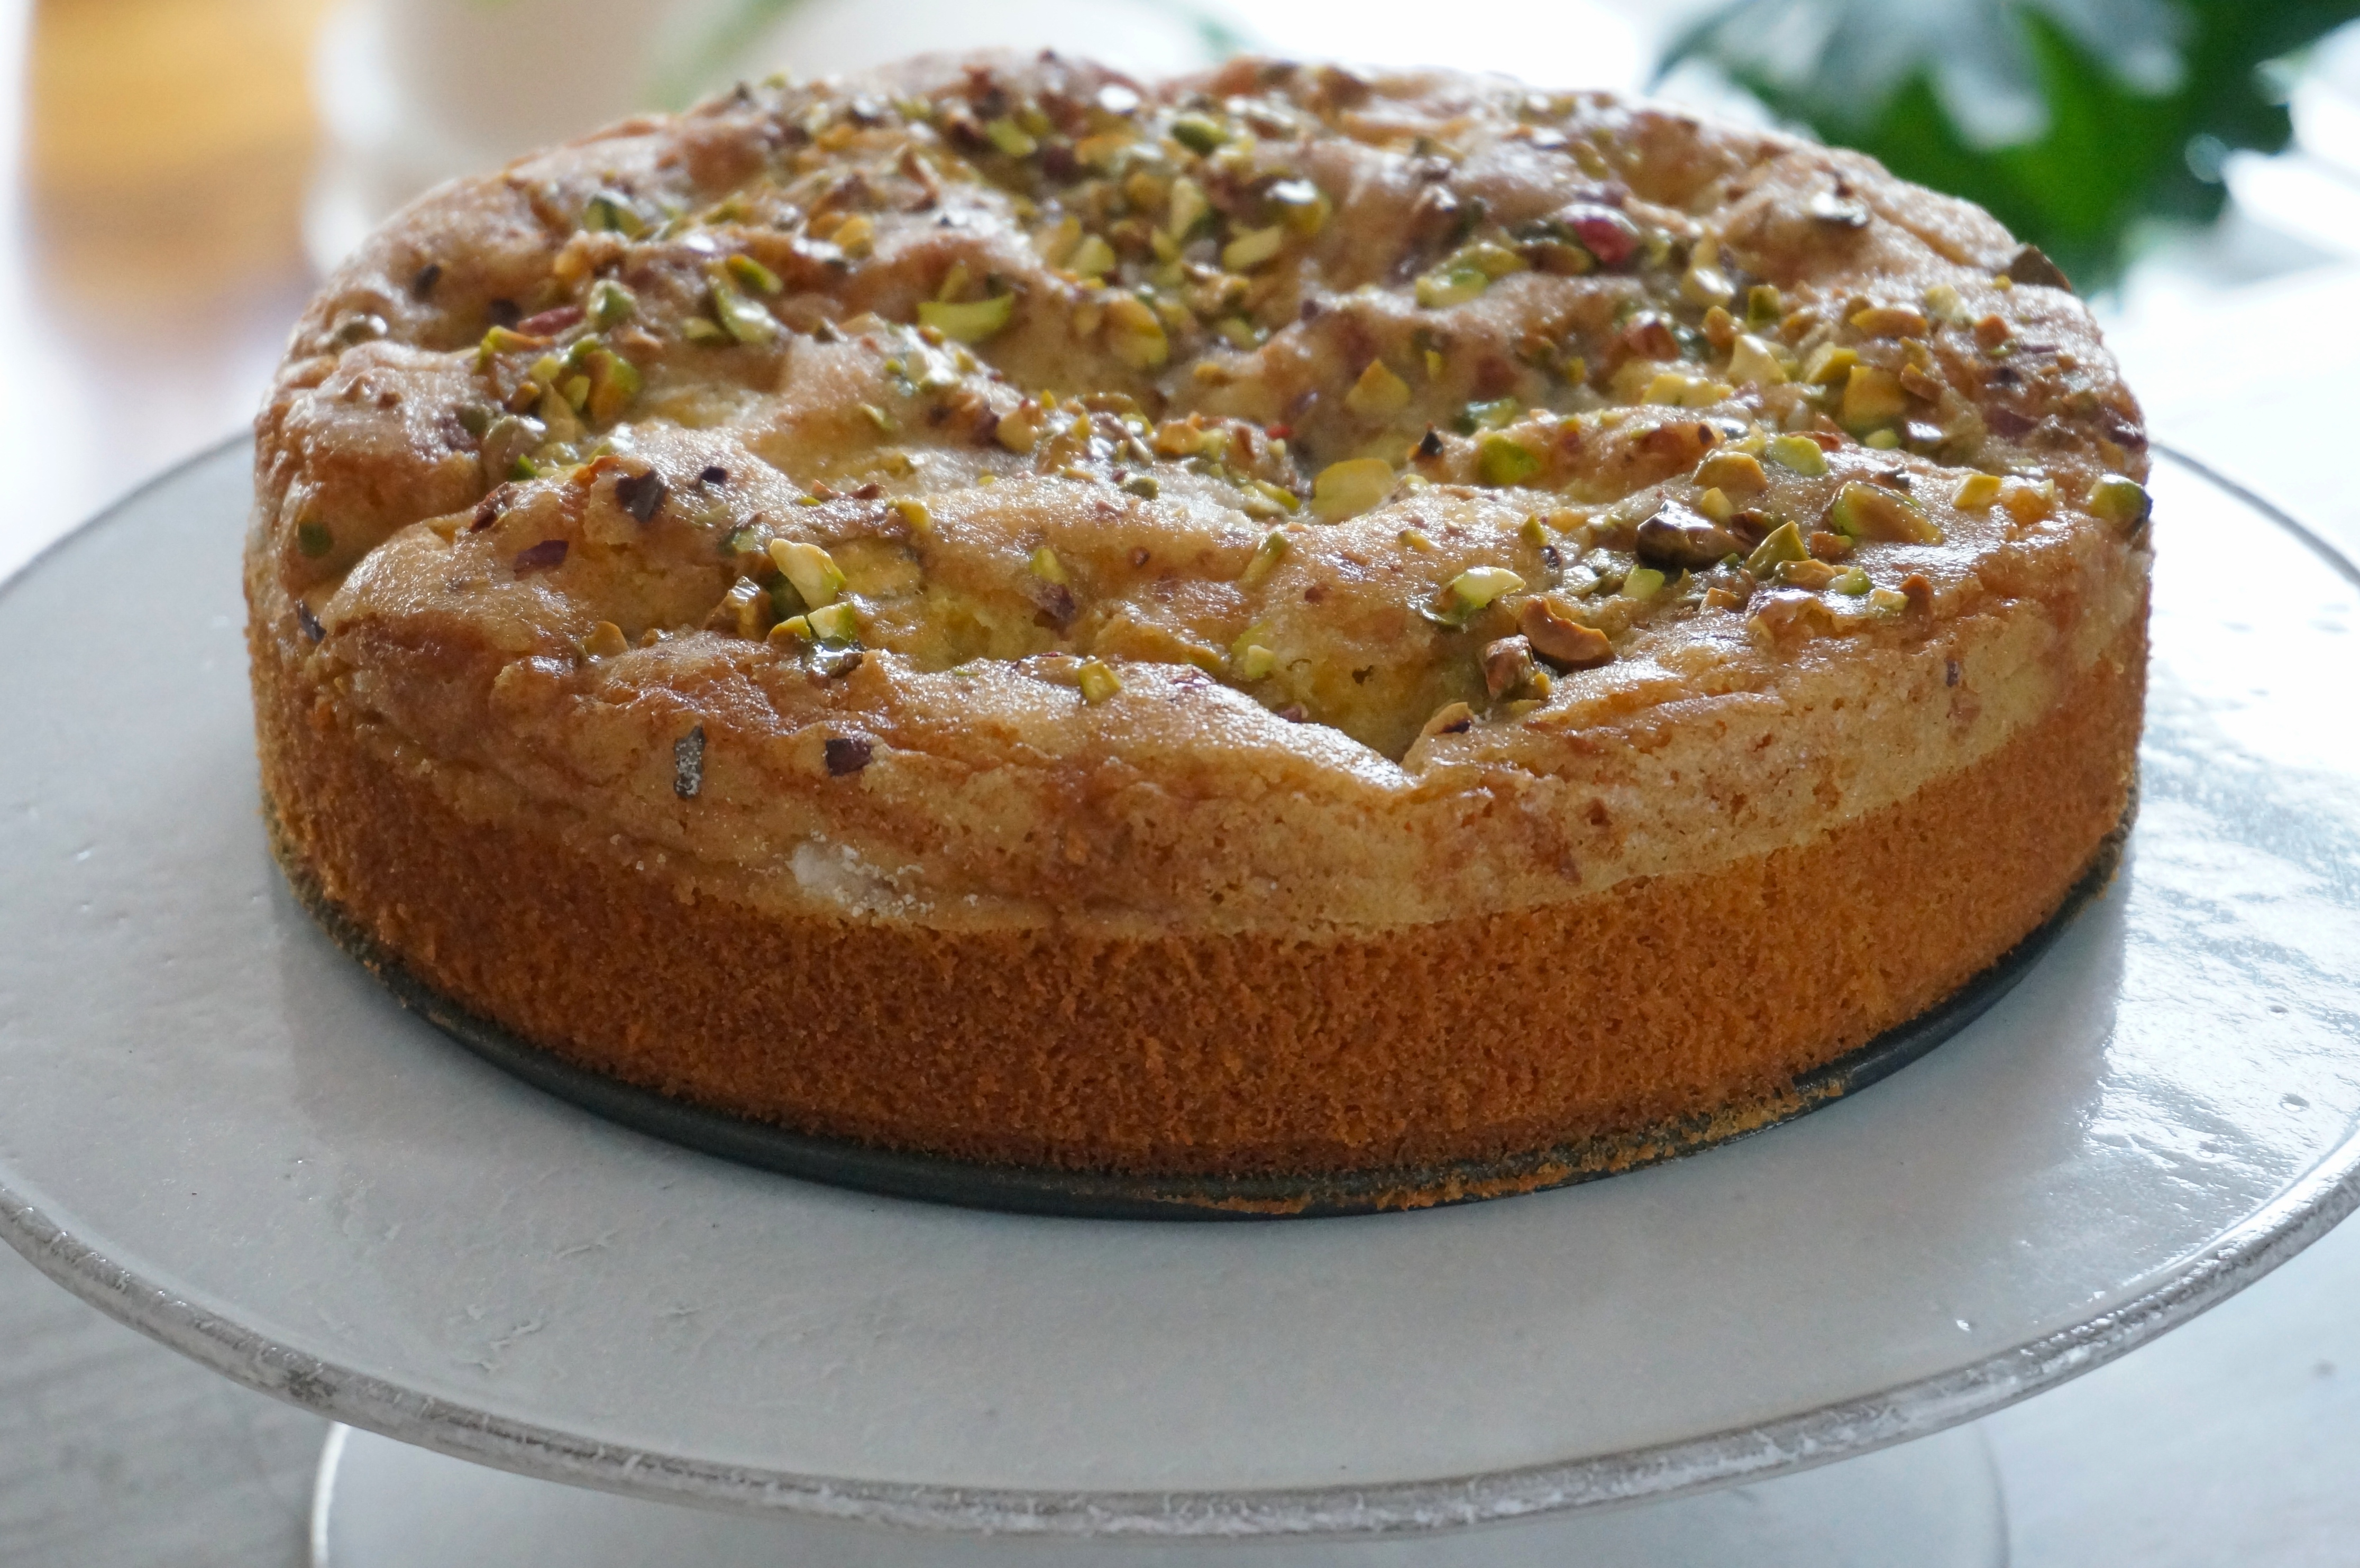
In many ways, it’s a pretty traditional apple cake. But there’s one little twist. The apples are added in two sections, one between the two layers of batter and one on top of the batter. This way, when the cake finishes, its top is studded with golden brown apple pieces, making it beautiful, as well as delicious.

DSC03326


Apple Cake – Slightly adapted from Smitten Kitchen

Ingredients:

6 apples (we used Fuji)
1 tablespoon cinnamon
5 tablespoons sugar
2 3/4 cups flour
1 tablespoon baking powder
1 teaspoon salt
1 cup vegetable oil
2 cups sugar
1/4 cup orange juice
2 1/2 teaspoons vanilla
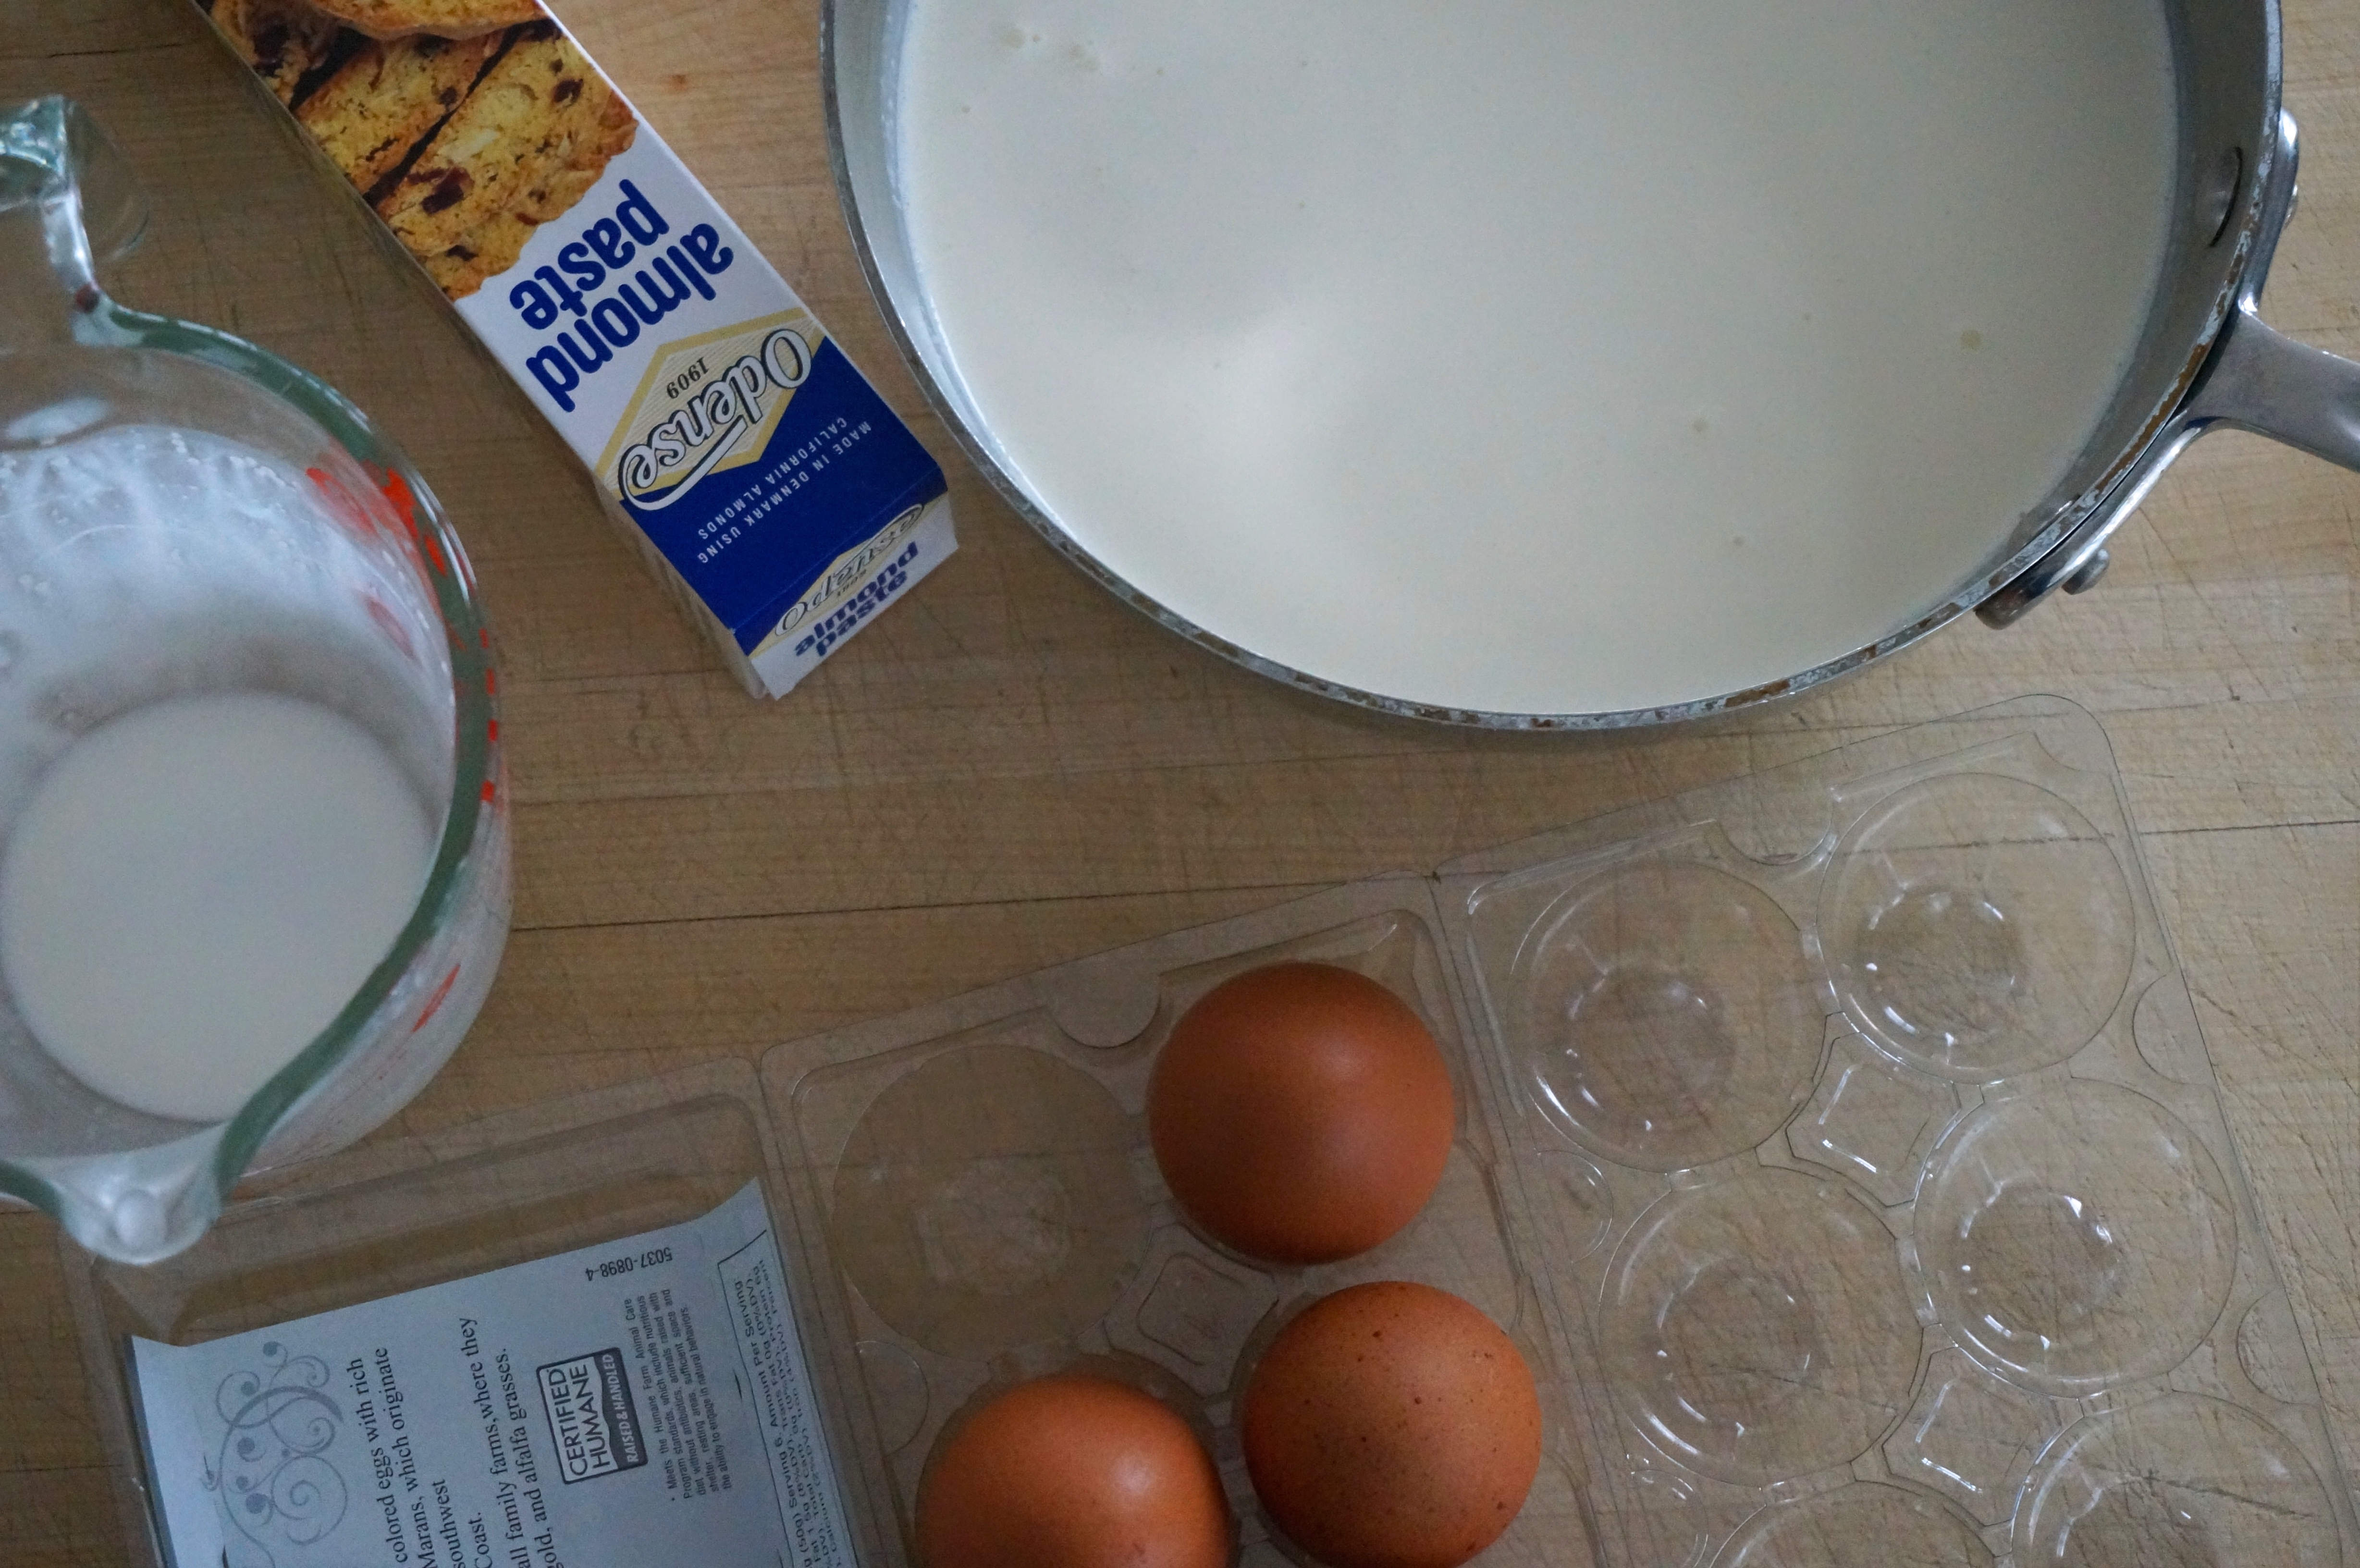
4 eggs

Directions:

Preheat oven to 350º F. Grease and flour a tube pan. Peel, core and chop apples into chunks. Toss with cinnamon and sugar and set aside.

Whisk together flour, baking powder and salt in a large mixing bowl. In a separate bowl, whisk together oil, orange juice, sugar, vanilla, and eggs. Add dry ingredients to the egg mixture and stir with spatula just until combined. Don’t overmix.

Pour half of batter into prepared pan. Spread half of apples over it. Pour the remaining batter over the apples and arrange the remaining apples on top. Bake for about 1 1/2 hours, or until a tester comes out clean. Cool completely before running knife between cake and pan, and unmolding onto a platter.

Stone Fruit Cobbler

DSC03259

We’ve done quite a lot of traveling around France over the years. We have always preferred to stay either in a chambres d’hôtes (a bed & breakfast) or, if we are traveling with a group of friends, a gîte (an entire house). Without a doubt, one of our favorite things about staying in a bed & breakfast has always been the breakfast part. The bed part is rarely good. The mattresses are often old and either lumpy and soft or hard as a rock. And the pillows are almost always square. Yes, square. The French use square pillows. Which means that the bottom of the pillow comes under your shoulders. And that makes for a really uncomfortable night of sleep. We’ve actually considered traveling with our own pillows but we don’t want to carry that much luggage.DSC03257

Anyway, back to the breakfast part. It is always a rather rich affair, with fresh bread, salted butter, homemade jams, fruits or fruit salad, baked goods, cheeses, and whatever else the owners have either prepared or acquired from their local market. I remember one B&B in the Loire valley that had the most amazing homemade jams. I still dream about their peach and rosemary jam. As you may already know, breakfast is very important to Steve and me. We wake up hungry, hungry! One of our friends has a funny photo that she took on our last trip when we were all staying at a B&B in Normandy. Steve and I are at the big dining table that is covered with untouched breakfast food. We are the first ones there, sitting ramrod straight in our chairs, staring straight ahead at the camera, looking incredibly hungry and anxious. It’s obvious we are thinking “why are they not down yet? when are we going to eat? we are so hungry.” DSC03251

This stone fruit cobbler is the type of dish that would be typical at this kind of breakfast. It’s quick to make and it uses few ingredients and seasonal fruit. It can be made in advance and kept in the fridge, ready to be presented to the two hungry American tourists that are sitting at the table by themselves, looking like they are ready to devour everything.

DSC03246


Stone Fruit Cobbler – Slightly adapted from Bon Appétit

Note: If stone fruit is not in season, you can use other fruits like apples or berries.

Ingredients:

3 pounds peaches, nectarines, or plums, each cut into 6 wedges (or 1″ pieces if using ramekins)
½ cup granulated sugar
2 tablespoons all-purpose flour
¼ teaspoon kosher salt
1 tablespoon kirsch (clear cherry brandy) or other fruit brandy (optional)
½ tablespoon orange flower water (optional)
½ cup all-purpose flour
¾ teaspoon baking powder
¼ teaspoon kosher salt
½ cup (1 stick) unsalted butter, room temperature
3½ oz. almond paste
½ cup granulated sugar
3 large eggs, room temperature
½ cup sliced almonds, toasted in a dry skillet over medium heat until pale golden brown

Directions:

Toss peaches, granulated sugar, flour, salt, kirsch and orange flower water, if using, in a large bowl. Transfer to a 13×9” baking dish or split among 12 ramekins; set aside.

Preheat oven to 350°. Whisk flour, baking powder, and salt in a medium bowl. Using an electric mixer, beat butter, almond paste, and granulated sugar in a large bowl until light and fluffy, about 4 minutes. Add eggs one at a time, beating to blend after each. Mix in dry ingredients.

Drop dollops of batter over fruit (batter will even out during baking). Sprinkle with almonds. Place baking dish or ramekins on a rimmed baking sheet and bake until topping is golden brown and fruit juices are thick and bubbling, 50–60 minutes for13x9 dish or 45-50 minutes for ramekins. Let cobbler sit at least 20 minutes before serving. It will sink as it cools down.

Cobbler can be served slightly warm, at room temperature, or cold, straight out of the fridge. It can be served as dessert but it also makes a wonderful breakfast or brunch addition.

Double Chocolate Zucchini Bread

DSC03058

I am not a fan of the cherished American tradition of making desserts out of vegetables. I have never liked pumpkin pie. Sweet potato pie? Not for me. I’ll eat a slice of carrot cake but only because it’s usually covered in sugary, creamy frosting (though I did recently find this unfrosted recipe that I love). I think zucchini muffins are ok as a snack but as dessert? No way. It’s not because I don’t like the vegetables themselves. I love them. But only in savory dishes.

DSC03051

Maybe it’s an American vs. non-American thing. We tried to get our friends in Paris to have some pumpkin pie one year when we were celebrating Thanksgiving with them. They wouldn’t even touch it. For them, it was a double abomination. It was made out of pumpkin, a vegetable, and it included a healthy amount of cinnamon, a spice they associate with savory dishes and can’t understand why Americans put it in every dessert (I’m on the side of Americans on that one; I love cinnamon in desserts).

DSC03053

In any case, this is the time of year when people who are lucky enough to have vegetable gardens start to post pictures of all the zucchini they are getting and asking for recipes to use it up. Inevitably, zucchini bread recipes start appearing left and right. I usually ignore them. But when I saw this recipe for double chocolate zucchini bread, I was curious. I mean double chocolate! I am happy to report that a couple of hour later I had made the first zucchini bread I love.

Now, let’s be honest here. This is a chocolate cake. No, a double chocolate cake. The zucchini is a minor player. Really minor. You won’t even know it’s there. But heck, if you want an excuse to justify eating a slice of moist, rich, luscious chocolate cake, tell people this is a zucchini bread and that it’s actually “good for you.” And then walk away before they ask to try a bite out of your own slice.

DSC03065

Double Chocolate Zucchini Bread – Slightly adapted from The Kitchn

Ingredients:

1/2 vegetable oil
1 cup (7 ounces) granulated sugar
2 large eggs
2/3 cup (1 ounce) cocoa powder
1 teaspoon vanilla extract
1/4 teaspoon salt
2 teaspoons baking powder
2 cups coarsely grated zucchini
1 1/3 cups (6 ounces) all-purpose flour
1/2 cup semisweet chocolate chips

Directions:

Butter and flour an 8×5-inch loaf tin then preheat the oven to 350°F.

In a medium bowl, whisk together the cocoa, salt, baking powder, and flour.

In a large bowl, whisk together the oil, eggs, vanilla, and sugar until combined. Stir in the zucchini until combined.

Add dry ingredients to the wet ingredients and fold until combined (do not overmix). Fold in the chocolate chips.

Transfer the batter to the loaf tin and spread out using a spatula or the back of a spoon. Bake for 60 to 70 minutes until the cake has risen and a toothpick inserted into the center of the loaf comes out without batter on it (the toothpick might just have some melted chocolate on it from the chocolate chips).

Let the cake cool in the pan for 10 minutes before turning out onto a wire rack to finish cooling completely.

Lemon Cake with Raspberries and Pistachios

DSC03030

It seems to me that this year has given us an amazing berry season, at least in the Northeast. Not only for strawberries and raspberries, but this year we’ve eaten blackberries so sweet and juicy that it felt like we had never tasted real blackberries before. And the blueberries have been consistently great for weeks. I love this time of year, with all the amazing fruits and vegetables overflowing in market stands and grocery shelves. I always end up buying way too many so I’m always looking for ways to preserve the ones we’ll never manage to eat before they spoil. So, I end up making lots of jam in the summer, as well as some pickled vegetables.

DSC03028

This lemon cake with raspberries and pistachios is a fantastic way to use some of the beautiful raspberries of this season. When I saw the recipe in Bon Appétit, I was a little skeptical. I had already made a different raspberry cake with buttermilk and we were pretty happy with it. But I gave this recipe a try anyway. I’m so glad I did. This cake is spectacular! Its magic comes from the lemon syrup you brush on it as soon as it comes out of the oven. It soaks into the top part of the cake, so that when you eat it you get layers of sweetness and tanginess along with the distinctive floral taste of raspberries. And the pistachios and sprinkled sugar on top add a little crunch that makes the whole thing pop. And to top it all, it uses olive oil instead of butter, so it’s on the healthier side.

Believe me, you want to try this cake. It’s a total winner. And it also freezes beautifully (I freeze it in slices and defrost them on the countertop overnight), though it will probably disappear pretty quickly after it cools down.

DSC03024

Lemon Cake with Raspberries and Pistachios – Slightly adapted from Bon Appétit

Note: Do not be tempted to use less syrup than the recipe calls for. The cake needs it all.

Ingredients:

A little vegetable oil for greasing pan
1¾ cups all-purpose flour
1½ teaspoon baking powder
½ teaspoon kosher salt
4 large eggs
1¼ cups plus 2 Tbsp. sugar, separated
2 teaspoons vanilla extract
2 tablespoons finely grated lemon zest
1 tablespoon plus ¼ cup fresh lemon juice, separated
¾ cup olive oil
1 cup fresh raspberries (about 4 oz.)
3 tablespoons chopped pistachios

Directions:

Preheat oven to 350°. Lightly grease a 9” diameter cake pan or springform pan with vegetable oil. Whisk flour, baking powder, and salt in a small bowl.

Using an electric mixer, beat eggs and 1 cup sugar until light and fluffy, about 5 minutes. With mixer running, add vanilla, 1 Tbsp. lemon juice, and lemon zest then gradually add oil, mixing just until combined. Fold in dry ingredients.

Scrape batter into prepared pan and smooth top. Scatter berries over cake, then pistachios and 2 Tbsp. sugar. Bake cake until a tester inserted into the center comes out clean, 45–55 minutes.

While cake is baking, bring remaining ¼ cup sugar and remaining ¼ cup lemon juice to a boil in a medium saucepan, stirring to dissolve sugar; let lemon syrup cool.

Transfer hot cake (still in pan) to a wire rack and immediately brush with lemon syrup (use all of it). Let cake cool completely in pan.

Cake can be stored for two days, wrapped tightly at room temperature. It can also be frozen.

Marzipan and Chocolate Ice Cream

DSC02700

When I was a kid, my parents had some strange ideas about how one caught a cold. These ideas weren’t just unique to my parents. Everyone thought them true and from what I can see when I visit my family now, many people still believe them. For example, if you take a shower and wash your hair, you should never walk outside with your hair wet during the winter, because you will catch a cold. You also must always make sure to cover your neck with a scarf when it’s cold, because otherwise you’ll catch a cold. You must never, ever drink refrigerated water in the winter, because you’ll…well, you get the idea. Never mind that winter temperatures only got down to the upper 40s and lower 50s.

DSC02636

Basically, the thought is that there are two things central to getting sick with a cold: cold temperatures (stay away from them) and your throat (keep it warm and covered). This combination created a particularly nasty villain in the fight against colds: ice cream in the winter. Which is why when I was a kid, there was no ice cream anywhere to be found outside the summer months. No ice cream shops, no ice cream trucks, no ice cream in grocery stores.

DSC02677

Come summer, the two main providers of ice cream on the island would open their stores. For many years there were only four flavors: chocolate, vanilla, strawberry, and rose. Then at some point, someone imported a brand of Italian gelato called Pahit Ice and from that point on we had all kinds of flavors and flavor combinations available to us. My and my sister’s favorite was chocolate hazelnut. My mom’s was always stracciatella: vanilla ice cream with chocolate chunks. My dad gravitated towards fruit flavors, like prickly pear or passion fruit.

There was never a marzipan and chocolate flavor, though. Which is strange, given that marzipan features prominently in our cuisine. So, here’s a recipe for a great version of it. It features a chopped up bar of the insanely addictive Ritter Sport dark chocolate with marzipan. If you can’t find it, just substitute with your favorite milk or dark chocolate.

Just remember. Enjoy your ice cream while it’s summer, because once the winter comes, you risk getting sick with a nasty cold if you indulge in it.

DSC02705

Marzipan and Chocolate Ice Cream – Adapted from Love and Olive Oil

Ingredients:

5 egg yolks
7 ounces almond paste, crumbled or cut into large chunks
2/3 cup sugar, divided
2 cups heavy cream
1 cup whole milk
1/4 teaspoon kosher salt
1/2 teaspoon almond extract
1 Ritter Sport Dark Chocolate with Marzipan, coarsely chopped

Directions:

Place a fine mesh sieve over the top of a medium sized bowl. Set aside.

In a separate bowl, with an electric mixer, beat egg yolks, 1/3 cup sugar, and almond paste together until smooth, about 2 minutes.

In a saucepan, combine cream, milk, remaining 1/3 cup sugar, and salt. Cook gently over medium heat, stirring regularly, until sugar is dissolved and mixture just starts to steam (small bubbles will start to form around the edges, but do not let it boil). Remove from heat.

Slowly whisk some of the warm cream mixture into the egg yolk mixture, 1/3 cup at a time, until about half of the cream mixture has been incorporated and mixture is warm to the touch.

Pour the egg mixture back into the saucepan, while whisking, and return to medium heat, stirring constantly, until the mixture thickens slightly and coats the back of a spoon, about 5 to 7 minutes, or until it reaches approximately 165 to 170ºF. Do not let it boil. Pour mixture through sieve into medium sized bowl, discarding any solids. Let mixture cool to room temperature. Cover and refrigerate until completely cool, at least 3 hours or overnight if possible.

Churn ice cream in ice cream maker according to manufacturer’s instructions. Add the chopped chocolate bar just before ice cream finishes being churned. Serve immediately (it will have the consistency of soft serve ice cream) or put ice cream in freezer container and freeze.


Ultimate Chocolate Ice Cream

DSC02471I really don’t like flying. The loss of control (you’re hurtling through the air at 34,000 feet at unimaginable speeds!), the long periods of sitting down, the dry air and pressure differential (hello explosive sinus headache!), the forced proximity to other people (does your elbow have to rest on my ribs? is that Chanel No. “stale smoke and onions” you’re wearing? what part of I-am-wearing-headphones-so-that-I-don’t-have-to-talk–to-you do you not understand?), are only some of the pleasures of flying that I wouldn’t mind never having to experience again.

We flew back yesterday from Hilton Head Island where we visited Steve’s dad, brother, and sister-in-law. Since Hilton Head Island airport is smaller than a Walmart, the only planes that land there are tiny propeller ones. We got into one that supposedly would fly all the way to Washington D.C. It did, but only after it shook and tumbled as it landed enough to make me think about reaching for the barf bag twice. And then, when safely on the ground, I turned airport mode off on my phone to find a voicemail that – surprise! – our flight to New York was cancelled – thank you for flying US Airways – you are now scheduled to fly tomorrow at 9am – good luck.

DSC02473

Fortunately, a helpful agent booked us on a Delta flight which would arrive in New York at the same time as our cancelled flight. Then as soon as we sat down in that plane, two college girls sat behind us. And then one of them – tan, dirty blond hair, short shorts – took a really deep breath and started talking without.a.break for the entire flight. Have you read Kerouac’s “On the Road”? The stream of thought chain of words that never lets up? Like that, except less interesting and delivered in the sentence-as-a-question cadence of valley girl speak that continued on through the flight, through the deplaning, all the way into the terminal until the other girl (who barely managed a few “uh-huh”s and “yeah”s the entire time) ducked into a bathroom, presumably to escape.

Hopefully, your Memorial Day travels are a little less eventful. So, as we begin the summer season, I offer you this recipe for the ultimate chocolate ice cream. It’s got a couple of ingredients that are tougher to find and which you can replace. But if you find them, the result will be worthwhile. Almost worth flying for.

DSC02743Ultimate Chocolate Ice Cream

Note: Gianduja is an Italian chocolate spread that contains about 30% hazelnut paste. It comes in blocks and it’s solid, not liquid. If you can’t find it, use good quality milk chocolate instead. I like Sharfgen Berger Extra Rich Milk Chocolate. Also, if you can’t find malted milk powder you can omit it from the recipe, but try to find it. It makes a big difference.

Ingredients:

2 cups heavy cream
3 tablespoons black cocoa
3 tablespoons Dutch process cocoa
125 gr sugar
Pinch of salt
2/3 cup malted milk powder
170g gianduja, chopped (or use good quality milk chocolate)
1 1/4 cup whole milk
1 teaspoon vanilla extract

Directions:

Place the chopped gianduja (or milk chocolate) in a medium bowl and set aside.

In a medium saucepan, add the cream, cocoa, sugar, salt and malted milk powder. Whisk gently while heating over medium heat until combined. When the mixture comes to a boil, pour over chopped gianduja in bowl. Whisk until gianduja is completely melted and incorporated. Add milk and vanilla and whisk to combine.

Let it cool and chill, covered, in the refrigerator. Freeze in an ice cream maker according to the manufacturer’s instructions.

Passion Fruit Ice Cream

DSC02632

My birthday was always my favorite day of the year when I was a kid. My parents made a big deal out of it and since my sister and I had birthdays that were separated by only 4 days, we celebrated them together, even when we were teenagers. Since we were only two years apart, we knew each other’s friends well and had no problem having one party where all of our friends were invited and had fun together.

The time of the year was always great too, because the weather at the end of April was usually warm and dry, while everything was in bloom. Our parents threw us a big party where everyone hung out in our big front yard. There was always music and lots of dancing (my sister and I loved to dance, and still do). There is a photo of me from what was probably my 8th birthday, twirling a girl from my class, most likely to an ABBA or Boney M song (my favorite bands at that time).

DSC02616

As an adult, I still love my birthday and I still get excited at the prospect of opening presents and celebrating a day that’s all about me. But not all of my adult birthdays have included big parties and dancing. Take this year, for example. The night before my birthday, I had an MRI of my left hip and lower spine to figure out the source of the hip pain and foot numbness that I’ve had since October (it turns out it’s a labral tear, tendonosis, and bursitis). Nothing makes you feel like you’re getting older quite like hip pain. Then I got home and in the middle of dinner a piece of my lower front tooth just fell off. The next day, the day of my birthday, we woke up to freezing temperatures (at the end of April) and one of the rainiest days in the history of New York city. On top of that I had to work all day and teach in the evening.

But before you start to feel sorry for me, I should tell you that after all that I got to come home to a lovely dinner with my amazing husband, who bought me presents and brought me flowers, and finished it all with a hefty scoop of this passion fruit ice cream, one of my favorite desserts. Which is to say, I had a great birthday again.
DSC02628


Passion Fruit Ice Cream

Note: I use the frozen passion fruit pulp from Goya, which I thaw before adding to the egg yolks. You can also buy fresh passion fruits and extract the pulp yourself. If you do so, you can either strain the seeds or leave them in for the added crunch.

Ingredients:

1 can (14oz sweetened condensed milk)
1 cup heavy cream
1/2 cup sugar
pinch of salt
1 cup passion fruit pulp (see note)
4 large egg yolks

Directions:

In a small bowl, whisk together the egg yolks and the passion fruit pulp. Place a mesh strainer on top of a medium bowl and set aside.

In a saucepan, add sweetened condensed milk, cream, sugar, and pinch of salt. Heat, stirring frequently, over medium heat until combined and bubbles start to form.

Temper the egg yolks by slowly pouring about 1/3 cup of the hot milk mixture into the egg yolks, while whisking constantly. Scrape the tempered egg yolk mixture into the saucepan, again whisking constantly. You’ll notice that the mixture will immediately become thicker. Continue to cook over medium heat for another 4 minutes, stirring constantly with a spatula and scraping the bottom and sides of the pan.

Pour the mixture through the mesh strainer into the medium bowl. Let cool completely and chill thoroughly in the refrigerator.

Freeze the ice cream in your ice cream maker according to the manufacturer’s instructions.