Braised Endives

I’ve been visiting my family this week so I haven’t cooked at all. I’ve been eating my mom’s food, which is what primed me through childhood for a food-obsessed life. When I come to visit, she makes some of my favorites, like koupepia (grape leaves stuffed with meat and rice) and ttava (a meat stew with tomatoes, onions, and cumin, baked in a clay pot).
IMG_2534

I’ve also been eating some of the sweets I remember fondly from my childhood. Just this morning, my sister, my mom and I went downtown for a coffee and we shared a big slice of shamali, a semolina-based cake that is flavored with mastique and soaked in a sugar syrup. It was cold and refreshing on a hot, sunny day and we ate it quickly, washing it down with frappés, the ubiquitous iced coffee drinks made with instant coffee.

IMG_2537

Now that I’ve teased you with the descriptions of all of those delectable temptations, you’re probably expecting a recipe for something along those lines. I’m afraid I’ll disappoint you. The recipe I’m sharing today may not feature syrup-soaked cakes or cumin-scented stews, but I promise you that you’ll love it anyway.

IMG_2540

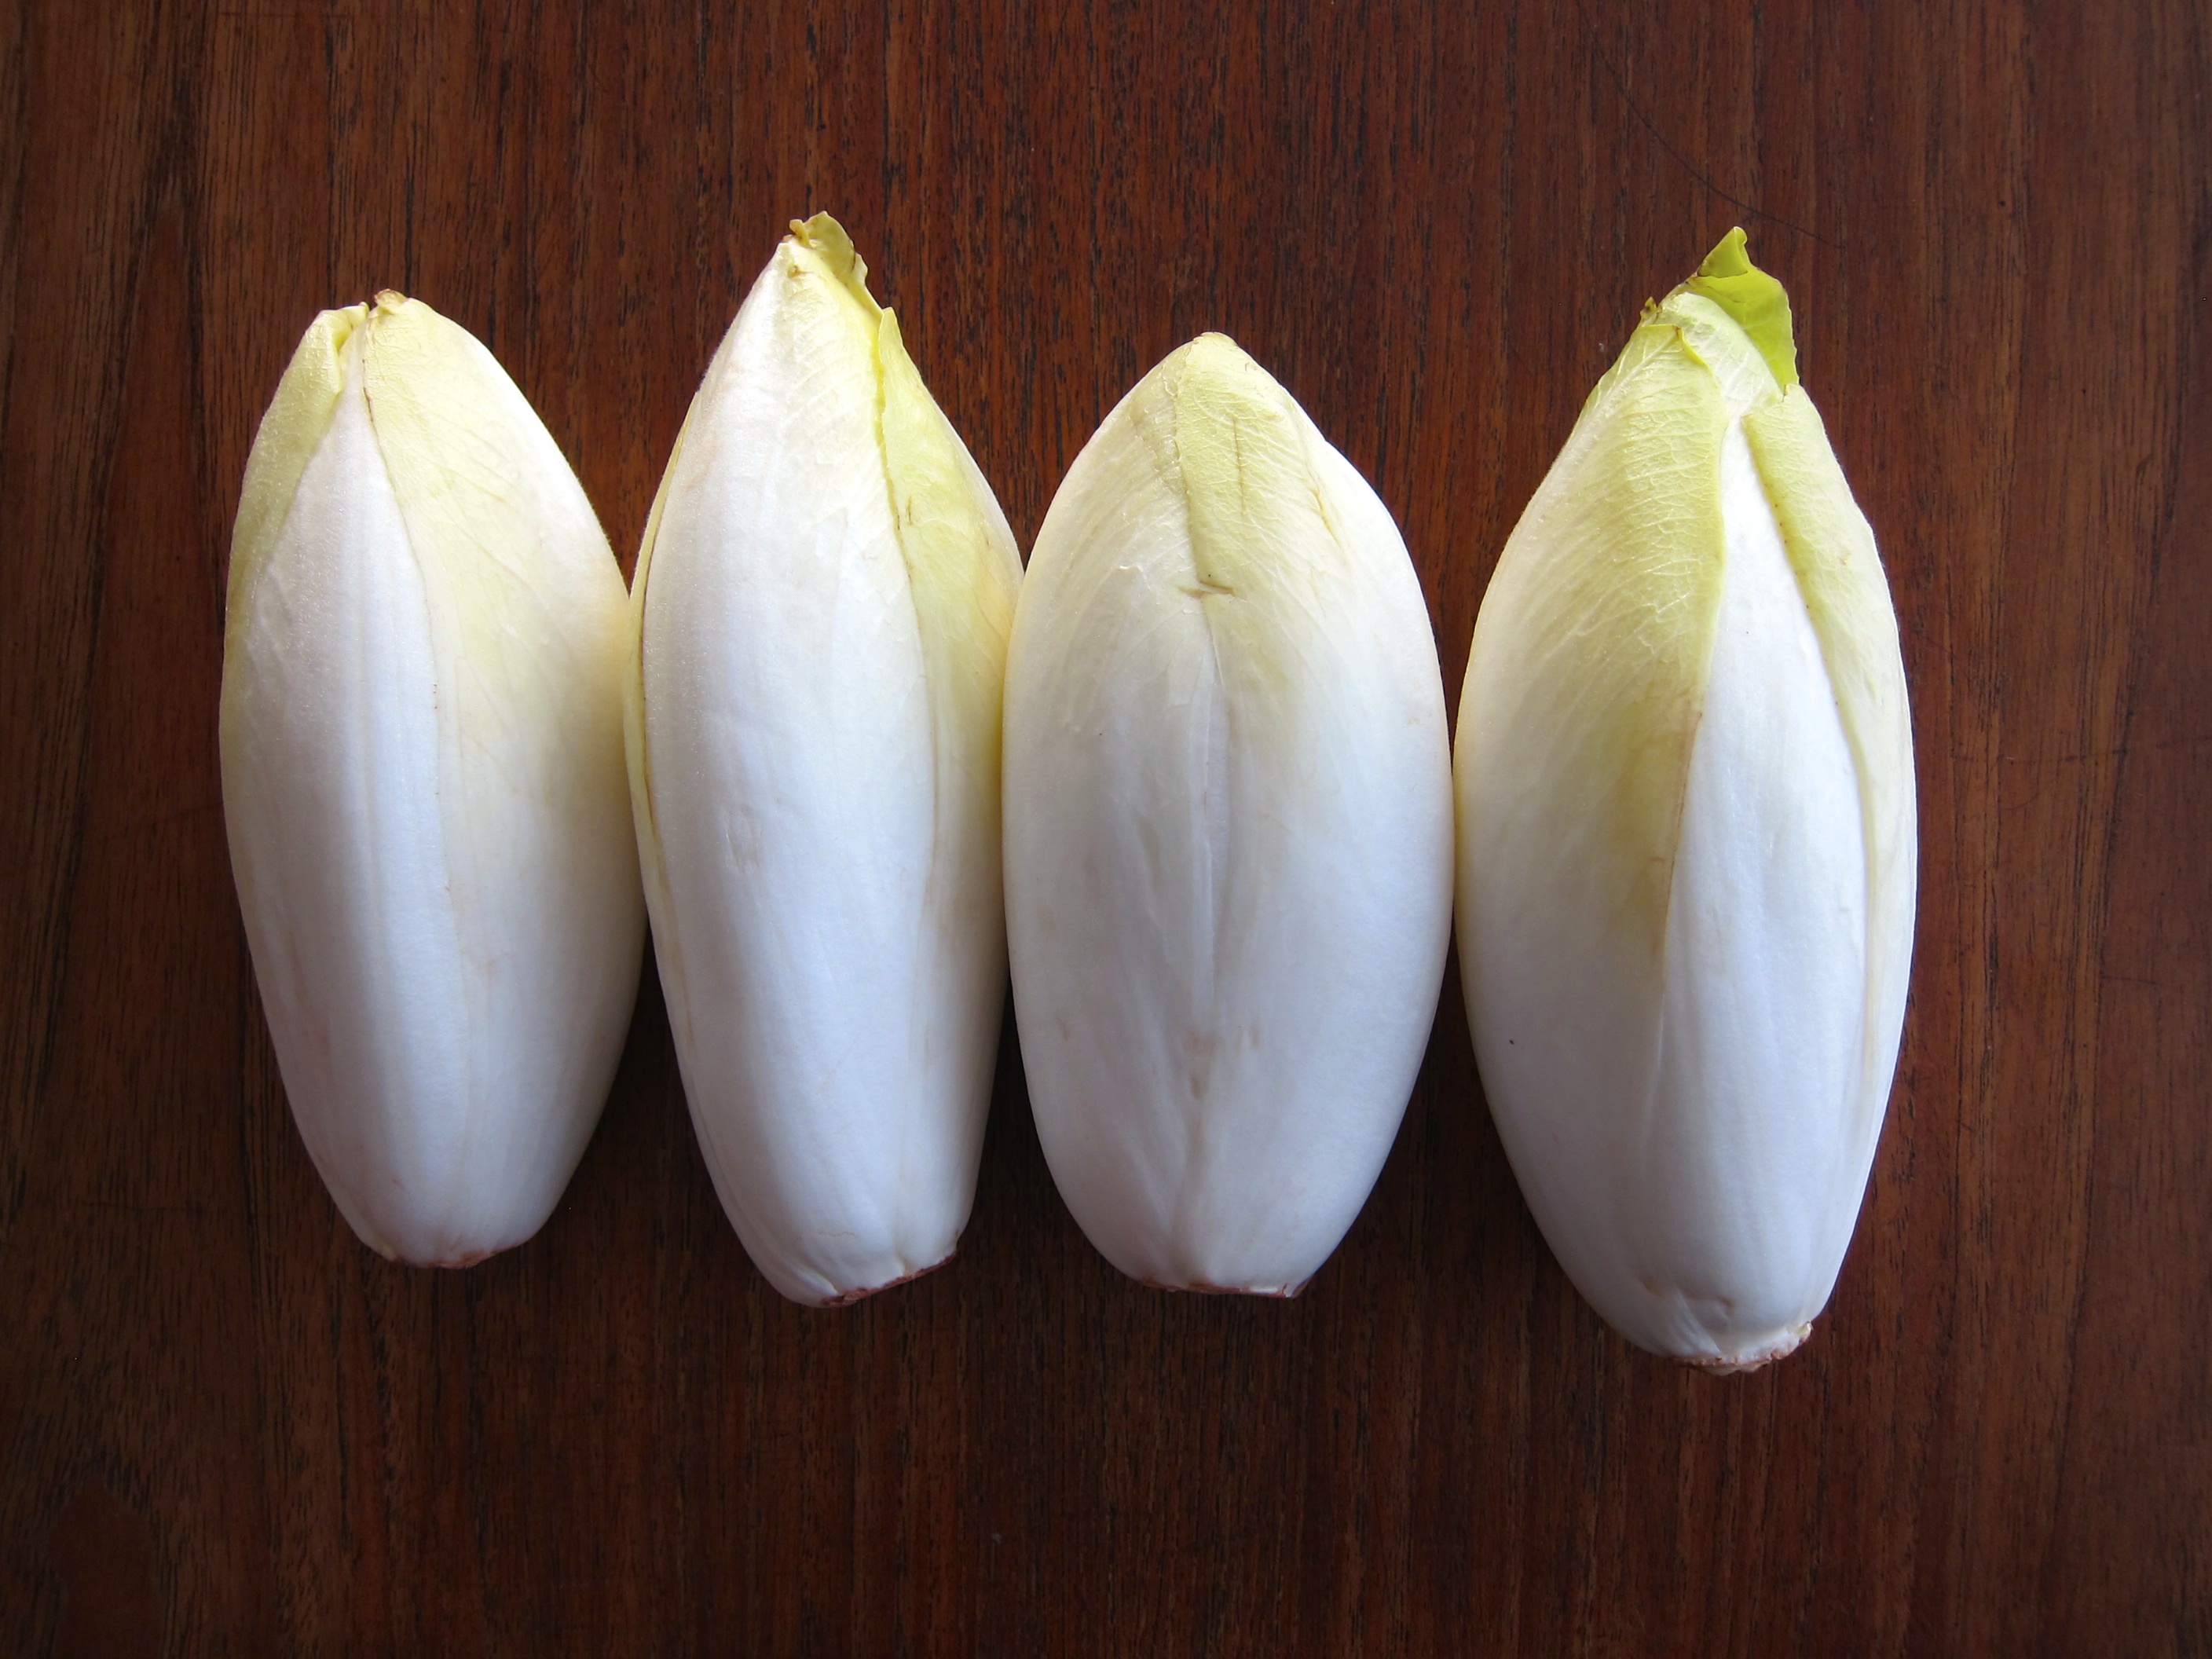
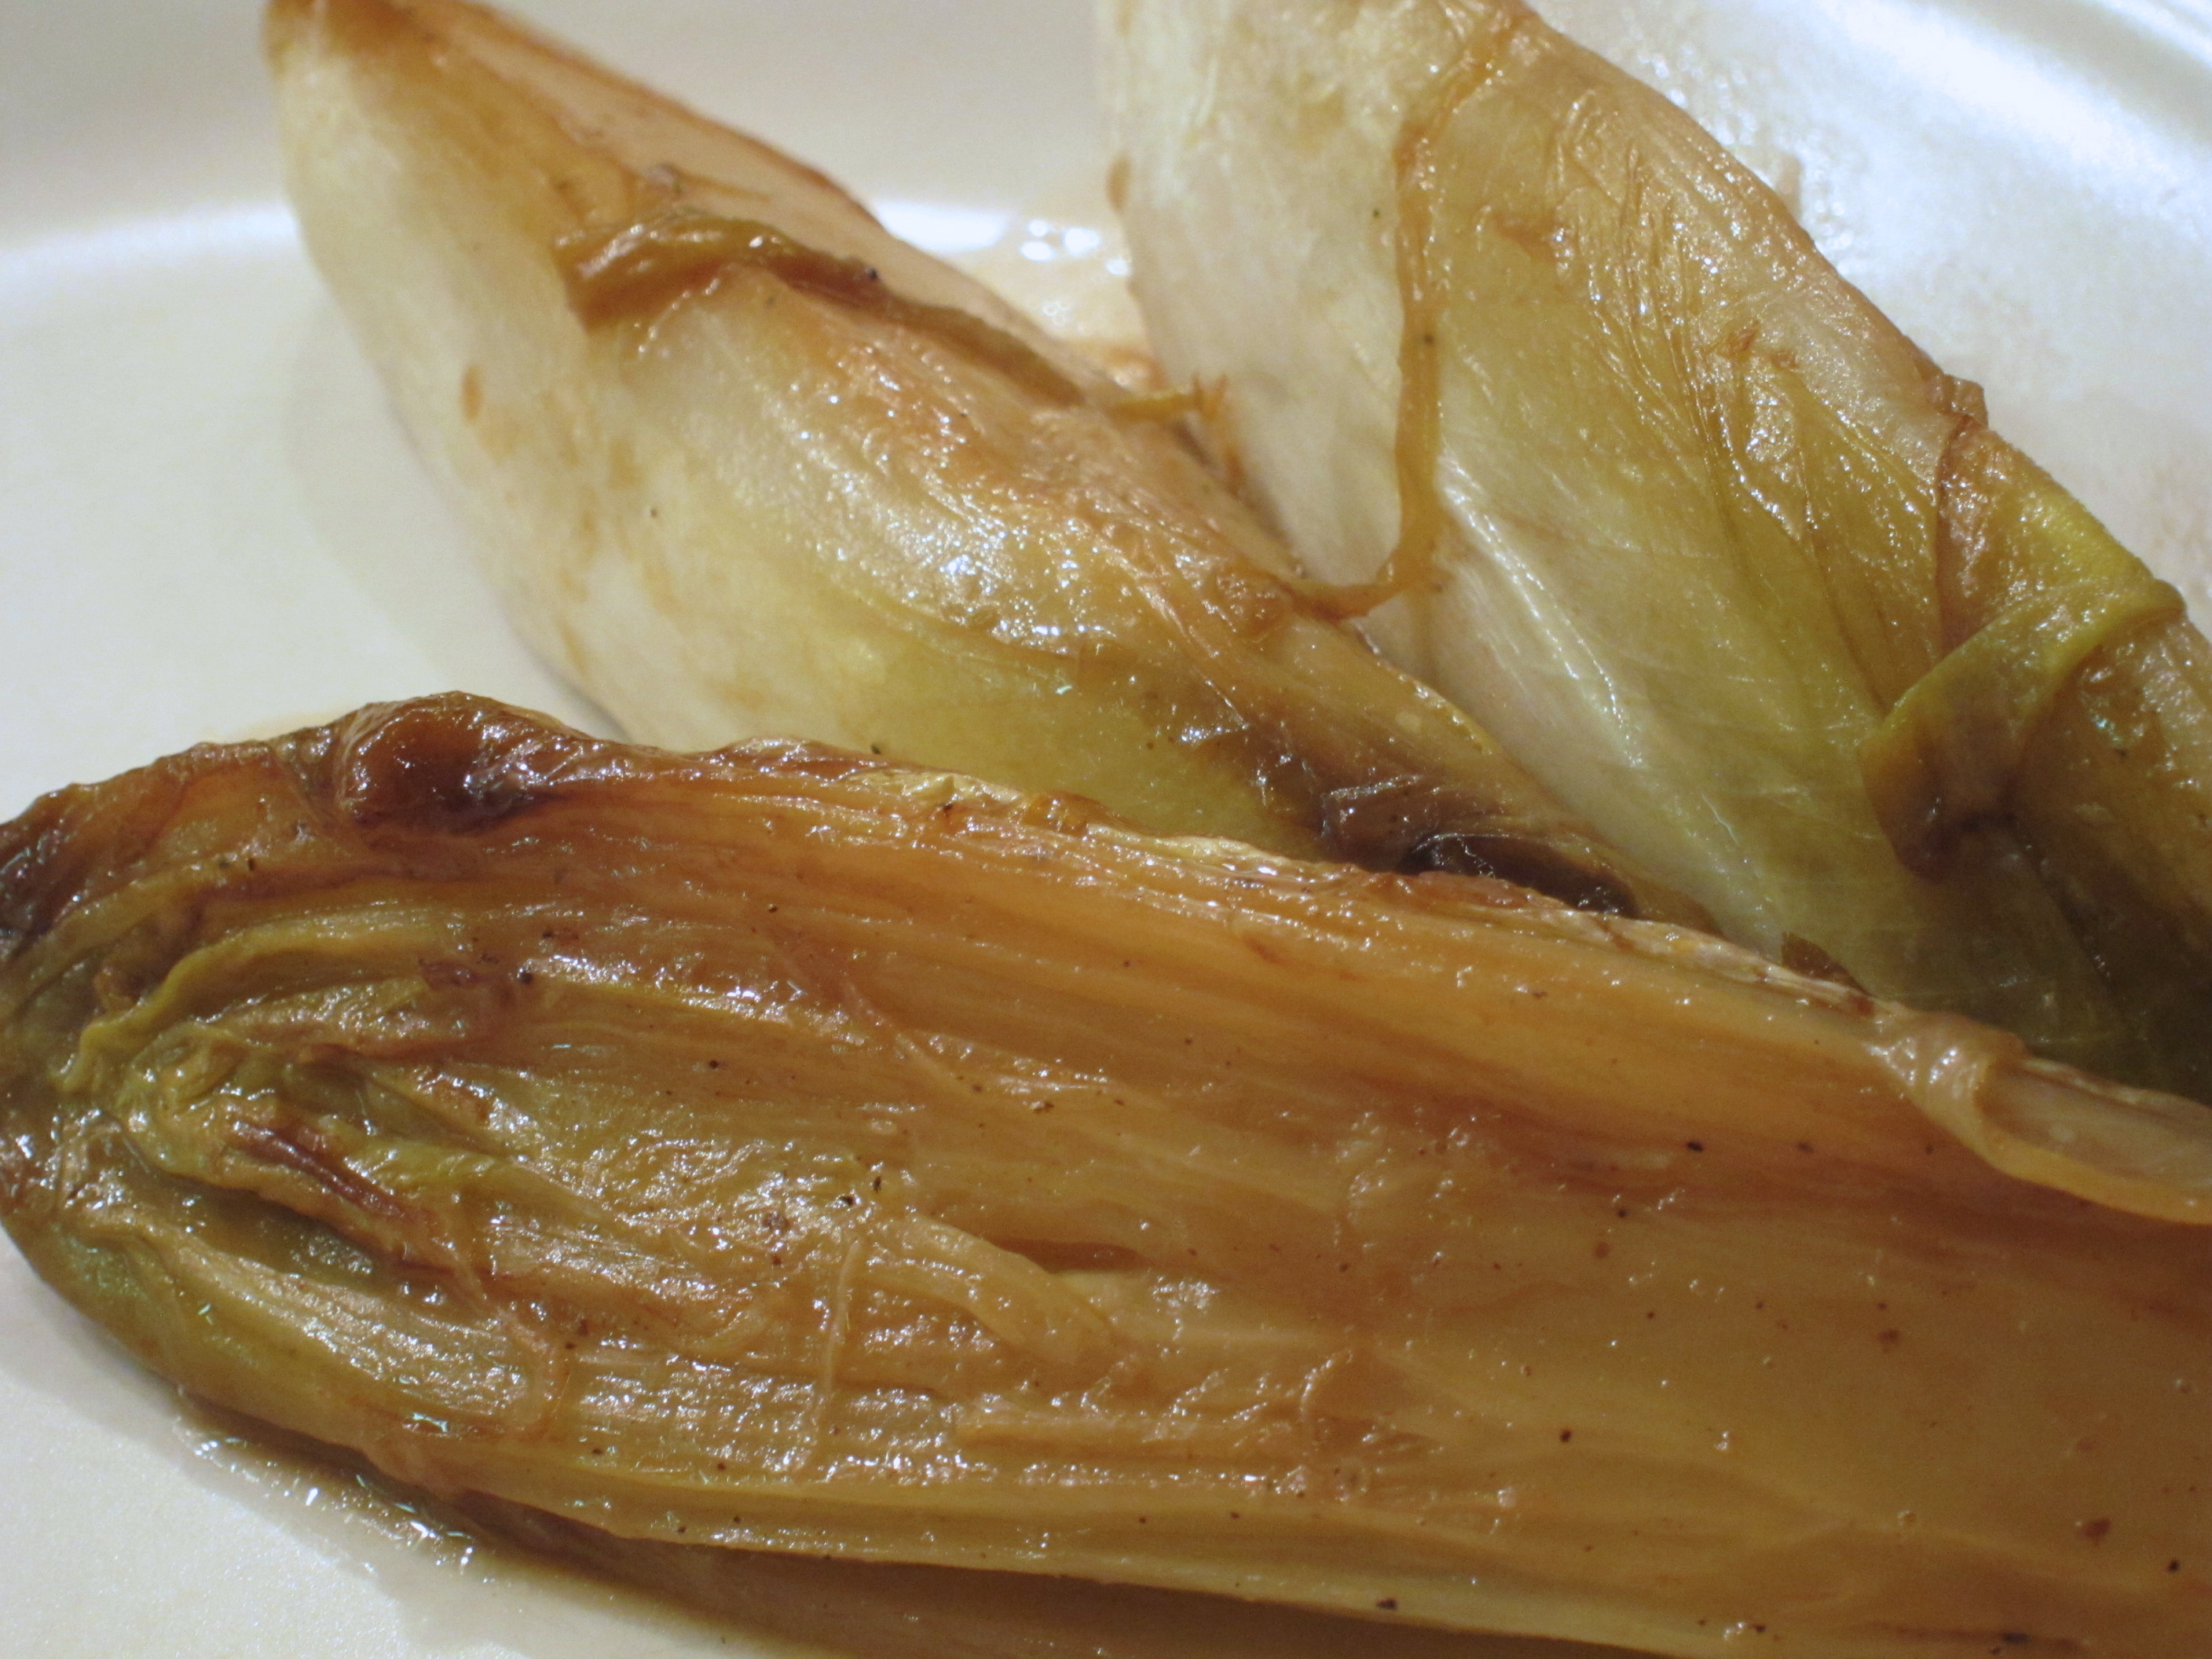
There are a lot of people who are not big fans of endives. They can be bitter or bland at times. This is a very simple and quick way to turn then into something pretty extraordinary. A quick sear in hot oil caramelizes their surface and is followed by a relatively fast braise in stock and a little vinegar. The process is transformative. The resulting endives are sweet and tangy, with maybe hints of bitterness but not enough to cause displeasure to the palate. By leaving the core intact, the endive halves stay together but still cook soft enough to cut through them easily. They make a great side dish and a great way to use that fancy vinegar you got as a gift that one time, many as part of a gift basket, and never knew what to do with it.

IMG_2547

Braised Endives

3 tablespoons olive oil
2 large endives (or 3 small ones)
1/2 cup chicken stock
2 tablespoons of your favorite vinegar (red wine, sherry, balsamic, cider, or any fruit vinegar)
salt and pepper

Cut the endives in two lengthwise, leaving the core intact. Sprinkle the cut sides with salt and pepper.

In large saute pan, add olive oil and heat over medium-high heat until the oil shimmers. Place the endives, cut side down, in the pan. Cook without stirring or moving them for about 4 minutes, until their surface has caramelized and turned dark golden brown. Turn endives on round side and cook for an additional 2 minutes.

Turn endives again on cut side and add stock (be careful, the stock will steam). Immediately reduce heat to medium-low and cover the pan. Cook covered for about 7 minutes. Uncover and add vinegar. Cover and cook for another 3 minutes.

Uncover the pan and turn the endives to coat them in sauce. Return them to cut side down. Turn the heat to medium-high and cook for another 5-7 minutes until the sauce has reduced and slightly thickened.

Serve immediately with additional salt and pepper on top, to taste.

Olive Oil and Maple Granola

I’ve been watching the new season of “Mad Men” and, like most people who watch the show, I’ve been pretty disappointed by it. I’ve been a really big fan of the show since it started. The first season was remarkable simply for the 60s factor and the “remember when [blank] was acceptable” game. Drinking at work, smoking everywhere, sexual harassment in the office. They were all there for us to watch and laugh at, feeling smug in our contemporary,better lives, but also a little nostalgic for our childhoods.

IMG_2484

By season too, the show became more than a neat time trick. It started exploring the main characters more deeply by placing them in situations that showed their inner gears. The writing was taut and the direction was beautiful but not showy. Some episodes were like literature. There was the one titled “The Suitcase” that was pure magic. A year or two ago there was an article on “Mad Men” in Entertainment Weekly and they asked the cast members to name their favorite episode. Most of them said it was “The Suitcase.”

IMG_2472

But this season has been uneven, at best. There have been what, four, five episodes? And yet it feels like nothing’s happened. Everyone seems to just be going through the motions and each episode is written less about the characters and more about a different important historical event of the late 60s. It’s like a history lesson with actors.

IMG_2477

I’ve read a few articles bemoaning this and analyzing the reasons for the show’s slump. But for me the reason is clear: there are just too many characters. As the main ones (Don, Peggy, Joan, Pete, and Roger) started to get married, divorced, remarried, to have lovers and parents and kids, too many people joined the show and the focus was lost. The show never spends enough time on the few important characters because it now has to also cover everyone else, even a little bit. The result is a watered down, overloaded soap opera.

IMG_2481

It’s the same with food (I know you were wondering where I was going with the “Mad Men” diatribe). There is such a thing as too many ingredients, one too many techniques, or too many courses. Most of the time, I’d rather have few, good ingredients that come together beautifully and support each other in the final product, than a complicated recipe with fifteen ingredients and thirty steps to make.

This recipe for olive oil and maple granola is somewhere in the middle. It has quite a few ingredients, all easy to find, but very few steps. Mix and bake, stirring a few times along the way. The result is probably the best granola I’ve ever tasted. It’s not too sweet, with a good combination of nuts and seeds, along with toasted coconut flakes to up the ante. The olive oil is all the way in the background, a grassy note to complement the maple syrup’s smoky sweetness. It all comes together perfectly, like an early episode of “Mad Men.”

IMG_2485

Olive Oil and Maple Granola – Adapted from Orangette

Makes about 7 cups

300 grams (3 cups) rolled oats (not the quick cooking kind)
125 grams (1 cup) raw hulled pumpkin seeds (aka pepitas)
130 grams (1 cup) raw hulled sunflower seeds
50 grams (1 cup) unsweetened coconut chips (you can substitute unsweetened, grated coconut if you can’t find the chips)
135 grams (1 ¼ cup) raw pecans, whole or chopped (you can also use any combination of nuts; almonds and pistachios work well)
85 grams (packed ½ cup) light brown sugar
1 tsp. kosher salt
175 ml (¾ cup) maple syrup
120 ml (½ cup) olive oil

Preheat the oven to 300°F and line a rimmed baking sheet with parchment paper.

In a large bowl, combine the oats, pumpkin seeds, sunflower seeds, coconut chips, pecans, light brown sugar, and salt. Stir with a spoon or spatula to mix. Add the olive oil and maple syrup, and stir until everything is well combined. Spread the mixture in an even layer on the prepared sheet pan. Bake, stirring every 15 minutes, until the granola is golden brown and toasted, about 45-55 minutes. If you like your granola more clumpy, stir only once or twice in the beginning and then do not stir anymore.

Remove the granola from the oven and cool completely on a wire rack. Store in an airtight container, where it will keep for about a month.

White Bread Loaves

IMG_2513

Nothing beats bread. Nothing. It requires a minimum of only two ingredients to make it, flour and water (yeast isn’t always necessary). It’s infinitely customizable. Add butter, milk, raisins, cinnamon, olives, nuts, seeds, pepperoni, cheese, and the list goes on and on. It’s adaptable. Eat it plain, toasted with butter, in a sandwich, in stuffing, in bread pudding, in bread crumbs, you name it.

IMG_2496

Growing up we had access to two kinds of bread. The first was a round loaf of country style bread, with a golden brown crust and a moist interior filled with holes (like the bread you get at some Italian restaurants). On occasion, my dad would get lucky and buy one at the local bakery just as it came out of the oven. When he brought it home it was still warm so my sister and I would cut a thick slice each, slather it with butter, and top it with honey. It was heaven.

IMG_2503

The other bread was a pre-sliced loaf of white bread. We called it slice. In fact, that’s what everyone still calls it back home. Thinking back, it was definitely inferior to the traditional round country bread, but as kids we loved slice. It was spongy and had no crust. And it made the best sandwiches with butter, halloumi cheese, and sliced cucumbers.

IMG_2498

I don’t even walk by the bread aisle at the grocery store anymore. It makes me too angry. I just don’t understand how something as simple and perfect as bread can be so corrupted by big corporate interests. It’s frustrating and sad. So, I just make my own. I have two go-to recipes for bread. The first is the no-knead bread recipe that created an actual revolution in bread-making in the U.S. And the second is this recipe for white bread loaves. This bread requires no bread stone, no high powered oven, no special equipment, and no special skills. Technically, you could make it by hand, though a heavy-duty mixer makes it much easier.

Don’t be scared by the length of this recipe. It’s super simple, pretty much foolproof, and results in delicious, homemade white bread. Slice it up after it’s cooled down and have it any way you want. Though I’m here to tell you that you’ll want to toast it and slather it with salted butter and honey. Trust me on that one.

IMG_2510
White Bread Loaves – Adapted from “Baking with Julia: Savor the Joys of Baking with America’s Best Bakers”

Makes 2 loaves

2 1/2 cups of warm water (105º F to 115º F)
1 tablespoon active dry yeast or 3/4 tablespoon instant yeast
1 tablespoon sugar
7 cups (875 gr) bread flour or unbleached all-purpose flour or combination of both
1 tablespoon salt
1/2 stick (4 tablespoons or 2oz) unsalted butter, at room temperature

1. If you are using active dry yeast: Pour 1/2 cup of the warm water in the bowl of a heavy-duty mixer. Sprinkle the yeast and the sugar and whisk to blend them. Let the mixture rest for about 5 minutes until the yeast bubbles. Add the flour and the salt. Slowly pour the remaining 2 cups of warm water in the bowl. Proceed with step 3 below.

2. If you are using instant yeast: In the bowl of a heavy-duty mixer, add the flour, the yeast, the sugar, and the salt. Slowly pour the 2 1/2 cups of warm water in the bowl.

3. Using the paddle attachment of the mixer, mix the dough at low speed for about a minute until it comes together.

4. Replace the paddle with the dough hook and mix at medium-low speed (2 or 3 on a KitchenAid mixer) for about 5 minutes, until the dough is smooth and elastic.

5. Keep the mixer running and add the butter one tablespoon at a time. Mix until each tablespoon is incorporated before adding the next. Your dough will seem to come apart but don’t worry, keep mixing and it will come together.

6. After the last tablespoon of butter is fully incorporated, stop the mixer and remove the dough. Shape it into a ball and place it in a large, lightly oiled bowl. Turn the dough around so that its entire surface gets covered with the oil. Cover the bowl tightly with plastic wrap and let the dough rise at room temperature until it doubles in volume, about 45-60 minutes.

7. When the dough has risen, butter two 8 1/2 – 4 1/2 inch loaf pans and set them aside. Preheat the oven at 375ºF, with a rack at the center of the oven.

8.Take the dough out of the bowl and place it on a lightly floured surface. Divide the dough into two equal pieces. Working with one piece at a time, pat the dough using your fingertips into a rectangle about 8 inches by 10 inches. The short side should be facing you.

IMG_2504

9. Starting at the top, fold the dough about two thirds of the way down the rectangle and pinch the seam together.

IMG_2505

Fold the top one more time so that it meets the bottom edge and pinch the seam together.

IMG_2506

Roll the dough so that the seam is in the center, facing you, and pinch the two ends of the loaf so that it seals.

IMG_2507

10. Place the loaves in the buttered load pans, seam side down, cover them with plastic wrap and let them rise at room temperature until the are growing just over the tops of the pans, about 45 minutes.

IMG_2508

11. Remove the plastic wrap and bake the loaves in the preheated oven for 30 minutes. After 30 minutes of baking,  remove the loaves from the pans and continue to bake them directly on the oven rack for an additional 10-15 minutes.

12. Remove the loaves from the oven and let them cool completely on wire racks before cutting them.

13. The loaves can be wrapped in plastic or aluminum foil and frozen. Take out of the freezer the night before you plan to eat them and defrost at room temperature.

Orange Blossom Ice Cream with Pistachios

Memory is a funny thing. The older I get, the more unpredictable it becomes. On the one hand, I have a hard time remembering what I ate yesterday for lunch or what was the plot of the book I just finished reading two nights ago. On the other hand, random memories will be pop up, seemingly for the first time, out of nowhere. The float to consciousness like bubbles from the dark, deep corners of my mind.

IMG_2466

Often, these memories are triggered by a smell or a taste. I am well aware that our sense of smell is tightly linked to our memory function, but still, every time it happens, I marvel at the ability of a group of molecules that reach my nose or tongue to evoke such strong emotional recollections.

The first time I made this orange blossom ice cream, I had exactly this kind of experience. I had just finished cooking the custard base and I added the three tablespoons of orange blossom water that the recipe called for. Since the custard was steaming hot, the smell wafted up to my nose. The memory it triggered was of all the times that my mom made us a simple custard, flavored with orange blossom water (called anthonero), to have as dessert.

IMG_2441

I hadn’t thought of that custard in decades. And yet, as soon as I remembered it, as soon as I smelled it in the bowl and tasted it on the spoon, I had a clear recollection of how it tasted of spring, how its creamy consistency coated our mouths, and how my sister and I always ignored my mom’s warnings to wait until it cooled down to eat it.

IMG_2438

I knew that this recipe would be amazing, even before I chilled the custard in the fridge and froze it in the ice cream maker. I’ve made it many times since then and at some point I decided to add chopped pistachios for a taste and texture contrast, which turned out to be a fantastic idea.

IMG_2452

This is a very easy ice cream to make. It uses cornstarch to thicken cream and milk into a quick custard. The trick is to make sure there are no cornstarch lumps and to cook it just enough time that it thickens and you can’t taste the “floury” cornstarch anymore. And if you are like me, the toughest part is to try not to eat it hot out of the pan, instead of chilling it and turning it into ice cream.

IMG_2454

Orange Blossom Ice Cream with Pistachios

1 1/2 cups whole milk
3/4 cup sugar
1 1/2 cups heavy cream
3 tablespoons cornstarch
3 tablespoons orange blossom water
1/3 cup shelled pistachios, chopped

In a small bowl or a 2-cup measuring cup, stir together the cornstarch and heavy cream using a fork, making sure there are no lumps. Place the milk and sugar in a saucepan and bring to a simmer, stirring so that the sugar dissolves. Remove from the heat and stir in the heavy cream mixture. Return the pan to the stove and cook over moderate heat, stirring constantly, until it thickens. It should coat the back of the spatula or spoon. Taste the mixture: make sure it does not have any floury taste, if it does, continue to simmer it until the cornstarch is cooked.

Remove from the heat and add the orange blossom water. Chill the mixture thoroughly in the refrigerator, then churn in your ice cream maker according to your manufacturer’s directions.

Add the chopped pistachios towards the end of the churning or layer them into the ice cream as you spoon it into its container from the ice cream maker.

Eleven Madison’s Strawberry Gazpacho

Two or three times a year, Steve and I will celebrate a special occasion (an anniversary, a birthday) by going to a really nice restaurant for dinner. Few things make us happier than one of those perfect meals, the ones that transcend the act of eating and nourishment, that emotionally transport us. We have been known to get teary-eyed during such a meal, though admittedly after a couple of glasses of wine.IMG_2469

So, when we do splurge on an expensive dinner at a fine restaurant, we usually request the tasting menu with the wine accompaniment. We expect that the chef will take us on a journey , with each small dish and paired glass of wine providing us with a gustatory milestone along the way. Some such journeys have been extraordinary (our first times at Momofuku Ko and Aska come to mind). Others have been great, though with a few bumps in the road (Aquavit, post-Marcus Samuelsson).

IMG_2458

And then there was Eleven Madison Park. I don’t remember what we were celebrating but we couldn’t have been more excited to get a reservation there. Widely considered one of the best restaurants in New York and the world, we counted the days to our dinner with breathless anticipation. We arrived there with big grins on our faces, hardly able to contain our excitement as the friendly Danny Meyer-trained staff sat us down and handed us the menu.IMG_2459

Keep in mind that this was a few years ago, two complete menu reinventions ago. Right there, tempting us, was the ultimate tasting menu: a 14-course behemoth that held more promises than a Christmas tree loaded with wrapped presents. We gleefully told our server we would choose that along with the wine pairings.IMG_2460

Things started out very promisingly. The long, rectangular plate with the tiny amuse bouches included pickled beet marshmallows. We still talk about them. And then we began the long journey into the evening. Trouble hit around course six or seven. I was full. Full! And I was only half way through this meal. From that point on, every plate or bowl that was placed in front of me became an increasingly more painful instrument of torture. I wanted so badly to want to eat the food, but my full stomach said otherwise. I took small bites, to at least taste it. But nothing seemed pleasurable to my satiated appetite. And the plates kept coming. And coming. I wished I could go to the bathroom and throw up, like a Roman at a vomitorium (which is a myth, by the way). But I couldn’t go that far.

IMG_2461

It took us a long time before we ordered a tasting menu again. The experience scarred us. Eventually, we did forget about it and went back to leaving ourselves in the hands of the chef for a carefully chosen tasting journey. But we make sure it’s never more than six or seven courses. And we arrive at the restaurant hungry. Really hungry.

IMG_2463

This strawberry gazpacho was not part of our torturous tasting menu. I first saw it on Food52’s Genius Recipes, a collection of recipes that are really smart and unexpected. It’s a pretty classic gazpacho recipe, except for the fact that it uses strawberries instead of tomatoes. It is crisp and full of sunshine, the perfect appetizer for a late spring or summer meal. Just don’t have an additional 13 courses after it.

Eleven Madison’s Strawberry Gazpacho – Adapted from Food52’s Genius Recipes

Serves 4 to 6

Soup:
1 tablespoon plus 1/2 cup extra-virgin olive oil
2 cloves garlic, peeled and crushed but kept whole
1 1/2 cup rustic-style bread, cut into 1-inch cubes
2 sprigs thyme
6 cups strawberries, hulled and quartered
2 1/4 cups English cucumbers, peeled, seeded, and diced
1 1/4 cup diced red bell pepper
3/4 cups diced green bell pepper
6 tablespoons tomato juice or tomato sauce
3 tablespoons red wine vinegar
1 1/2 teaspoon salt

Croutons:
2 tablespoons extra-virgin olive oil
2 cloves garlic, peeled and crushed but kept whole
2 cups rustic-style bread, cut into 1/2-inch to 1-inch cubes
3 sprigs thyme
1/2 teaspoon salt

Make the soup:
Heat a small saute pan over medium-high heat. Coat the bottom with 1 tablespoon of the olive oil and add 1 clove of garlic. When the garlic begins to sizzle, add the bread cubes and thyme. Toss occasionally until the bread turns golden brown, being careful not to burn it.  Transfer the bread to a large bowl. Discard the garlic and thyme.

Add the strawberries, cucumber, peppers, remaining garlic clove, remaining 1/2 cup of olive oil, tomato juice or sauce, vinegar, and salt to the bowl with the bread cubes. Toss to combine and cover tightly with plastic wrap. Marinate at room temperature for 3 to 6 hours, stirring the mixture once or twice. Puree the ingredients and their juices in small batches in a blender on high speed until very smooth. If you want you can strain the soup through a fine mesh strainer, or you can keep it as is. Chill the soup in the refrigerator until very cold. Taste and season, if necessary, with salt and red wine vinegar.

Make the croutons:
Heat a small saute pan on medium-high heat. Coat the bottom with the olive oil and add the garlic. When the garlic begins to sizzle, add the  bread and thyme. Toss occasionally until the bread turns golden brown, being careful not to burn it. Quickly transfer to a baking sheet lined with paper towels. Discard the garlic and thyme and season with the salt. Once cool and dry, store in an airtight container line with paper towels for up to 1 day.

Serve the soup with a few croutons on top, several drops of hot sauce (such as Tabasco or Louisiana Hot Sauce), and fresh mint leaves.

Julia’s Best Banana Bread

I like my bananas firm and just turned yellow, with a hint of green still visible. Once they fully ripen, get brown spots, and turn super sweet, I don’t want to eat them anymore. What I usually do is blend them with other fruit and some orange juice for a breakfast smoothie.
IMG_2414
I know that most people like to make banana bread with overripe bananas, but I’ve never cared for the banana breads I’ve tasted. They are often cake baritones: heavy, overly sweet, and dense. I always feel like they need some tenor, or even soprano, flavor notes in there. But I never attempted to make one of my own because all the recipes I saw seemed to pretty much be variations on a pound cake with added mashed bananas.

IMG_2404

This changed when Bon Appetit ran an article called “A Slice of Paradise: Andrew McCarthy’s Banana Bread Quest.”In it, the actor Andrew McCarthy (yeah, that Andrew McCarthy, from Pretty in Pink) talks about his search for the best banana bread on the island of Maui in Hawaii. He finds it at a remote, little roadside stand called Julia’s. Fortunately, he leaves with the recipe.

IMG_2405

As soon as I saw the recipe I knew I had to try it. It’s easy, two-bowls-and-a-whisk kind of easy. And it uses no butter, just eggs and oil. Even more important, it calls for just two bananas, not three like most other recipes I have seen. But I decided to make one small but important change. I had bought a bag of coconut palm sugar, a kind of sugar extracted from the nectar of the coconut tree. It’s very trendy right now because it’s supposed to be better for you than regular cane sugar.

IMG_2408

I don’t care much about that claim. What intrigued me about it was its taste. It’s earthy and complex. There is butterscotch and coffee and coconut in there. I thought it would go well in this Hawaiian recipe for banana bread, so I substituted half of the white sugar with it.

IMG_2402

The end result is the best banana bread I have ever tasted, by far. Granted, the benchmark was already low, but this was heavenly. The cake is moist but not dense. The banana flavor is distinct but not overpowering. The coconut palm sugar gives it both darker notes and a little acidity.

No baritones or sopranos here. Just a good old folk singer singing on the beaches of Maui.

IMG_2417

Julia’s Best Banana Bread – Slightly adapted from Bon Appetit

Note: If you don’t have coconut palm sugar, you can use light brown sugar instead. Or you can just use all white sugar, as the original recipe does.

1 3/4 cup all-purpose flour
1 1/2 teaspoons baking soda
3/4 teaspoon kosher salt
3 large eggs
3/4 cup white sugar
3/4 cup coconut palm sugar (break up any lumps with your fingers)
1 cup mashed ripe bananas (about 2 large)
3/4 cup vegetable oil

Preheat oven to 350°. Coat a 9x5x3-inch loaf pan with vegetable oil. Dust with flour and tap out excess.

Whisk flour, baking soda, and salt in a medium bowl. In a large bowl, whisk eggs, sugars, and bananas until smooth. Add dry ingredients to banana mixture and stir gently, just until there no more traces of flour. Pour the batter into prepared pan.

Bake until a tester inserted into the center of bread comes out clean, 60-70 minutes. Transfer to a wire rack and let bread cool in pan for 15 minutes. Run a knife around inside of pan to release the bread. Turn out onto rack and let cool completely.

You can make this 3-days ahead and store it in an airtight container at room temperature. Or you can slice it and wrap individual slices (or pairs) in plastic wrap and freeze them. Take out of the freezer at least two hours before eating and leave on countertop, unwrapped, to defrost.