Coconut Beef Patties

I’m in a coconut state of mind. (That would make a great lyric, wouldn’t it?)

I pulled up the list of all the drafts of yet-unpublished posts for this blog, and I saw that there were five recipes that featured coconut. I’m not sure how that happened. Don’t get me wrong, I really like coconut, but it’s not the first thing I go for on a menu. I’ll blame (or thank) the dead zone. This period we are in when it’s not winter and it’s not spring. When I avoid going to the farmers’ market because it makes me sad to see all those withered apples and dried up squashes (though it’s probably when the farmers need me to buy their things the most, now that I think about it). So I turn to things that are without season. Like dried beans and grains and shredded coconut that’s always available at the store.

DSC02370

I also realized that I’ve neglected the Appetizers section of this blog. It’s not an easy section to fill. Most of the time, I’m cooking for just the two of us, so there’s no appetizer involved. I have to wait until I’m cooking for company to bring out my list of appetizer recipes.

For this recipe, I reached out to a cookbook I have had for probably close to 15 years. I used it a lot when I first bought it back in the 90s but then it got buried somewhere in the back of the bookcase.

DSC02372

It’s a great cookbook on Indonesian food called Taste of Indonesia: Over 70 Aromatic Dishes from the Spice Islands of Bali, Java Sumatra and Madura by Sallie Morris. It has big, beautiful photographs and recipes that are not hard to make, though they do sometimes require searching for some exotic ingredients like galangal or pandan. This recipe for coconut beef patties, however, is easy to make with things you probably already have in your pantry.

DSC02377

The patties are lightly spiced with coriander and cumin and they carry a distinct coconut flavor. They remain, however, steadfastly meaty. When you serve them, make sure you provide lime wedges for your guests to squeeze over them. They need the acid. Or if you want to go a step further, serve them with a small bowl of Thai chili vinaigrette to dip the patties in. Just call it Thai-Indonesian fusion.

DSC02378


Coconut Beef Patties – Adapted from Taste of Indonesia: Over 70 Aromatic Dishes from the Spice Islands of Bali, Java Sumatra and Madura

Makes 10-12 patties

Ingredients:

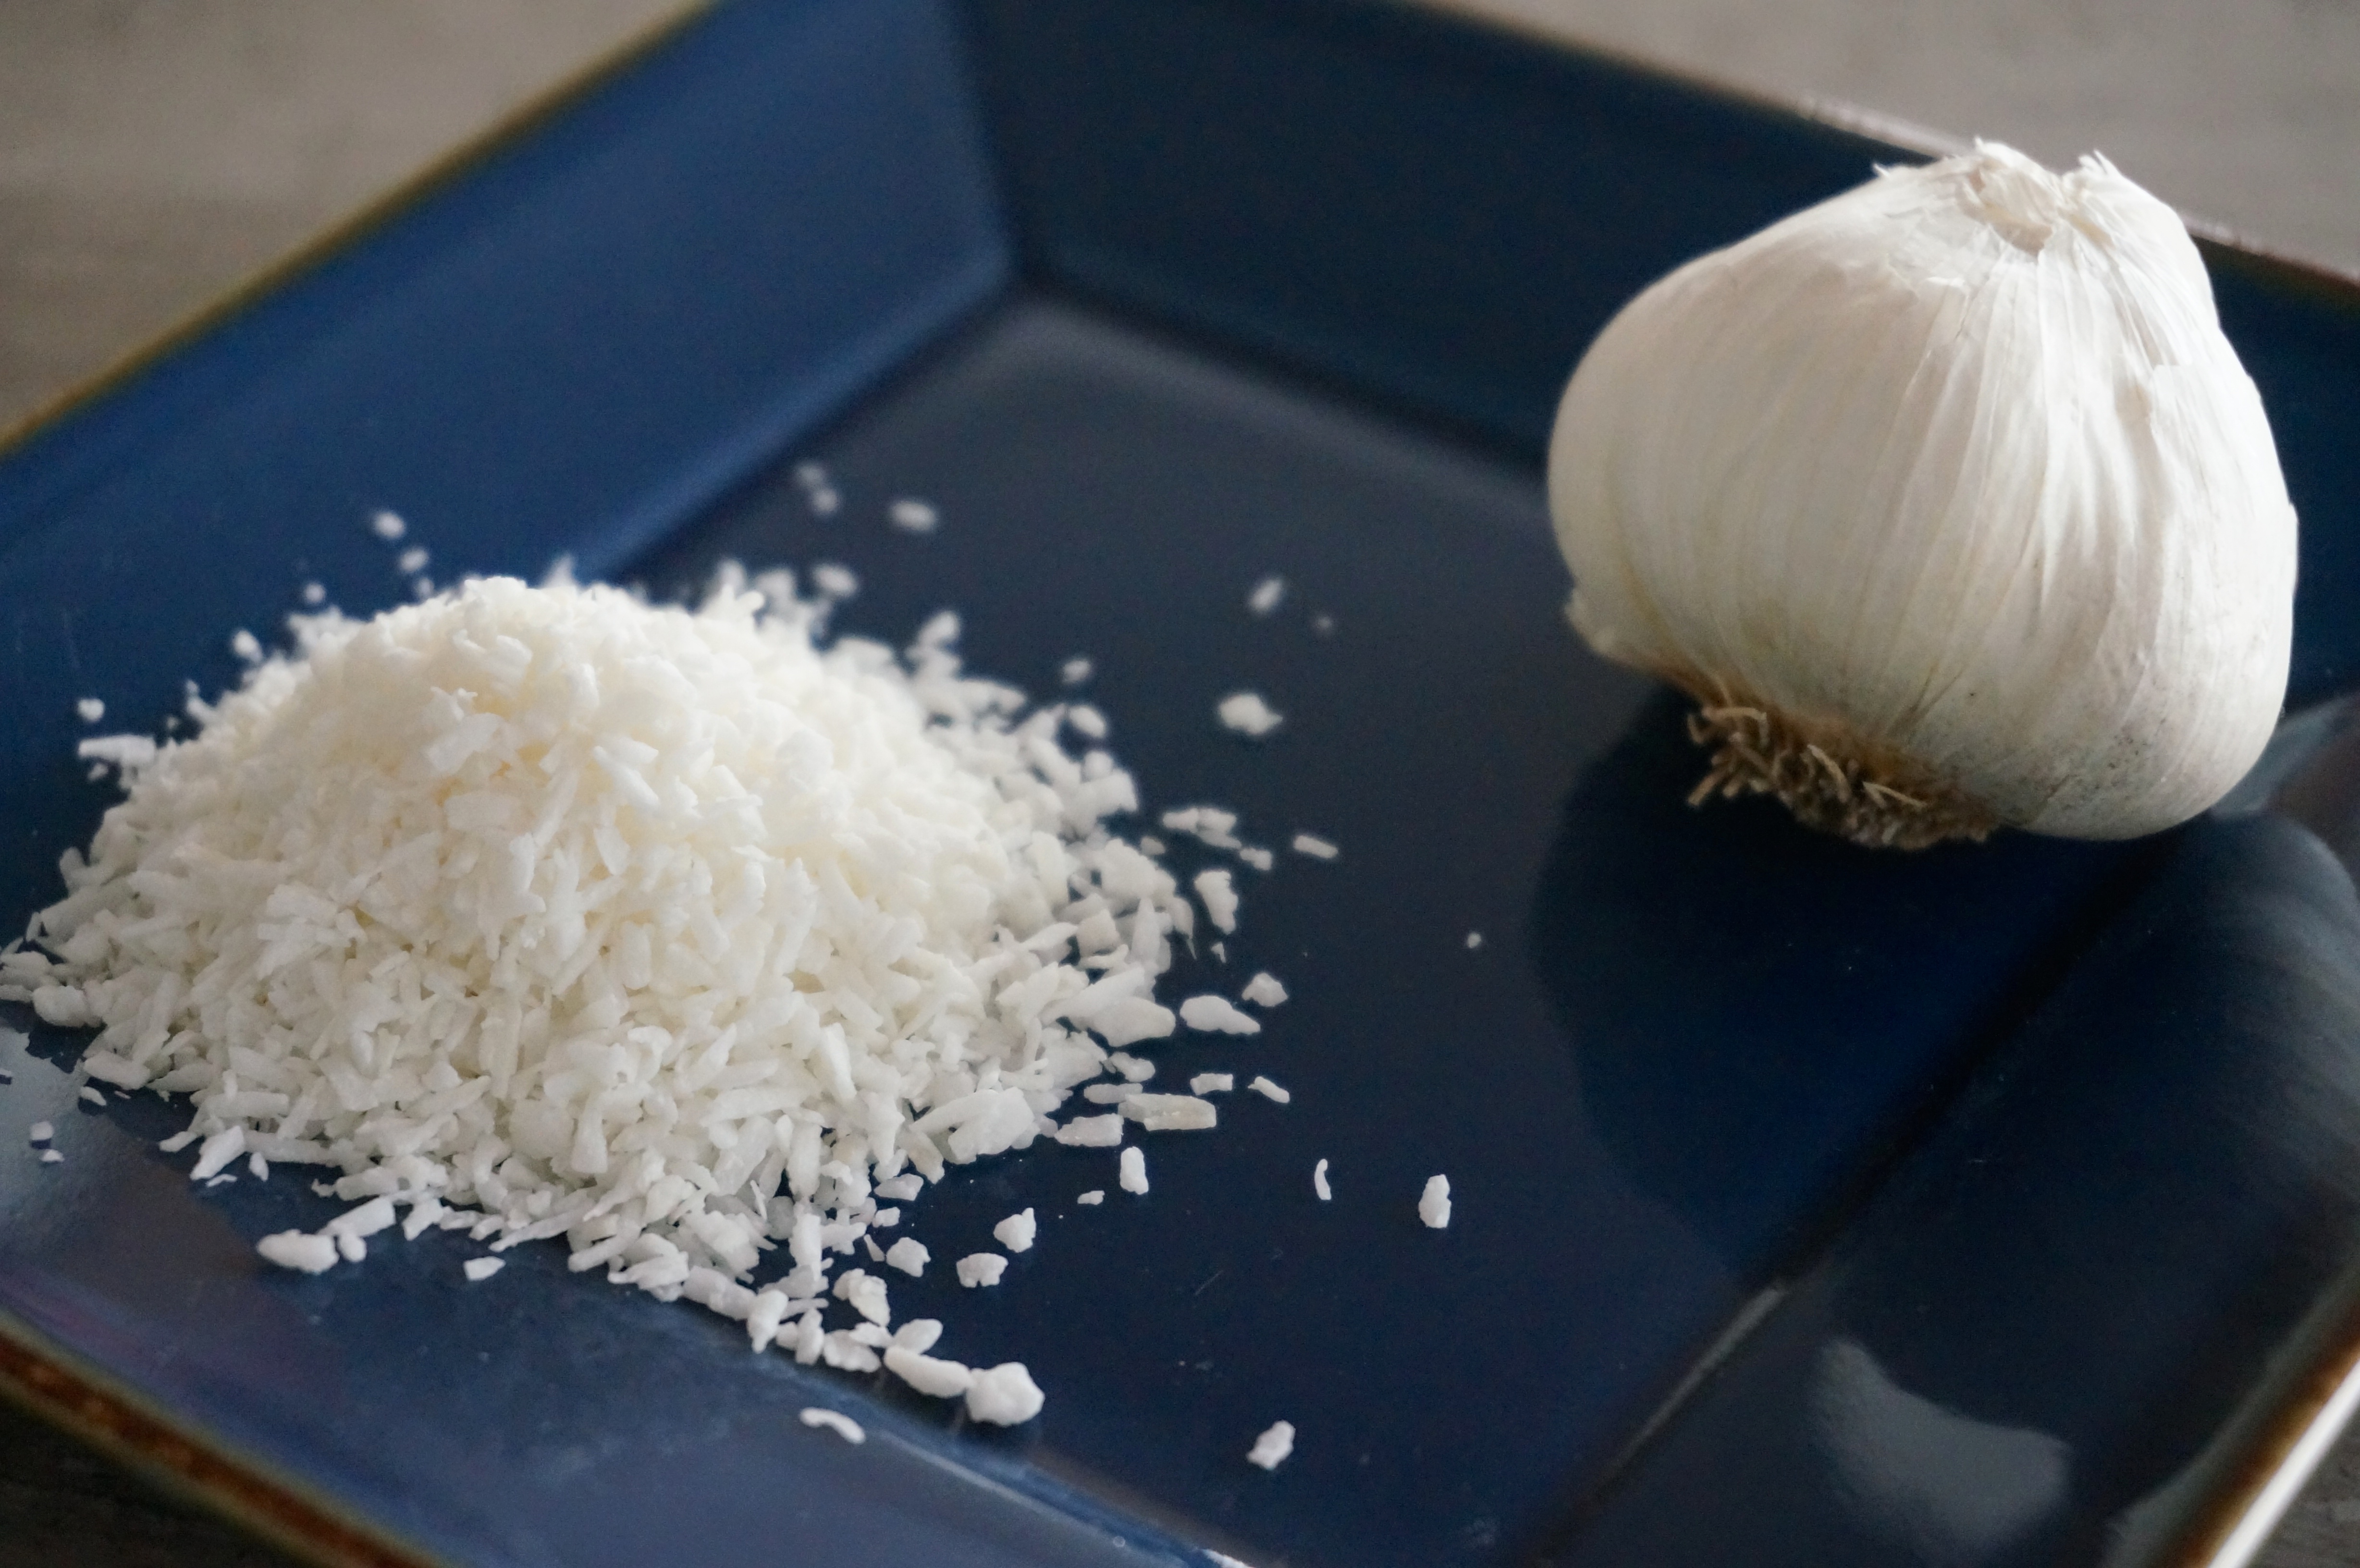
4oz shredded coconut, soaked in 6 tablespoons of boiling water
12oz ground beef
½ teaspoon ground coriander
½ teaspoon ground cumin
½ teaspoon salt
1 garlic clove, minced
1 egg, lightly beaten
1-2 tablespoons all purpose flour
vegetable oil for frying
lime wedges to serve

Directions:

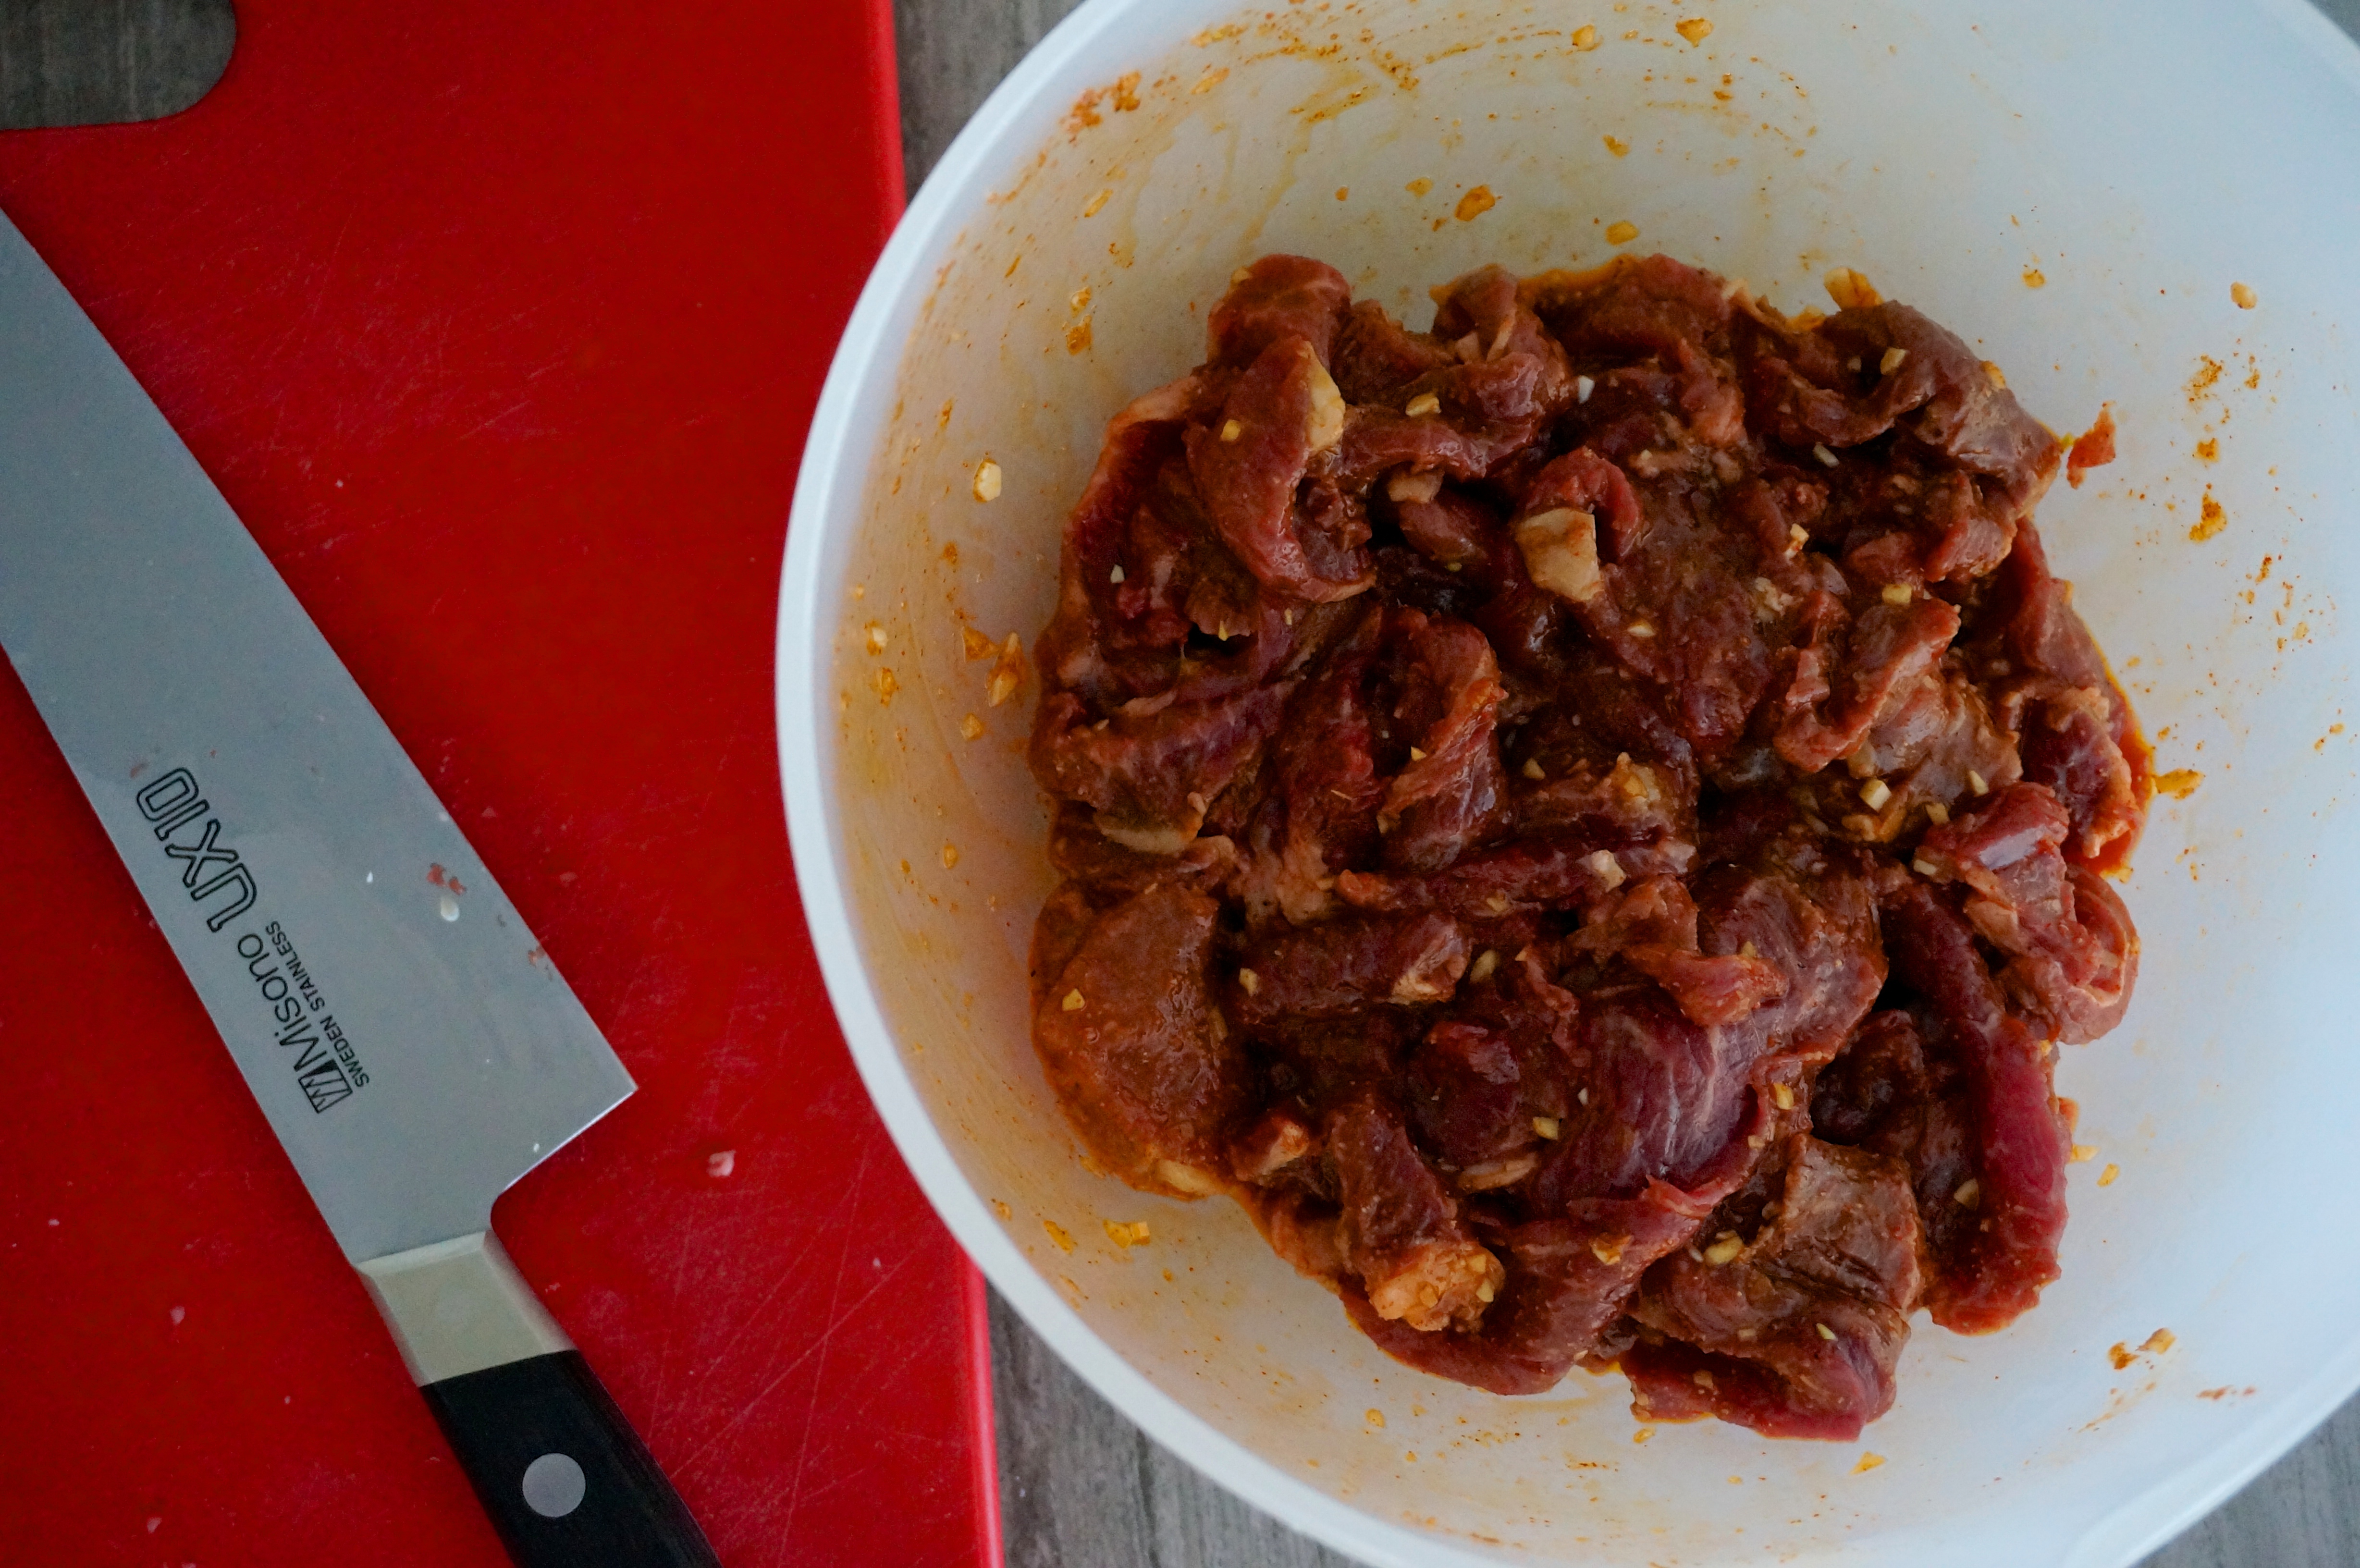
In a small bowl, mix together the coriander, cumin, salt, and garlic into a paste. Add to the soaked coconut and mix to combine. Add coconut mixture and egg to beef and use your hands to combine.

Divide the meat mixture into 10-12 even sized portions and form them into patties about 2″ in diameter and ½” thick. Dust both sides of patties with flour.

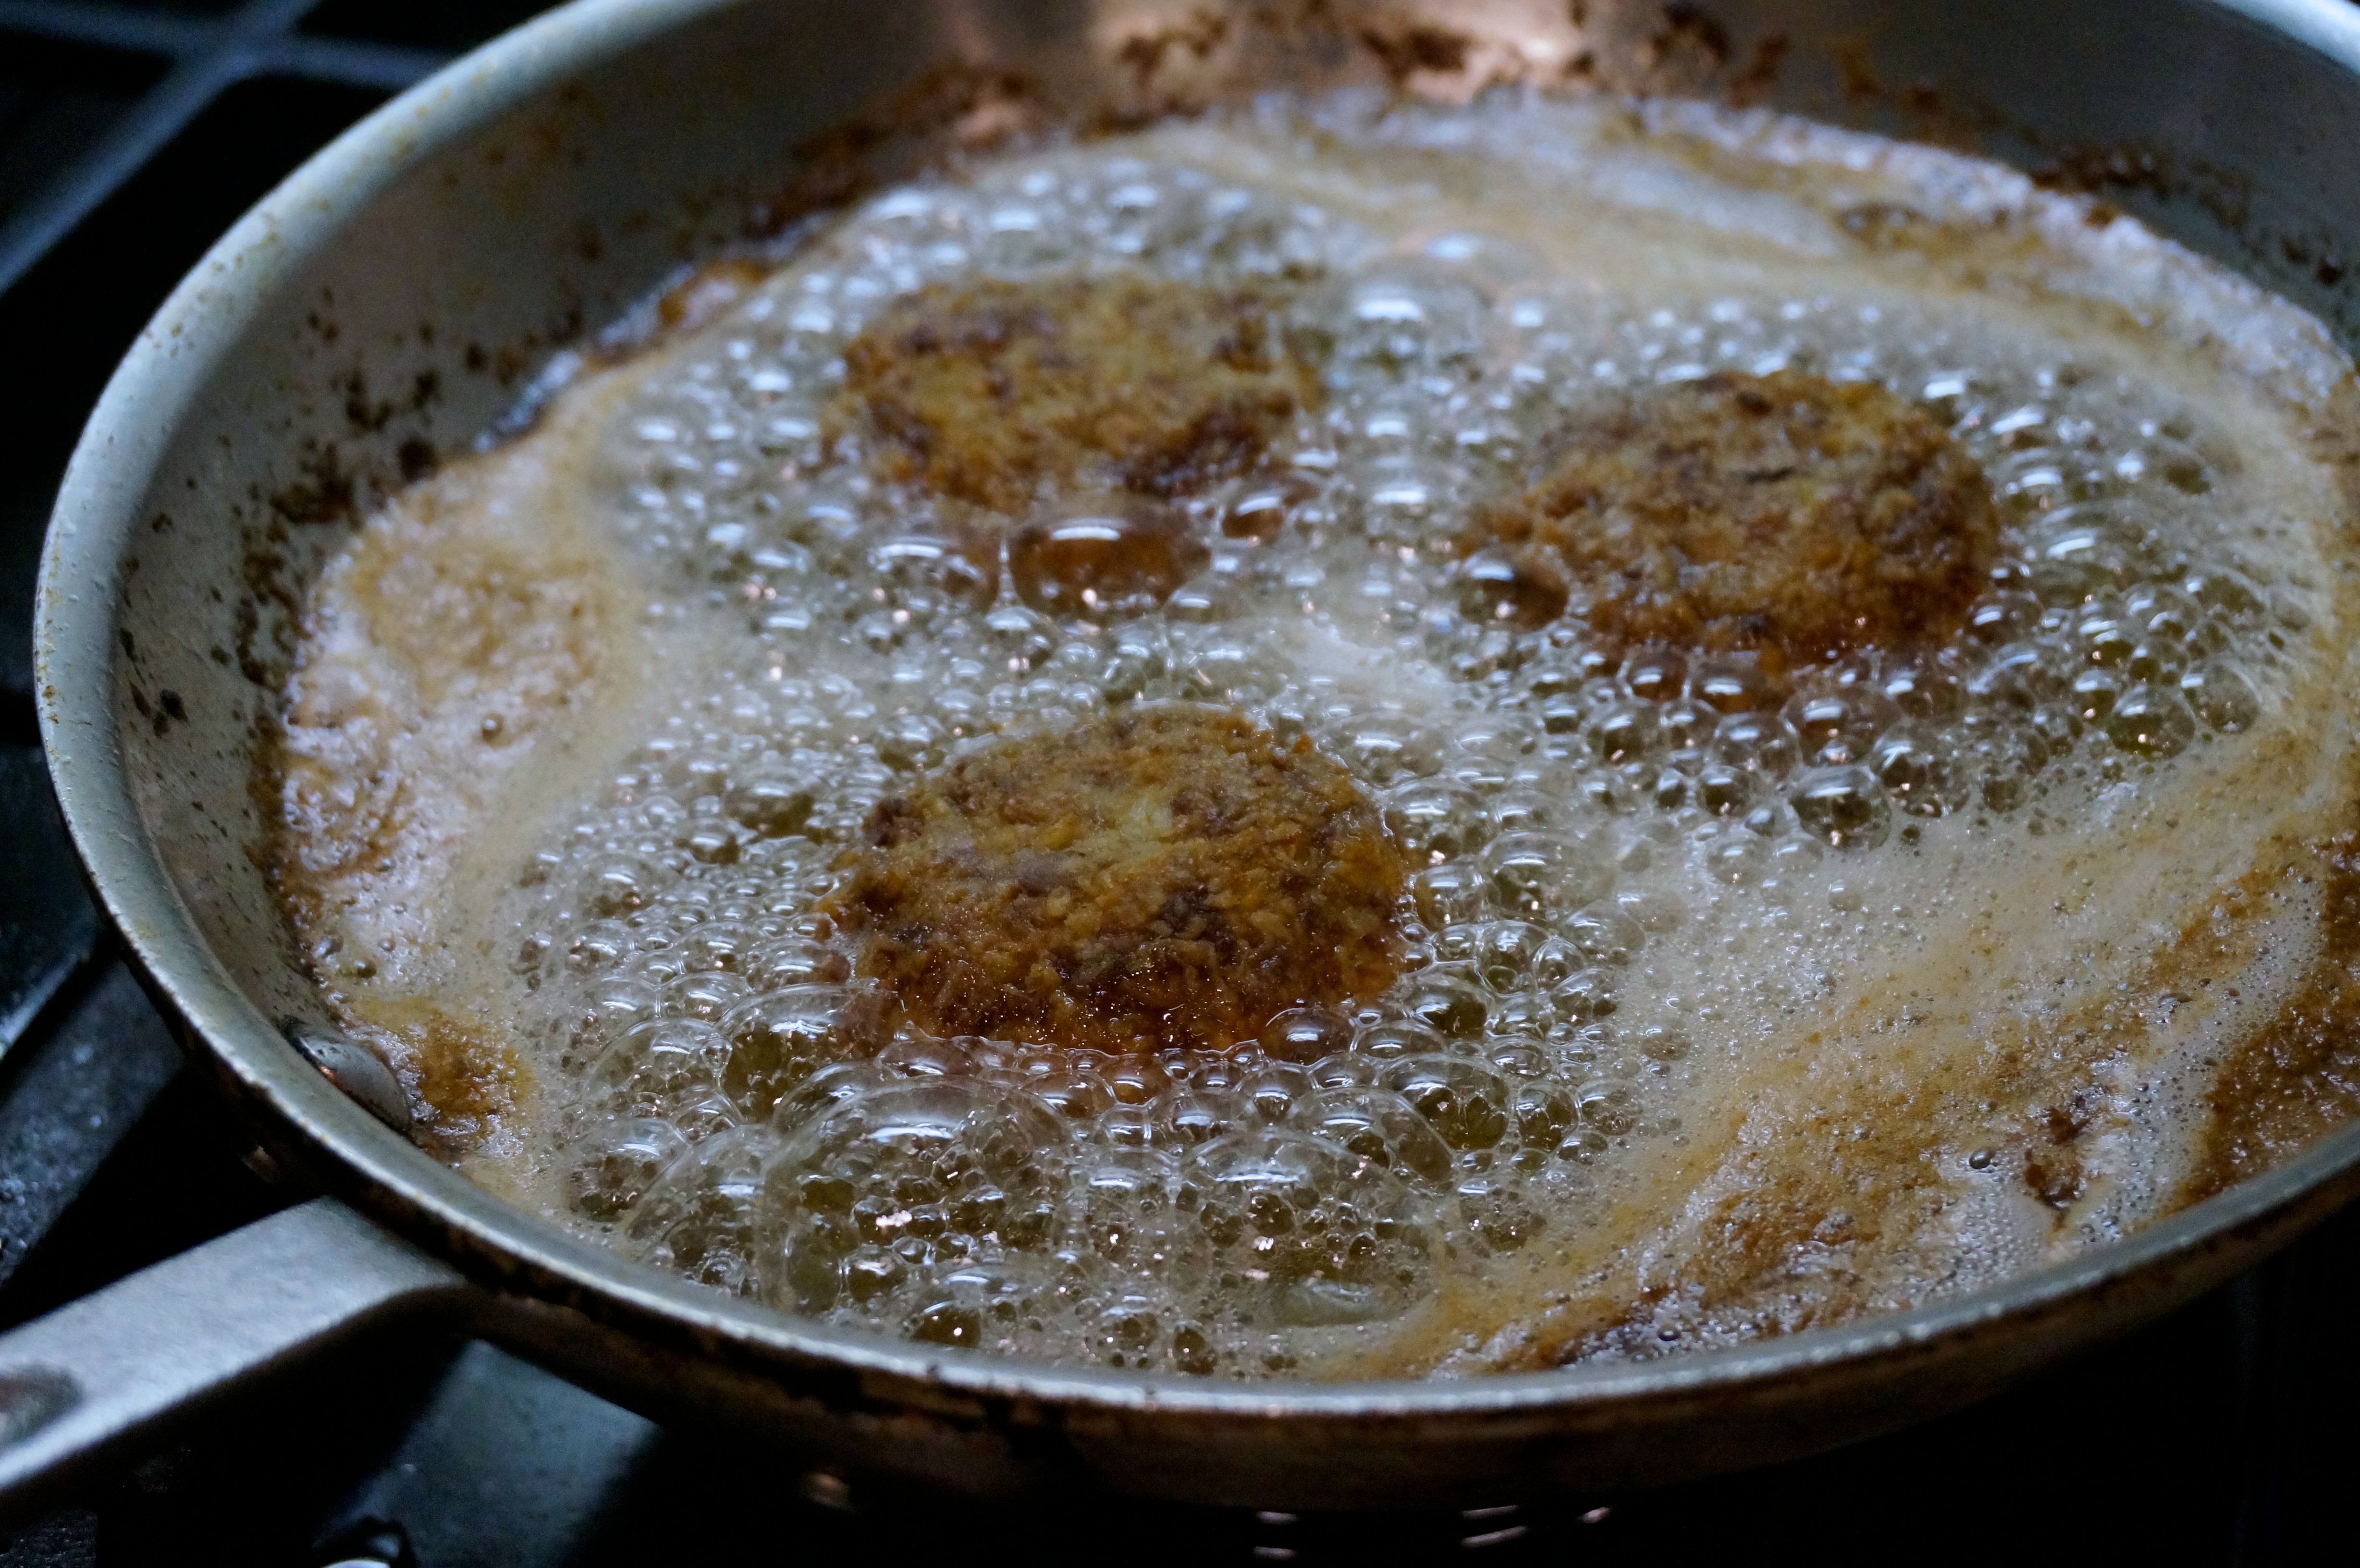
Put enough oil in deep sauté pan to come to about ½” deep. Heat oil over medium high heat to about 350° F. Fry patties in batches for about 3 minutes on each side, adjusting heat to maintain oil temperature, until cooked through and both sides are golden brown. Do not crowd patties in the pan.

Serve immediately with lime wedges to squeeze over.

Baked Pasta with Broccoli Rabe and Sausage

DSC02400

Substitutions don’t always work.

Years ago, when I was just learning French, I was in Paris and my carpal tunnel syndrome was acting up. I needed to get a wrist splint to help alleviate the pain. An online search for the French word for “splint” was fruitless, so I decided I would just describe it. I walked into the first pharmacy and approached the pharmacist. In my halting French, I started to speak.

“Hello. I need something – I don’t know the word in French – something to fix my wrist in place.”

The pharmacist looked at me funny. I continued, undaunted.

“You see, my wrist is inflamed and it hurts, so I need something to restrict it.”

I could see a smile starting to take place on the pharmacist’s lips. Actually, no, that wasn’t a smile. It was a suppressed laugh!

“There is an inflammation in my wrist,” I went on, “and I need this thing you use to stop it from moving.”

I could tell that the pharmacist could barely contain herself. I started to mimic a splint, encircling my wrist with the other hand, showing her how it works.

“Oh! No monsieur,” she immediately replied, looking relieved. “We don’t have any. I’m sorry.”

DSC02403

I walked out of the pharmacy confused. Why was she so close to breaking out in laughter? Was my French so bad? On a hunch, I pulled out my phone and did a couple of searchers on my online French-English dictionary. I immediately started laughing out loud.

The French word for wrist is poignet. Unfortunately, in my explanation to the pharmacist, I had substituted it with the word poitrine, a word that means bosom or breasts. I had just asked her for something to fix my breasts in place because they were inflamed.

Like I said, substitutions don’t always work.

The recipe below, however, can take just about any substitution. No broccoli rabe? Use regular broccoli (like I did here), or brussel sprouts, or squash, or any other vegetable you have. Just adjust its cooking time, or use it precooked in the case of squash. No mozzarella? Use any left over cheese in your refrigerator. The sausage used can be made from just about anything, beef, pork, chicken, or replaced with mushrooms if you’re a vegetarian.

DSC02420

Baked Pasta with Broccoli Rabe and Sausage – Slightly adapted from Smitten Kitchen

Ingredients:

1 pound chunky pasta of your choice (such as penne or orecchiette)
1 bundle broccoli rabe, stems and leaves cut into 1-inch segments (or about 3-4 cups of chopped up broccoli)
1 pound Italian sausage (or your favorite uncooked sausage), casings removed
2/3 cup grated parmesan or pecorino romano cheese
6 ounces mozzarella, cut into small cubes
2 cups whole milk
4 tablespoons unsalted butter
1/4 cup all-purpose flour
1/2 teaspoon table salt
Freshly ground black pepper
2 cloves garlic, minced
Few gratings fresh nutmeg

Directions:

Bring a large pot of well-salted water to a boil. Add pasta and five minutes before its cooking time is up, add the broccoli rabe (for regular broccoli, add it 3 minutes before it’s done). Drain the broccoli rabe and pasta together and place in a large bowl.

Meanwhile, heat 1 to 2 tablespoons olive oil in a large, wide saucepan (you will use this for the bechamel in a few minutes; you could also use your pasta pot, once it is drained) over medium heat. When hot, add the sausage, breaking it up with a wooden spoon until it starts to brown, about five minutes. Remove with slotted spoon or spatula, leaving any fat behind. Eyeball the drippings and use one tablespoon less butter next if it looks like there’s more than a tablespoon there. Any less, don’t worry about adjusting the butter.

Heat oven to 400º F.

Melt your butter in same saucepan that you cooked the sausage in over medium heat. Once melted, add your flour and stir it into the butter until smooth. Cook the mixture together for a minute, stirring constantly. Pour in a small drizzle of your milk, whisking constantly into the butter-flour mixture until smooth. Continue to drizzle a very small amount at a time, whisking constantly. Once you’ve added a little over half of your milk, you’ll find that you have more of a thick sauce or batter, and you can start adding the milk in larger splashes, being sure to keep mixing. Once all of the milk is added, add the salt, garlic, nutmeg, and few grinds of black pepper, and bring the mixture to a lower simmer and cook it, stirring frequently, for 10 minutes. Taste and adjust seasonings if needed.

Add the sausage and bechamel to the bowl with the pasta and broccoli rabe. Stir in mozzarella and half of grated parmesan or pecorino until combined. Pour into a lasagna pan, deep 9×13-inch baking dish or 3-quart casserole dish and coat with remaining parmesan or pecorino. Bake for 25 to 30 minutes, until the edges and craggy points are nicely bronzed.

Lamb Stir-Fry with Pomegranate and Yogurt

DSC02360

I wasn’t especially close to my grandparents. My maternal grandfather died when I was really young and my dad’s parents lived far away so we saw them rarely. The only grandparent I saw fairly often was my maternal grandmother. For as long as I can remember, she lived in a little house behind my aunt’s house. She was a refugee, having lost her home in the war of 74, and a widow. We saw her a few times a year when we would go and visit.

DSC02346

My grandmother looked like a typical old Greek woman from the movies. Always dressed in black (perpetually in mourning for her husband, as old customs required), her hair always covered in a large black headscarf. It was a source of great mystery to me, her hair, when I was little. The couple of times I caught a glimpse of her without the headscarf, I could see a torrent of white hair cascading down her black-clad back. It seemed magical somehow.

DSC02352

I have few memories of the times I spent with her. I remember that my sister and I, influenced by American movies and cartoons we watched on TV, always wanted her to tell us stories and fairytales. When she would tell us that she didn’t know any stories (she was a farmer’s wife who raised nine children in hard, village conditions) we would explain to her that she must, she was a grandmother after all, and all grandmothers know all kinds of fables. Inevitably, she would give in and tell us the same one or two stories she knew, none of which satisfied our hunger for fantastical beings. One of those stories involved a cockroach who convinced a cow to let it ride on its back to cross a muddy field, but then somehow fell in the deep impression that the cow’s hoof left in the mud, at which point the cow, unaware of the cockroach’s fall, started to pee, filling the impression with pee and drowning the unfortunate cockroach to death.

Yeah, she wasn’t kidding when she said that she really didn’t know any fairytales.

DSC02354

One fond memory I have with her involves pomegranates. There was a small pomegranate tree growing in her front yard and when the fruit was ripe, she would pick one and painstakingly peel and deseed it for us. My sister and I loved receiving our small bowls filled with the sweet-tart fuchsia-colored seeds, eating them with a spoon, feeling their juices burst in our mouths, always wary of eating too many lest they make us constipated as the adults always warned us.

DSC02359

Pomegranates always make me think of my grandmother. I didn’t often eat them, however, because I hated the process of picking the tiny seeds from their intricate web of pith. It was only recently that I discovered a much easier way to deseed a pomegranate by whacking it with a wooden spoon. So, when I saw this recipe for a lamb stir-fry with pomegranate and yogurt in Bon Appétit, I bought a pomegranate and tried it. It turned out to be fantastic. The lamb is intensely fragrant with cumin and coriander, while the yogurt and pomegranate add a buoyant and sweet coolness to the dish.

DSC02363


Lamb Stir-Fry with Pomegranate and Yogurt – Adapted from Bon Appétit

Serves 2

Ingredients:

1 teaspoon ground cumin
½ teaspoon ground coriander
1 pound boneless leg of lamb, thinly sliced against the grain
1 teaspoon paprika
3 cloves garlic finely chopped
1 tablespoon red wine vinegar
½ teaspoon salt
½ teaspoon freshly ground black pepper
1½ tablespoons olive oil
½ cup plain Greek yogurt
1 tablespoon water
zest from half a lemon, finely chopped
1 medium red onion, cut into ½” wedges
½ cup water
¼ cup pomegranate seeds
2 tablespoons chopped pistachios
Fresh oregano and mint leaves (for serving)

Directions:

In a medium bowl, mix together cumin, coriander, paprika, garlic, vinegar, salt, pepper, and 1½ Tbsp. oil in a large bowl. Add lamb and toss to coat. Cover and let it marinade in the fridge for at least two hours, or up to 24 hours.

Whisk yogurt, lemon zest, and 1 Tbsp. water in a small bowl; season with salt and pepper. Set aside.

Heat 2 Tbsp. olive oil in a large skillet over medium-high heat. Working in batches, cook lamb (do not overcrowd in pan), tossing occasionally, until browned, about 3 minutes per batch; transfer to a plate with a slotted spoon.

Add onion to skillet and cook, stirring often, until beginning to brown and soften, about 4 minutes. Add ½ cup water; season with salt and pepper and cook, stirring occasionally, until onion is tender and water is almost completely evaporated, about 4 minutes. Return lamb to skillet and toss to combine.

Serve lamb topped with yogurt, pomegranate seeds, pistachios, and herbs.

The Perfect Roast Chicken

DSC02221

I am not a perfectionist. I never have been. Yes, it’s true that I can be a control freak, but that’s because I want things done in a certain way, not necessarily to be perfect. If you’ve ever worked with me in the kitchen, you know what I mean (and you have sworn never to set foot in a kitchen where I am cooking again). I’ve always believed that the amount of resources necessary to achieve that last sliver of perfection are proportionately much larger than the potential benefits gained.

DSC02177

So, in my work and my cooking, I’ve always believed that really good is as good as perfect. A few rough edges here and there add character. Especially when it comes to food. I’d rather spend my energy trying new recipes or heck, enjoying the food I made, than chasing the perfect crust or the quintessential balance of flavors.

But once in a while, perfection will just land in your lap, like a gift from the heavens. That’s the case with this recipe for the perfect roast chicken. It comes from the people who actually do look for perfection, experimenting with recipes again and again until they get them, well, perfect. I’m talking about the team behind Cooks Illustrated and America’s Test Kitchen. I’ll admit, sometimes I think they fall short of their goals. But in this case, they reached the summit of chicken-y perfection.

DSC02206

This isn’t a tough recipe, but it does require some planning. The chicken really needs to sit in the fridge for at least 12 hours, even better if it’s a full 24 hours. So, the night before you will be roasting it, you’ll need to prep it. It’s not tough. It’s a little icky at first (it involves separating the skin from the meat with your fingers) but after the first time, you’ll get used to it.

But here is the best part. The chicken comes out perfect. Every. Single. Time. The skin is unbelievably crisp and crackly, without even a hint of fat underneath it. The meat is incredibly juicy. And the potatoes and carrots that have been roasting in chicken fat almost outshine the chicken itself.

I’m not a perfectionist. But thank god other people are. Without them, we wouldn’t have this recipe for the perfect roast chicken.

DSC02228

The Perfect Roast Chicken – Slightly adapted from America’s Test Kitchen

Ingredients:

1 chicken (3.5-4 lbs)
3/4 tablespoon table salt
1 teaspoon baking powder
1/2 teaspoon black pepper
3 medium potatoes
2 carrots
1/2 teaspoon table salt
1 tablespoon canola oil
1 tablespoon fresh thyme leaves

Directions:

Pat dry the chicken, inside and out. Using a sharp paring knife, cut four slits along the back of the bird.

DSC02180

Using your fingers, carefully loosen the skin from the breasts, thighs, and legs. Start by inserting your fingertips under the skin from the large cavity side. Keep moving your fingers side to side moving down the breast towards the neck. Move all the way to the leg and thighs and loosen as much of the skin as you can, being careful not to tear it.

DSC02182

Using the tip of the sharp paring knife, poke the skin of the chicken about 20 times. Do that all around, including the back, the legs and the thighs.

DSC02191

Tuck the wing tips under the bird.

DSC02195

In a small bowl, whisk together the salt, baking powder, and black pepper. Rub the mixture all over the chicken (over the skin; don’t rub the mixture under the skin). Make sure you rub it on the entire skin, including, the back, wings, legs, and thighs.

DSC02197

Place on a rack over a roasting pan and set in the fridge, uncovered for at least 12 hours, preferably 24 hours.

DSC02204

The next day, peel potatoes and carrots and slice in 1/4 inch slices. Mix with oil, salt and thyme.

Preheat the oven to 450º F. Put heavy duty foil in bottom of roasting pan. Spread potatoes and carrots evenly. Make sure you have enough potato and carrot slices to cover the bottom of the roasting pan.

When the oven is hot, flip the chicken breast-side down and roast on a rack on top of the roasting pan with the potatoes and carrots for 25 minutes.

DSC02217

Flip the chicken breast-side up. Roast for an additional 20 minutes.

Raise the heat to 500º F. Continue roasting another 10-15 minutes, until a thermometer inserted in the thickest part of the thigh registers 160º F.

Remove from the oven and let chicken rest for 5-10 minutes before carving. Serve alongside roasted potatoes and carrots.

Preserved Honey Figs

DSC02257

Last week, two of our dearest friends sent us an email that they were leaving New York city for a new job in another state. Over the years, this has happened several times with an increasing frequency as we get older. That’s the problem with living in New York. We come here, drawn by its constant change, its promise for ever-shifting opportunities, its inability to stop and stay still. But it’s exactly those qualities that guarantee that whatever group of friends you become a part of, whatever tribe you build, they will be transient.

New Yorkers, or at least those who like living here, leave New York mostly for two reasons. Some of them get a job somewhere else, forcing them to move. Others start families and the absurd costs of child care and education in New York city, where day care could easily cost $20,000-$30,000 a year (that’s day care, not college), drives them out of the city, somewhere more affordable.

So, we are left behind, growing older in the city we love so much, with fewer and older friends still nearby, and an increasing number of them far away, staying in touch via email or the occasional phone call, or if we’re lucky, a visit to their old stomping grounds.

I’ve always accepted the fluid nature of my circle of friends. Though they come and go in and out of our lives, the close, intense friendships we once shared remain behind, like these figs preserved in syrup, growing sweeter with time, but never completely losing the taste it had when it was still fresh.


Roasted Broccoli with Anchovies and Black Garlic

DSC02299

I guess I know that a once obscure food item has gone mainstream when I can find it at my corner grocery store, right in the produce aisle. I’m talking about black garlic, a onetime rare delicacy that I am hoping will continue its trend to easy access (In addition to our corner store, I also found it at Trader Joe’s and I’m sure it’s available at Whole Foods). Black garlic is regular garlic that has been aged in a hot environment (often referred to as “fermentation,” though the term is under dispute) over several weeks until it turns coal black. Each clove is soft and slightly sticky, almost jelly-like, with a taste that’s sweet with tones of tarragon and molasses, but still clinging to its mellow garlic flavor. It’s delicious, versatile (it stays good for a long time), and incredibly addictive.

DSC02303

A few weeks ago I was putting together dinner for us and I decided to come up with a new dressing for roasted broccoli, instead of the usual lemon zest, parmesan, and olive oil that I use. I had some leftover anchovies packed in oil and a head of half-used black garlic and I thought, salty and sweet, all I need is some fat and some acid to make the perfect dressing. So, I experimented a little and ended up with this recipe. It makes for an extremely satisfying side dish, one that would probably overwhelm any main dish you pair it with, so choose something simple, like grilled chicken or tuna steaks (as we did in the photo below).

DSC02320

Roasted Broccoli with Anchovies and Black Garlic

Makes 2-3 servings

Ingredients:

12 oz (350 g) of fresh broccoli florets (from three broccoli stems)
1½ tablespoon olive oil
freshly ground black pepper
4-5 anchovy fillets packed in olive oil, drained and chopped into small pieces
2 tablespoons olive oil
1 tablespoon freshly squeezed lemon juice
4-5 cloves black garlic, sliced into thin slices
½ tablespoon balsamic vinegar

Directions:

Preheat oven at 425º F. In a large bowl, toss broccoli, 1½ tablespoon olive oil, and freshly ground pepper (do not add salt to the broccoli). Spread on a baking sheet and roast for about 20 minutes, tossing once halfway through, until the broccoli starts to turn dark brown at the edges.

Meanwhile, make the dressing. In a small bowl combine the rest of the ingredients and whisk with a fork until combined. As soon as the broccoli is finished roasting, place it in a heatproof bowl, add the dressing and toss well. Serve immediately.

Gluten-free, Dairy-free Chocolate Orange Cake

DSC02255

This is what my cookbooks look like. Whenever I buy a new one I go through it and mark any recipe that looks like something I’d want to try. I like to use these nifty Post-it bookmarks that are clear where they attach to the page so that they don’t cover anything. As you can see from the photo (and this is only a small sample of the cookbooks I have), I end up with a lot of recipes that I want to try out. And this doesn’t include recipes from magazines and blogs, which I collect using the fantastic Paprika recipe manager app.

DSC02277

To make a long story short, I really shouldn’t be adding to my collection of recipes to try. But the other day I was reading a newspaper from back home online, when at the bottom of the page I noticed the title of a recipe: Incredibly Light Chocolate Orange Cake (without Flour).  I was intrigued. Chocolate and orange are one of my favorite flavor combinations (here’s looking at you, irresistible orangettes!). A quick look at the ingredient list revealed ground almonds as the substitute for flour and boiled, whole oranges as the substitute for butter. I was beyond intrigued. I had to try it.

DSC02240

The result was actually very interesting. A moist cake with a distinct chocolate taste but redolent with aromas of orange. I say aromas because the presence of orange in this cake goes beyond what you would get if you used only orange juice. Since it incorporates the entire fruit, you get the sweet and tangy flavor of the orange segments, the mellow bitterness of the pith, and the sharp taste of the orange oil from the rind. All together, it creates a not-too-sweet cake that begs for another bite, if only to decipher the complex combination of tastes hitting your tongue at the same time.

DSC02262

I know this post seems to come a day late, given that yesterday was Valentine’s day. But Steve and I don’t really do much on Valentine’s day, a day we feel ambivalent about. Back in my single days, I used to hold a dinner party for all my single friends, making beef bourguignon and a chocolate torte, all of us toasting to our singledom, in defiance of this silly holiday that taunted us.

Now that I think about it, given the bitter and sweet flavor combinations of this cake, it would perhaps make a perfect Valentine’s day cake, for both those in celebration of the day and those who don’t like it.

DSC02288

Gluten-free, Dairy-free Chocolate Orange Cake – Translated and slightly adapted from Phileleftheros

Ingredients:

2 small oranges, preferably organic/unsprayed (about 12 oz / 345 g)
2 tablespoons orange liqueur, like Grand Marnier
1 ½ teaspoon baking powder
½ teaspoon baking soda
½ cup unsweetened cocoa (2 oz / 55 g)
1 ¼ cups sugar (7 ¾ oz / 250 g)
2 cups ground almonds (7 oz / 200 g)
pinch of salt
6 large eggs

Directions:

Preheat the oven at 350º F (180º C). Lightly grease the bottom and sides of a springform 8″ (20 cm) cake pan. Cover the bottom of the pan with parchment paper.

Wash the oranges and place them in a medium-sized pot. Cover them with cold water and heat over medium-high heat until they come to a boil. Reduce the heat to low, cover, and let simmer for about 1 1/2 to 2 hours. Drain oranges and let cool. (Oranges can be boiled up to two days in advance and kept in the fridge)

Roughly chop the oranges, remove any pits, and place in the bowl of a food processor. Add liqueur and process until no pieces of orange are left. The mixture should be a relatively smooth pulp with small pieces of rind (it doesn’t have to become completely smooth). Add the baking powder, baking soda, cocoa, sugar, almonds, and a pinch of salt. Process until combined.

Add eggs one at a time, processing until each egg is combined. Pour mixture in prepared pan and bake for about 60 minutes, until a cake tester inserted in the middle comes out clean. Immediately run a sharp knife around the edge of the pan and place the pan on a cooling rack. Let cake cool completely in the pan.