This week Steve and I went to the New York City Marriage Bureau to get our marriage license. The city has created a new space in the City Clerk’s building for this purpose, which includes two chapels where couples can get married on the spot. The new marriage bureau is beautiful, with gold crown moulding, marble walls, and gilded light fixtures. It is worlds away from the old room they used as the marriage bureau, where six years ago we went to register as domestic partners .

On that day back in 2007, we were both excited when we arrived and we approached the bored woman behind the information desk. “What are you here for?” she barked at us without looking up. “We’d like to register as domestic partners!” we both exclaimed, smiles from ear to ear. It had been about 2 years since we’d met and this was a big deal. Same-sex marriage was not yet legal in New York state, and in any case, we weren’t at that point yet. The woman thrust a form at us, told us to to fill it out and go to window 2.

We filled out the form right there, in a windowless room, surrounded by walls of peeling paint, harsh fluorescent lighting, and old half-broken chairs. At window 2, a young man in his 20s, wearing a baseball hat backwards, let us through the motions of answering some questions and signing the required documents. When we were finished, there was no congratulations or any other acknowledgement. We needed to get up and let him move on to the next couple.

Despite the decidedly unromantic circumstances and environment, we were elated. We stepped out into the sunny New York day and we walked half way up the Brooklyn Bridge to celebrate. We took a selfie with one of our cellphones, that we never properly saved and promptly lost.
Things were a little different this time. The beautiful room of the new marriage bureau felt celebratory. People who worked there were polite and attentive. There were many couples waiting their turn, sitting on the green couches that the city provided. Others took pictures in front of the large wall-sized photograph of City Hall. Everyone looked happy and excited. About half the couples we saw were same-sex. And we were there to get a marriage license, for our wedding, which would be legal and real in every sense of the word.

So, with weddings on my mind, today I give you a recipe for an ice cream that screams wedding. It’s inspired by ispahan, an amazing dessert created by Pierre Hermé in Paris that includes rosewater cream, raspberries, and lychees, sandwiched between two rose macarons. The first time I had it a Ladurée in Paris I was amazed. The combination of the floral rose with the slightly tart raspberries and sweet lychee, offset by the crunch of the macarons, was ethereal.

I decided that I wanted to recreate the experience in an ice cream. The result is the recipe you see here. It’s a little longer than usual because you have to make the two fruit syrups first, but they are easy to make. You can eat the ice cream on it’s own, but to truly get the ispahan experience, I would recommend serving it in meringue nests for that added crunch.
Ispahan Ice Cream (Rose, Raspberry, and Lychee)
For raspberry syrup:
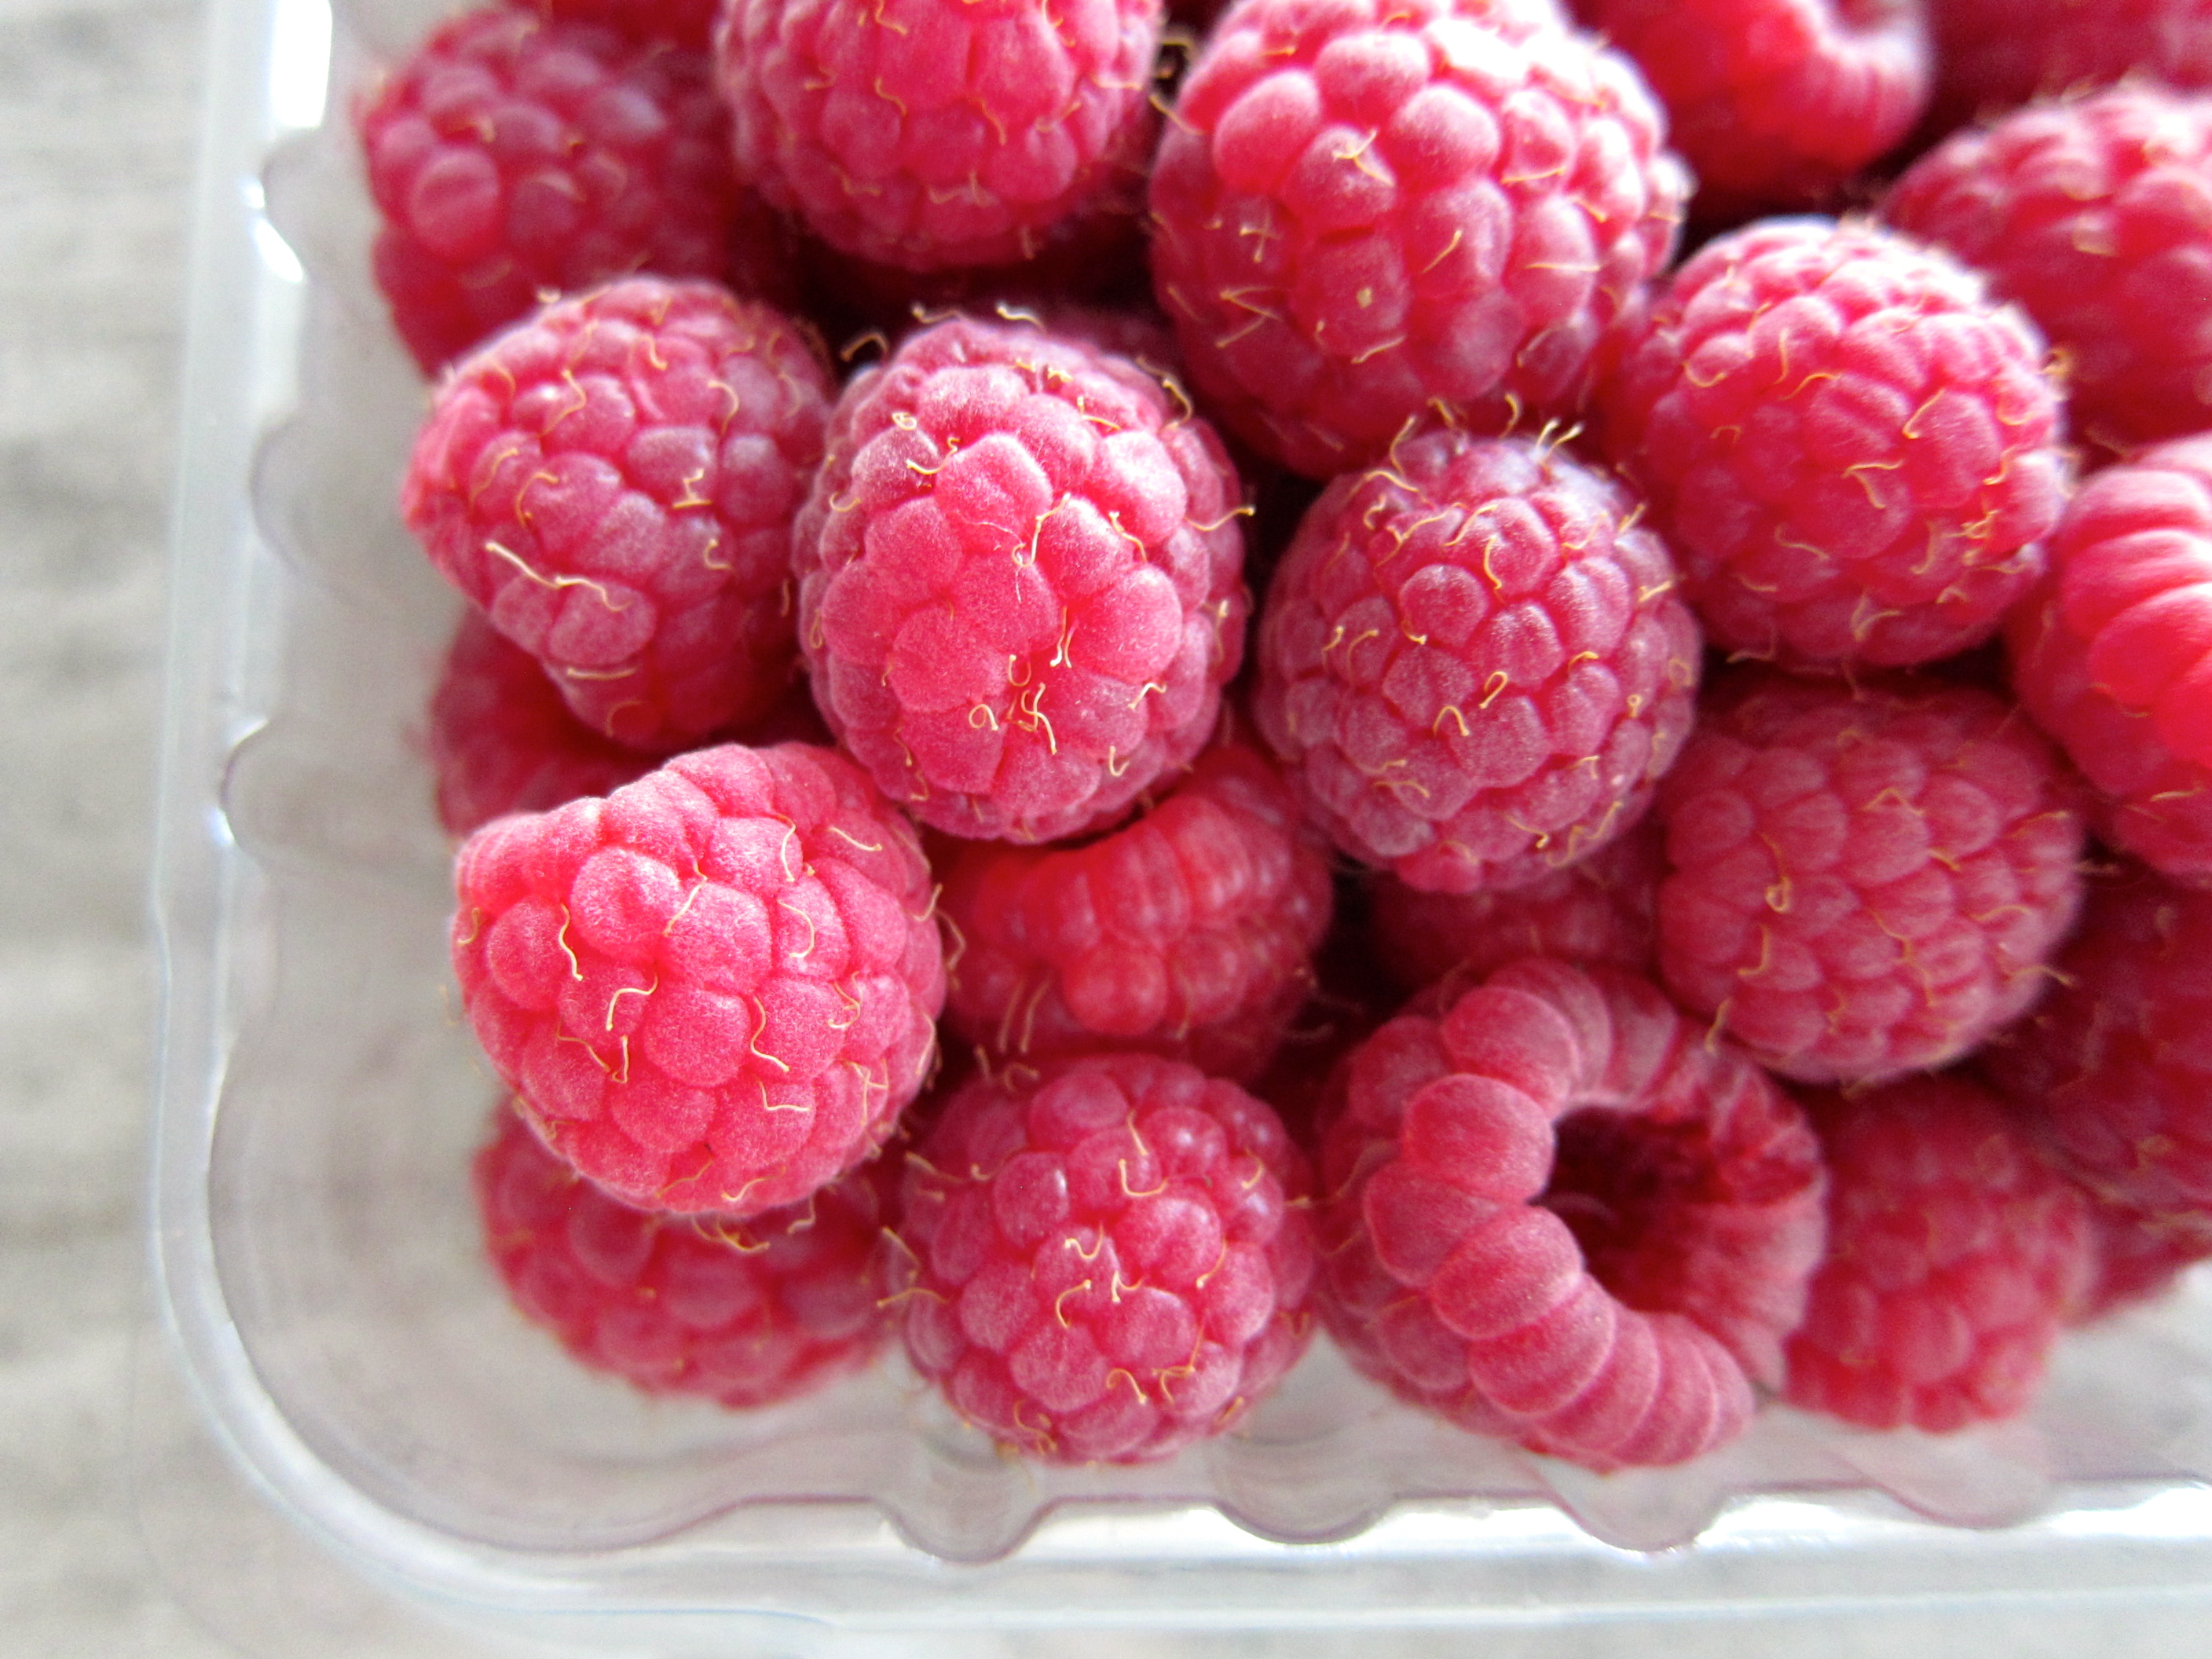
1 cup raspberries
1/2 cup sugar
1 teaspoon kirsch
For lychee syrup:
1 cup peeled, pitted lychees (from about 14-16 lychee nuts), chopped into to small pieces
1/2 cup sugar
1 teaspoon kirsch
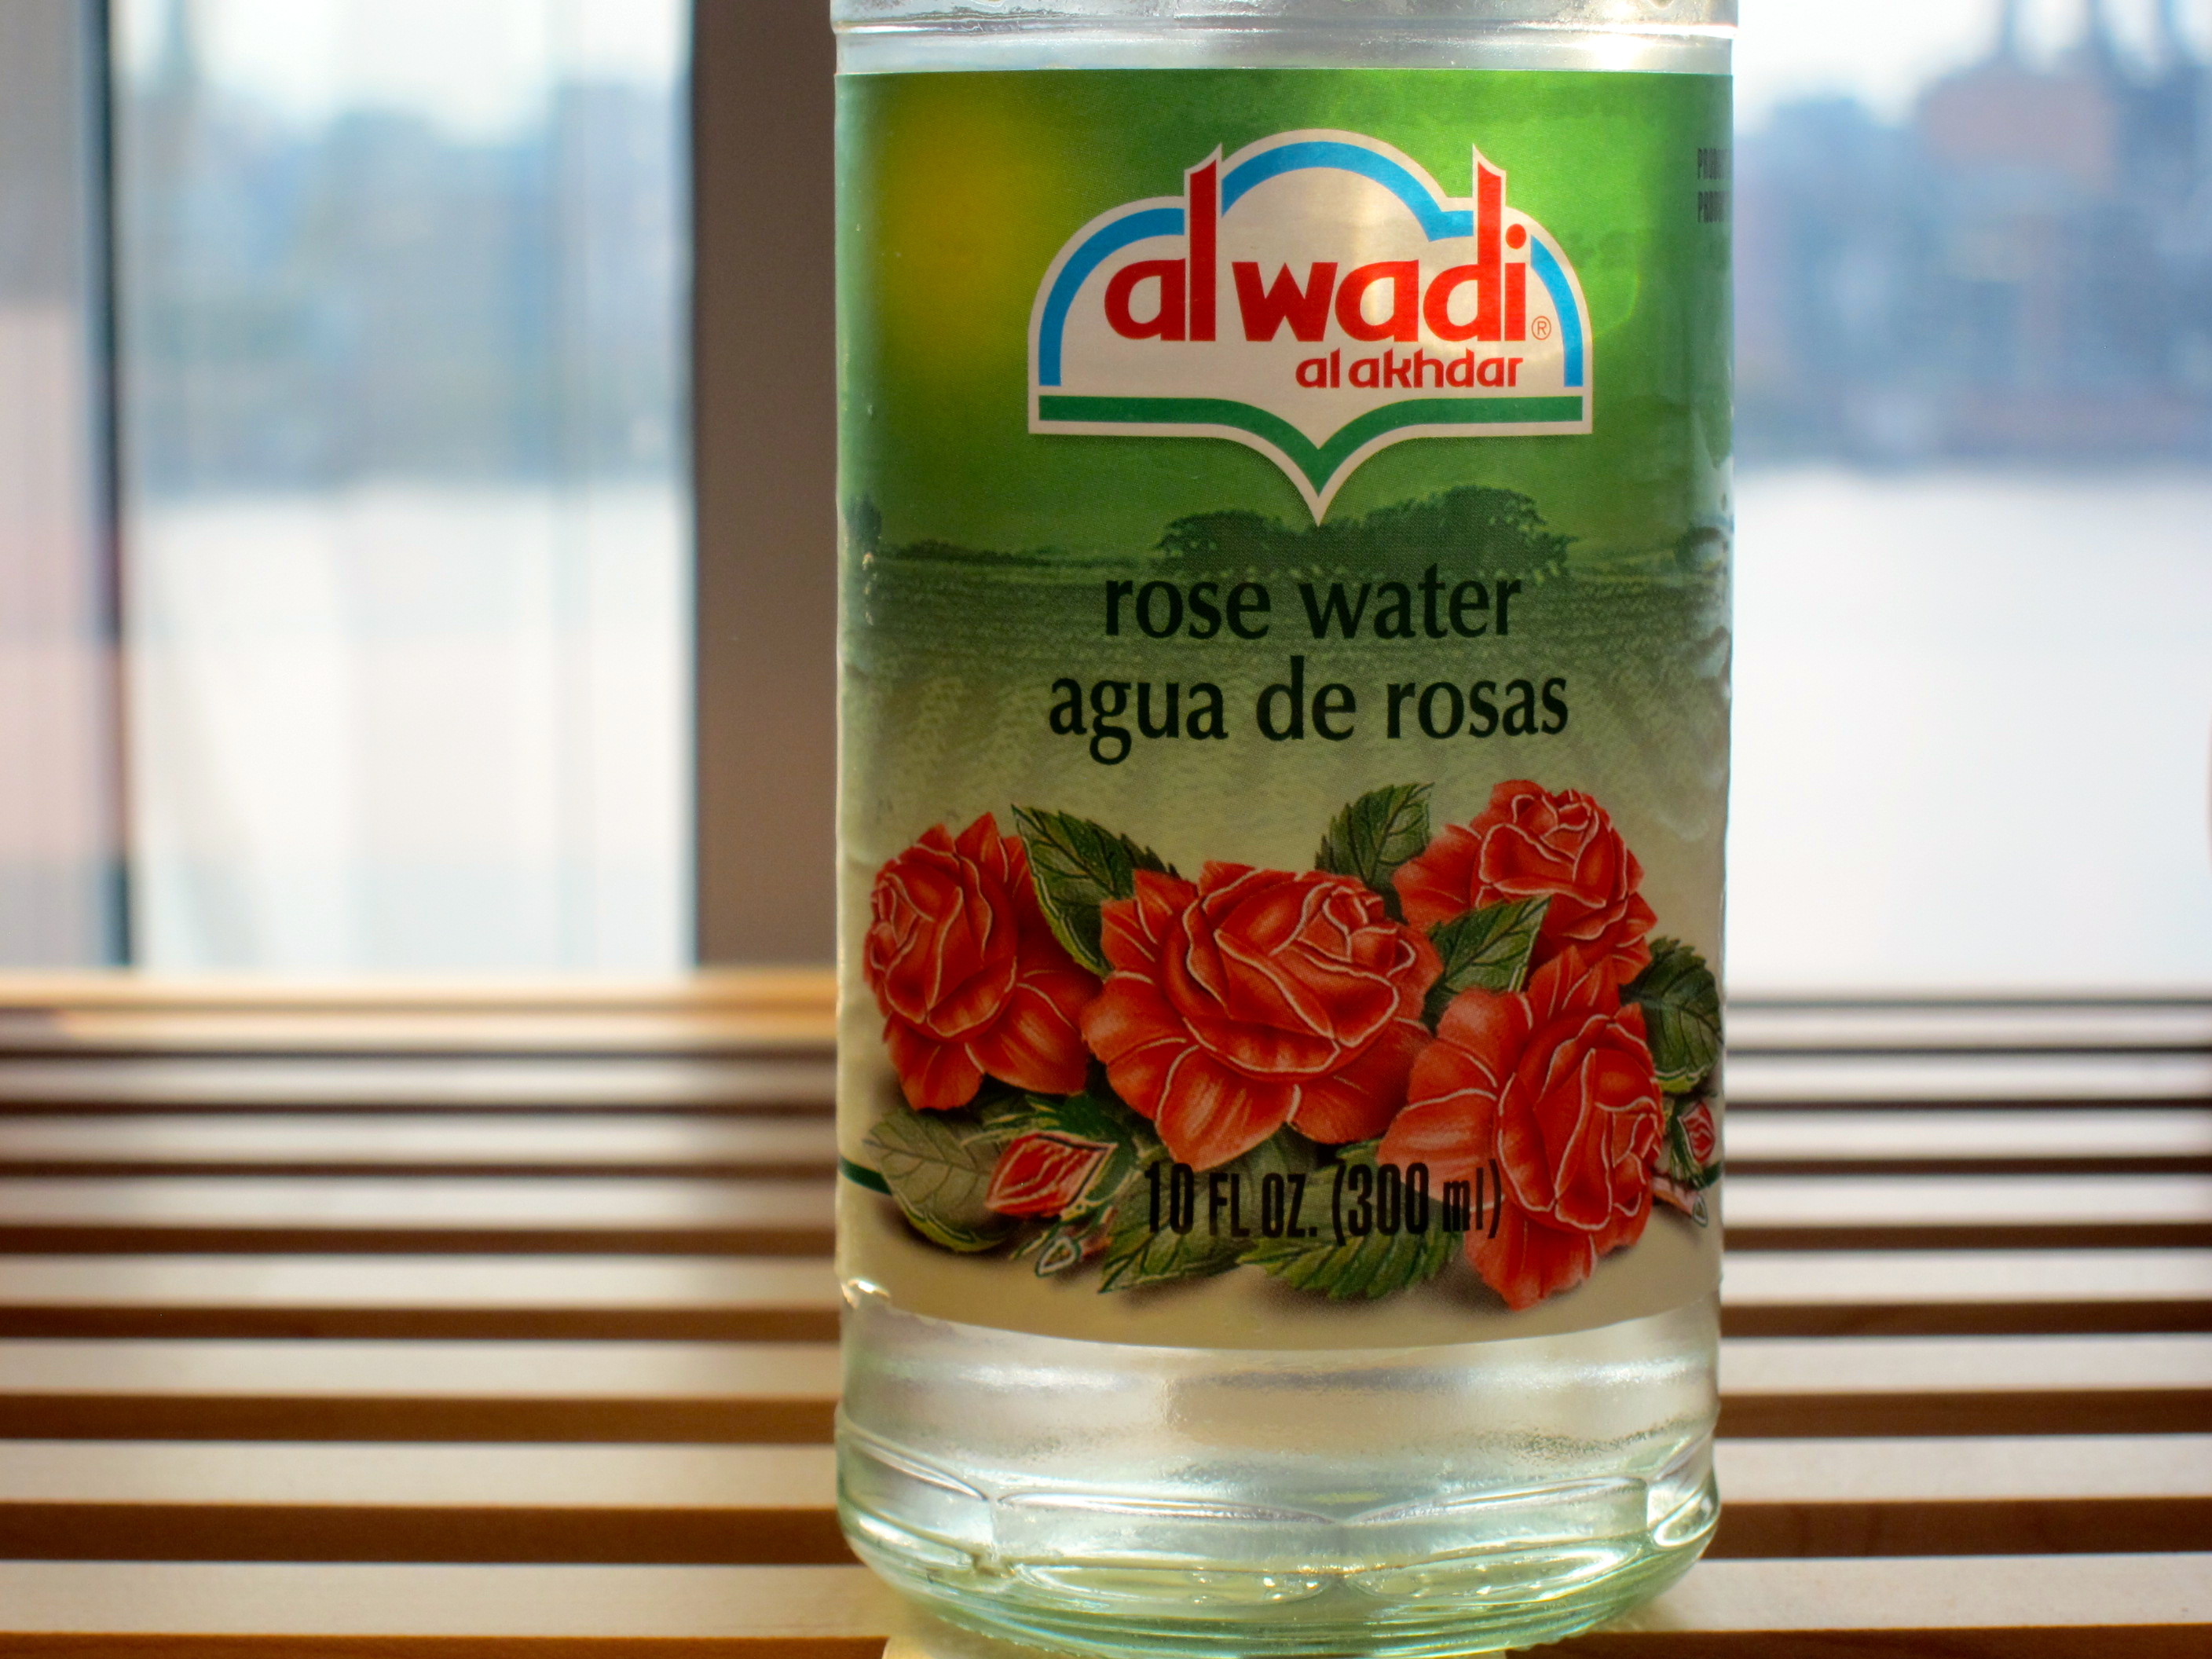
For rose ice cream:
1 1/2 cups whole milk
3/4 cup sugar
1 1/2 cups heavy cream
3 tablespoons cornstarch
3 tablespoons rose water
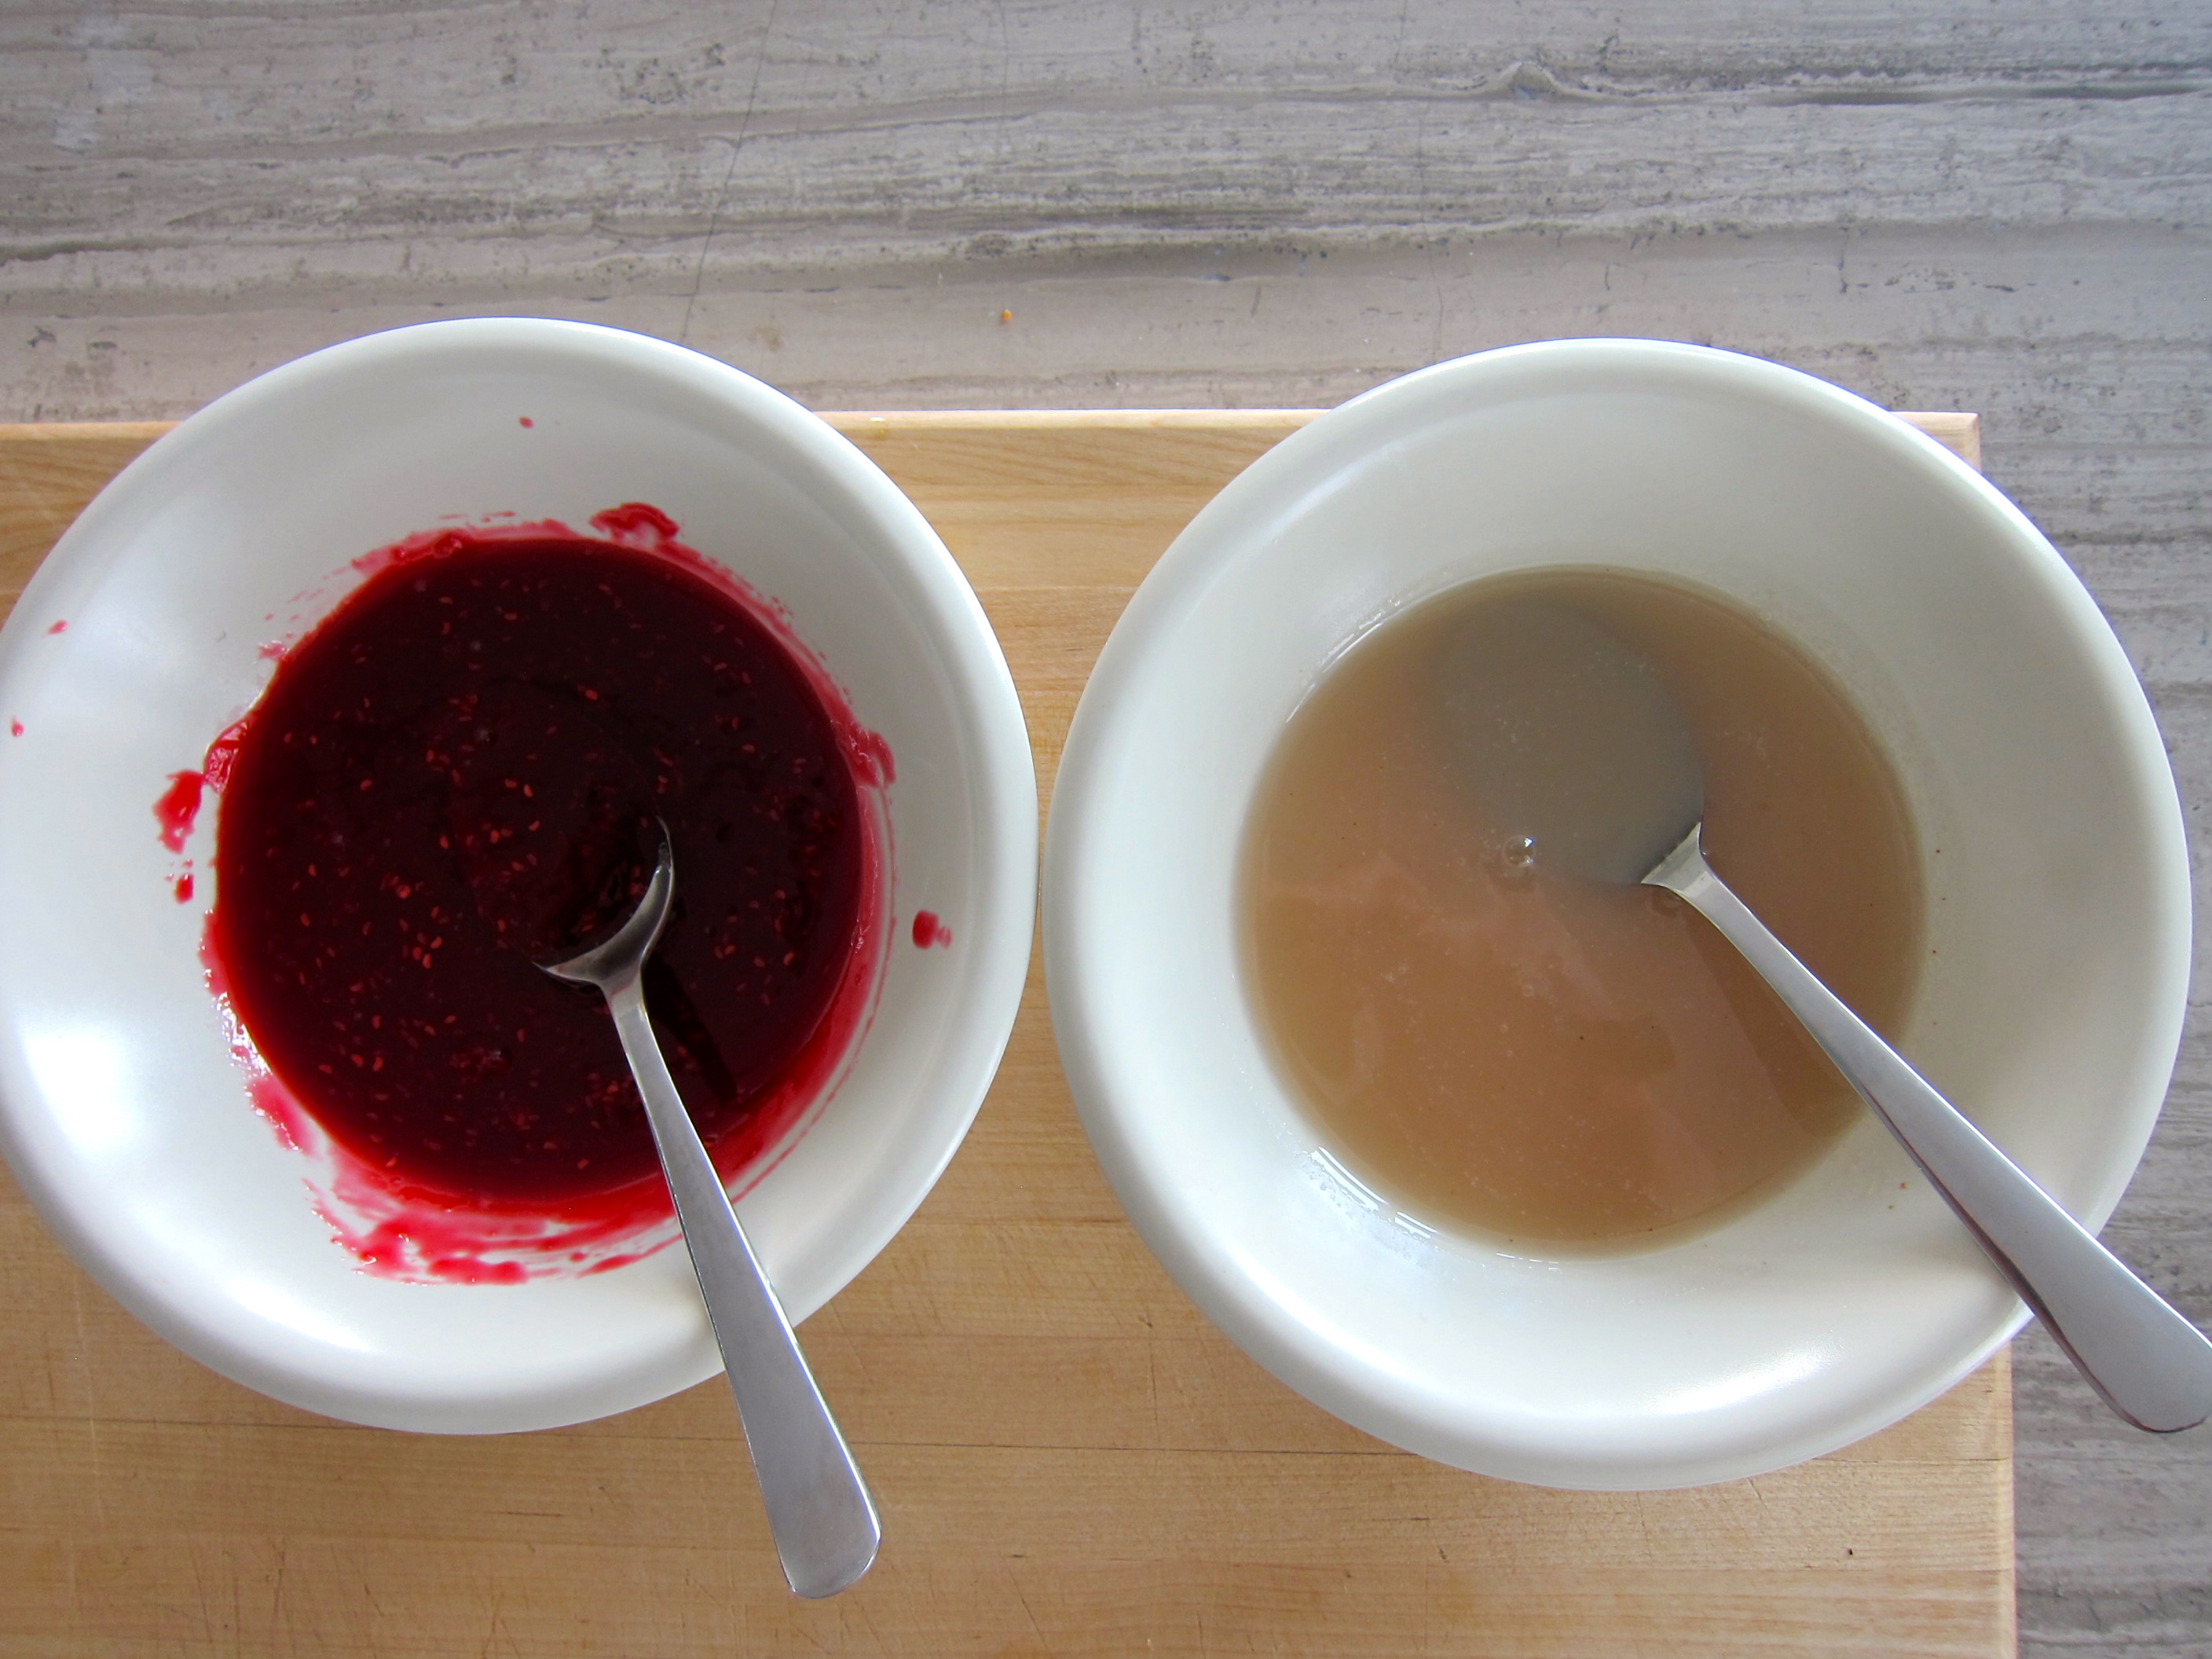
First make the raspberry syrup:
In a small saucepan, combine raspberries, sugar, and kirsch. Bring to a boil over medium-high heat, stirring continuously for about 6-8 minutes. The syrup should thicken a little. Let it cool a little and then force through a fine meshed sieve to remove the seeds. Take about a teaspoon of the seeds and add them to the strained syrup. Cool completely and chill in the fridge. Can be made several days ahead and kept refrigerated. This makes almost double the amount you will probably need for the ice cream.
Make the lychee syrup:
In a small saucepan, combine chopped lychee, sugar, and kirsch. Bring to a boil over medium-high heat, stirring continuously for about 8-10 minutes. The syrup should thicken very slightly . Let it cool a little and then force through a fine meshed sieve. Cool completely and chill in the fridge. Can be made several days ahead and kept refrigerated. This makes almost double the amount you will probably need for the ice cream.
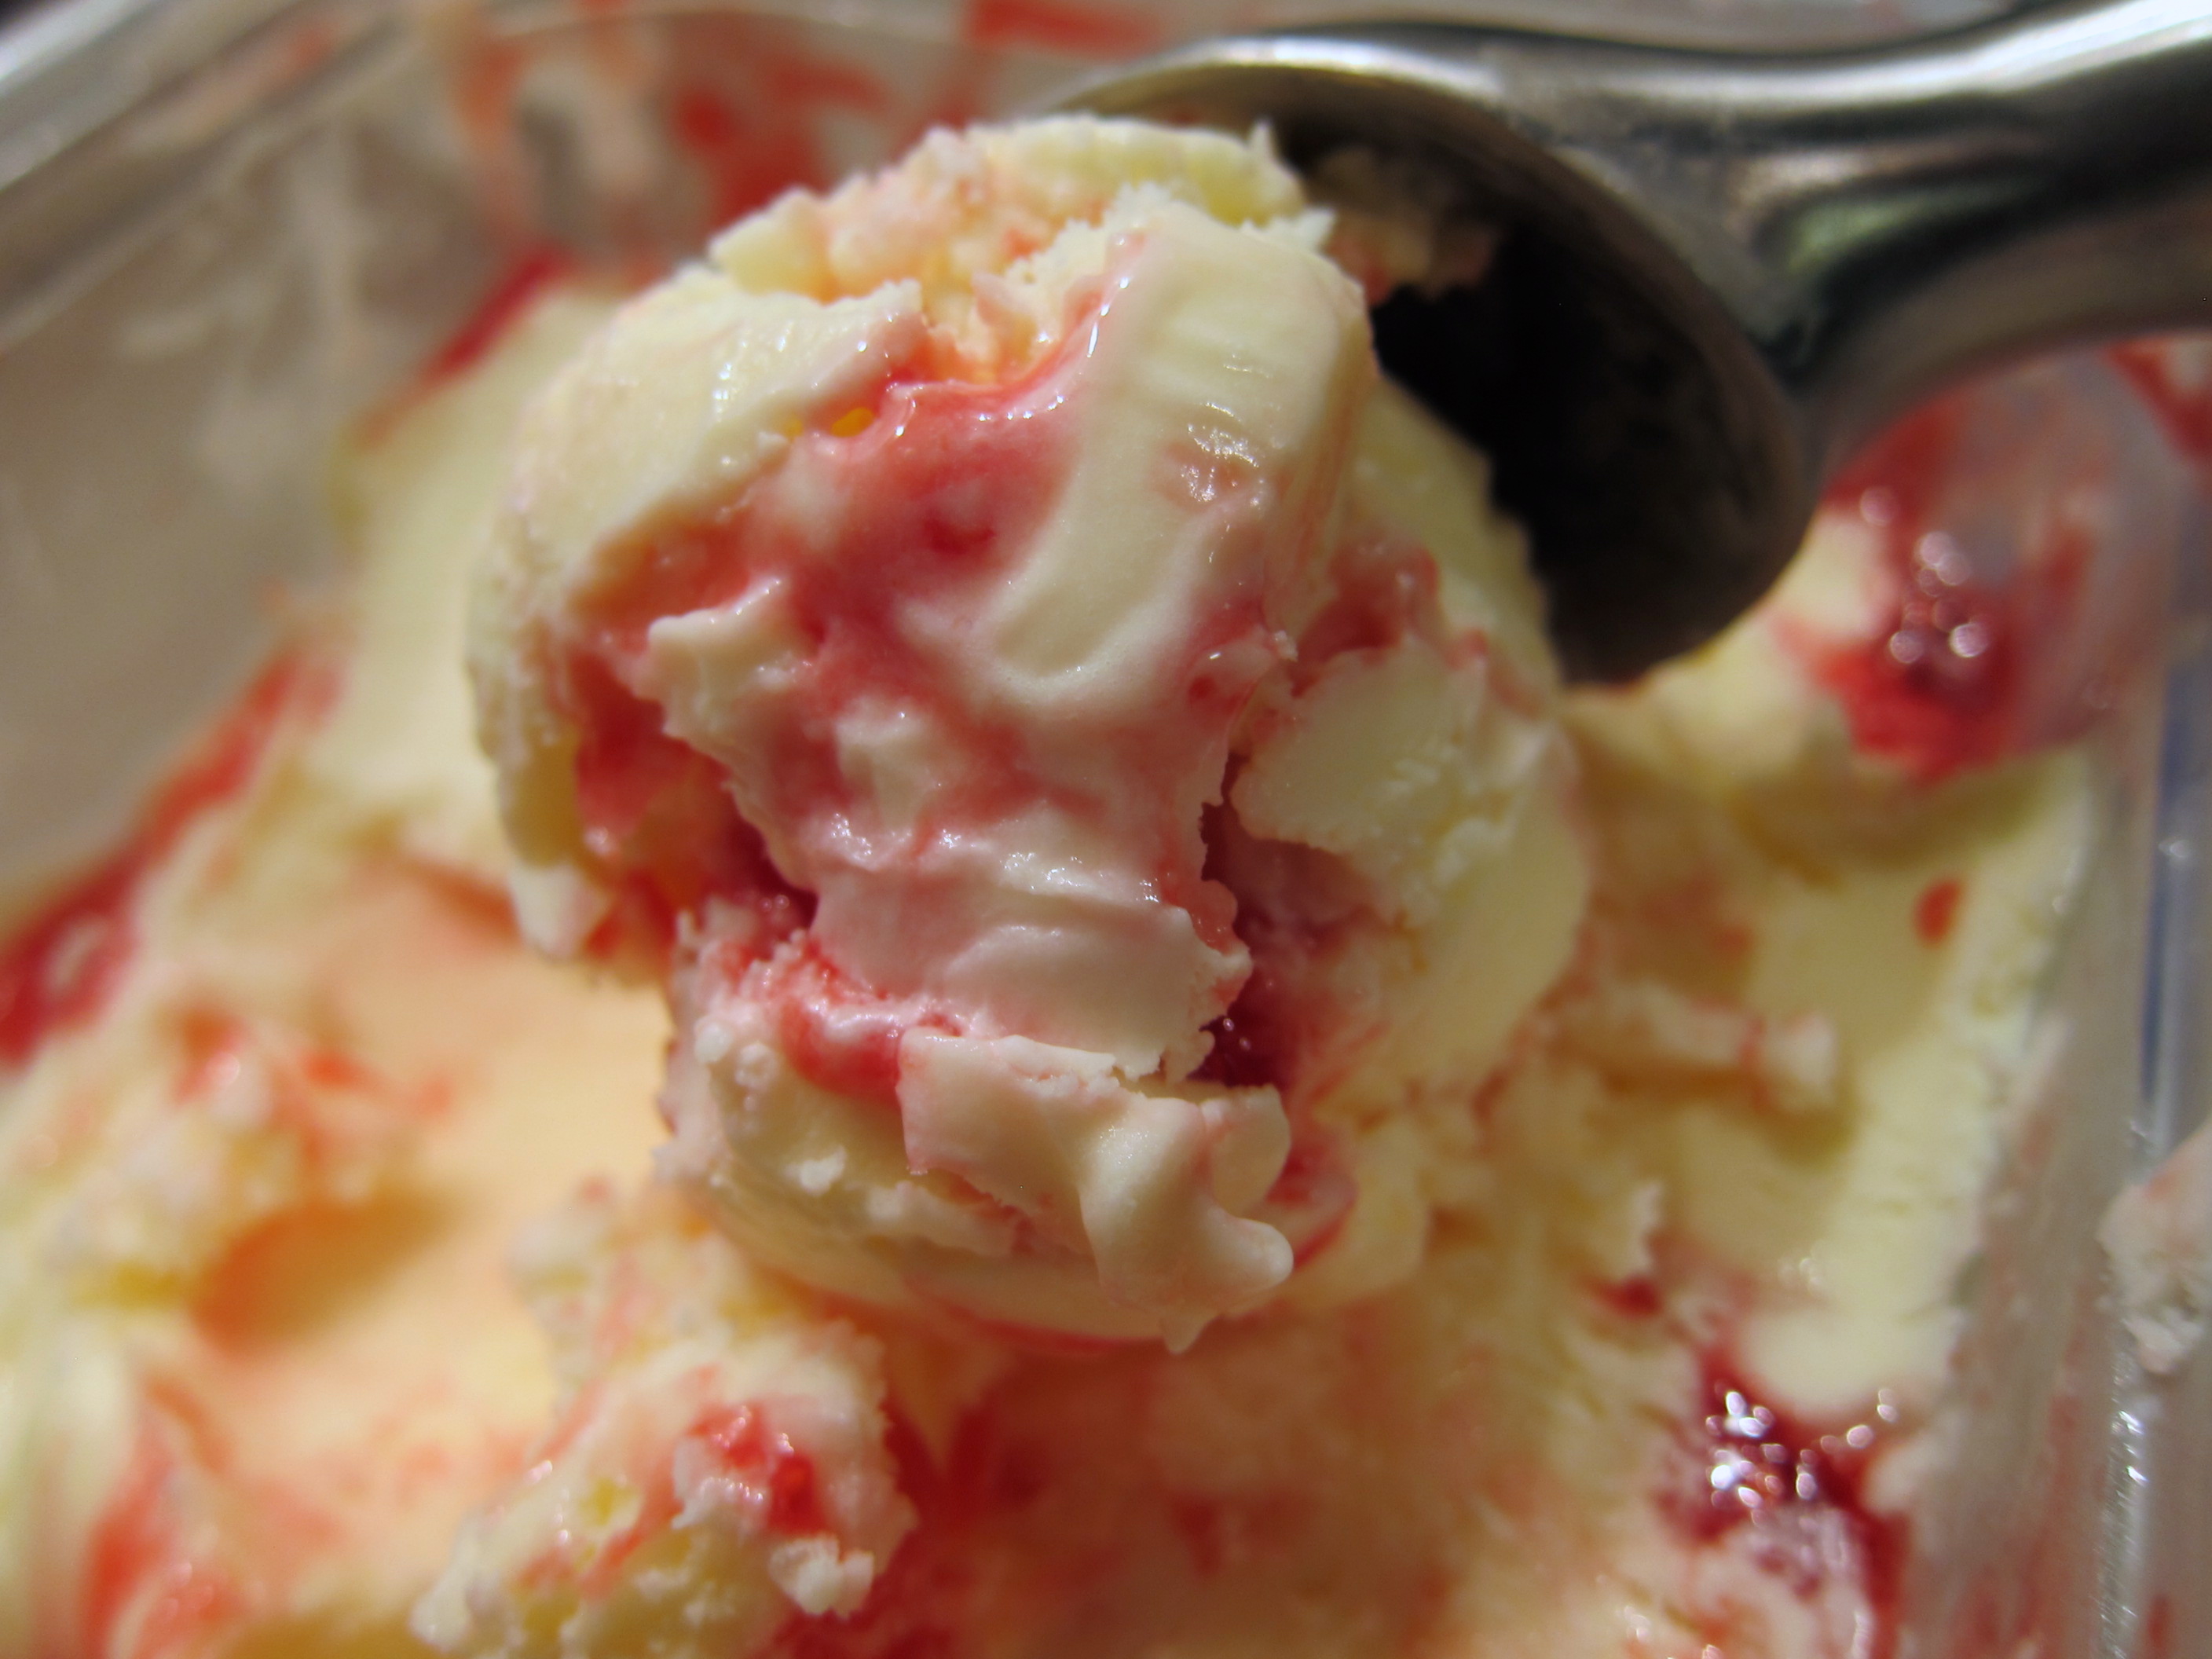
Make the rose ice cream and combine with syrups:
In a small bowl or a 2-cup measuring cup, stir together the cornstarch and heavy cream using a fork, making sure there are no lumps. Place the milk and sugar in a saucepan and bring to a simmer, stirring so that the sugar dissolves. Remove from the heat and stir in the heavy cream mixture. Return the pan to the stove and cook over moderate heat, stirring constantly, until it thickens. It should coat the back of the spatula or spoon. Taste the mixture: make sure it does not have any floury taste, if it does, continue to simmer it until the cornstarch is cooked.
Remove from the heat and add the rose water. Chill the mixture thoroughly in the refrigerator, then churn in your ice cream maker according to your manufacturer’s directions. Place about a quarter of the churned ice cream in the container you will use to store it in. Drizzle about 2 tablespoons of the raspberry syrup and 2 tablespoons of the lychee syrup over it. Repeat the process four times, layering the ice cream and syrups in the container.