Two-Minute Barbecue Sauce

This week it hit almost 80 degrees in New York. That’s the way it goes usually. We have winter, which never seems to end, and then bam! we have summer. Spring winks at us as she passes by for a week or two. Granted, we do have beautiful falls (lovely indian summers) but I would love a nice prolonged spring once in a while.

In any case, warm weather inevitably puts people in a grilling mindset around here. Which is funny, given than New Yorkers rarely have outdoor space where they can grill. But we make do. Some keep grills (illegally) on their tiny balconies. Others use communal back yards. And some (like me), use a stovetop grill pan to get some grill marks but, alas, no smoke.

IMG_2344

Nothing goes better with grilled meat than barbecue sauce. Of course, I am reluctant to buy the bottled stuff, wary of long, indecipherable ingredient lists, so I have created my own recipe for a super quick two-minute barbecue sauce. Yep. Two minutes. And you really only need those two minutes to gather the ingredients. After that, you just mix them together with a spoon and you’re done. All of the ingredients are things you probably already have in your pantry except for the liquid smoke (it lasts forever so I just keep a bottle in the pantry) and the smoked paprika, which, if you don’t have, you should buy immediately. It makes everything better.


IMG_2348

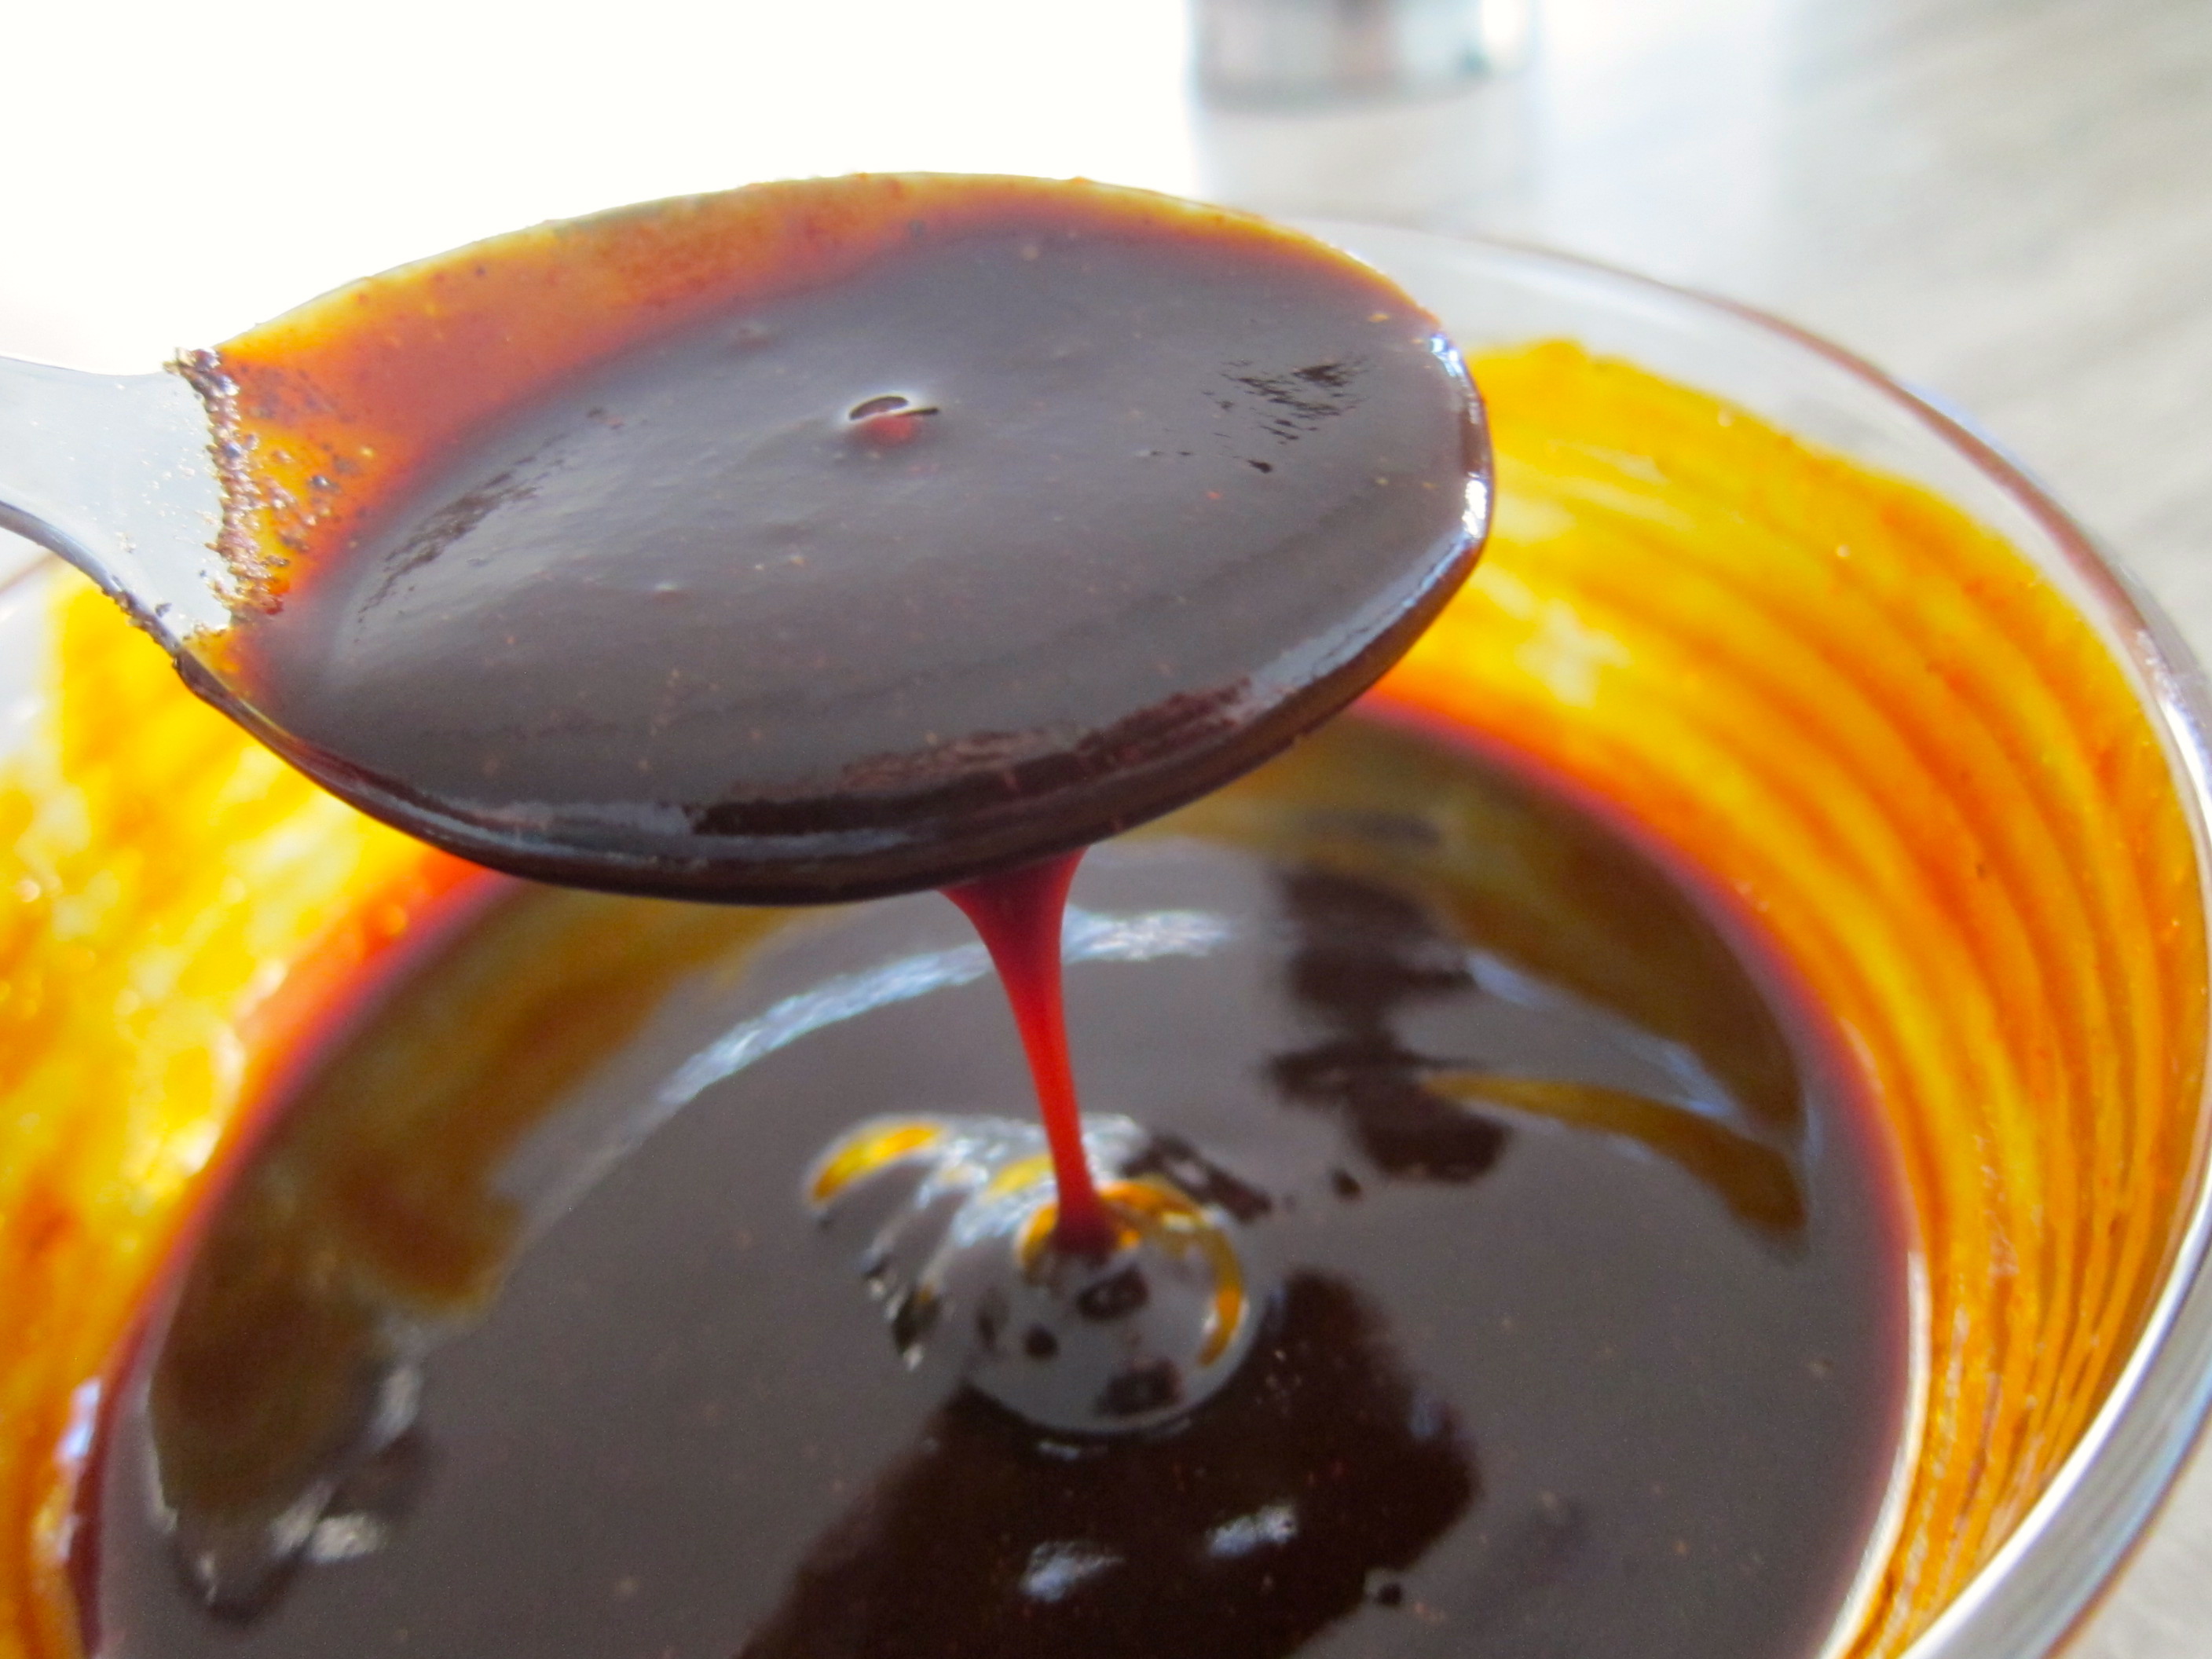
The end result is a smooth, smoky barbecue that is great brushed on chicken breasts or skirt steak and can be kept in the fridge for a long time if you make more than you need.

The other great thing about this barbecue sauce is that it can serve as your own palette that you use to make your own individual version of a barbecue sauce. You want an Asian flair? Add hoisin sauce. You want a kick? Add Sriracha sauce or cayenne pepper. You like your barbecue sauce sweeter? Add maple syrup.

Happy grilling!

IMG_2357

Two-Minute Barbecue Sauce

1/4 cup ketchup
2 tablespoons molasses
1 tablespoon soy sauce
2 teaspoons Worcestershire sauce
1/2 teaspoon liquid smoke
1/2 teaspoon smoked paprika (pimentón)
1/2 teaspoon lemon juice
ground black pepper

In a small bowl, mix all the ingredients with a spoon until you have a smooth, liquid sauce.

This is the basic recipe for the barbecue sauce, which you can improvise with by adding other ingredients to “flavor” your sauce. Some of the things that work well are:

  • Maple syrup
  • Stone ground mustard
  • Hoisin sauce
  • Orange zest
  • Prepared horseradish
  • Sriracha sauce

Chocolate Sherbet

Have you every made your own ice cream or sorbet, put it in the freezer to set, and tried the next day to scoop it out, only to find out it is frozen solid and can’t be scooped or even drilled into? Sure you can let it sit out for 10-15 minutes but first of all, who has the patience, and second, usually the outside will have melted enough but the inside will be still frozen solid.

IMG_2247

There are three ways to avoid that when making ice cream or sorbet. The first way (and this applies mainly to ice cream) is to displace as much of the water in your base with fat. So, the more cream (as opposed to milk, or god forbid, low fat or skim milk) you have in your base, the less your ice cream will become a block of ice.

The second way is with corn syrup. I know, I know. It’s the devil’s milk, that evil corn syrup. Actually, that’s high fructose corn syrup. That’s the really evil stuff. Plain corn syrup (Karo syrup) isn’t that bad for you. And in ice creams or especially sorbets, we’re talking a couple of tablespoons for a quart of ice cream. Since corn syrup doesn’t freeze, your frozen treat remains scoopable when you add some to the base.

IMG_2239

The third way is alcohol. The higher proof, the better. Kirsch, for example, is a great addition to sorbets to keep them soft in the freezer. Again, we’re talking a couple of tablespoons, not a martini glass full of vodka.

IMG_2238IMG_2238

David Lebovitz, who is my ice cream guru, posted a great recipe for a chocolate sherbet on his blog (which is one of my favorite food reads). A sherbet is like a sorbet, except it uses some milk instead of all water. In this case, it’s whole milk. Even though he says you can use low fat or skim milk I wouldn’t recommend it (see my point above about water vs. fat in your base).

IMG_2244

The milk helps the sherbet stay a little softer in the freezer but it’s not enough. He also recommends two tablespoons of your favorite coffee-flavored liqueur. Though he says it’s optional, for me it’s essential in order for the sherbet to have great texture. The result is a luxurious frozen treat. The cocoa gives it an intense, dark chocolate flavor that’s not diluted by cream or eggs. We love to eat it with a little sea salt sprinkled on top right after we (easily) scoop it out of the container where it happily lives in the freezer.

Chocolate Sherbet – Slightly adapted from DavidLebovitz.com

2 cups (500ml) whole milk (I’ve also used coconut milk successfully, which turns this into a vegan dessert)
1/2 cup (100g) sugar
a pinch of salt
1/2 cup (50g) unsweetened cocoa powder (use good quality cocoa; my favorite is Valrhona)
4 ounces (115g) semisweet or milk chocolate, chopped (I usually prefer the Extra Rich Milk Chocolate by Scharffen Berger)
1/4 teaspoon vanilla extract
2 tablespoons coffee-flavored or chocolate-flavored  liqueur

Put chopped chocolate in a heat-proof medium-sized bowl and set aside.

In a medium-sized saucepan, add 1 cup of milk, sugar, salt, and cocoa powder. Over medium-high heat, bring it to a full boil, whisking frequently to dissolve the cocoa and prevent scorching in the bottom. As soon as it comes to a full boil (careful because it can boil over), reduce the heat and simmer it gently for 30 seconds. This will “bloom” the cocoa powder, intensifying its flavor.

Pour cocoa mixture over the chopped chocolate and stir with the whisk until it has all melted. Add the vanilla, the liqueur, and finally the other 1 cup of milk. Stir to combine.

Chill the mixture thoroughly, then freeze in your ice cream maker according to the manufacturer’s instructions.

Fried Egg with Ginger Fried Rice

When I was a kid, there was only one Chinese restaurant in our city and it was a nice one. I still remember its name: Pagoda. We went there only on very special occasions, maybe once a year, since it was expensive for my family. But we all just loved it. It was the closest thing we had to a vacation in an exotic land.

IMG_2329

The food was so different than what we were used to: sweet and sour chicken, crispy spring rolls, pork with pineapple. These were unheard of flavor combinations and textures in our everyday diet. We kids loved the big round tables with the lazy susan center that allowed everyone to sample from the many dishes without getting up. And I still remember the nice waiter who taught me how to use chopsticks, a skill I proudly demonstrated every time we went back.

IMG_2318

You can imagine my delight when I arrived in the U.S. to study and I found out that Chinese food was everywhere and dirt cheap. In Philadelphia, where I lived, there were even trucks selling it on every street corner! My still-new palate found every greasy, overcooked, laden with sugary sauce dish to be a culinary treasure. It took a few years to start relegating American Chinese food to the bottom of the list of my favorite foods.

IMG_2320

IMG_2322

Fortunately here in New York, along with the abundance of terrible Chinese food, there are also some great places from which we sometimes order food delivery. But every single dish comes with the obligatory box of rice, very little of which we eat. I’ve always hated throwing out the leftover rice until a couple of years ago, I saw Mark Bittman of the New York times introduce a recipe for using it up.

IMG_2325

This is technically a recipe by Jean-Georges Vongerichten and it’s really just a simple fried rice recipe. But its simplicity belies the incredibly satisfying combination of flavors and textures that is this dish. It takes just a little chopping and some quick sautéing and it uses things you most likely already have in your kitchen.

IMG_2323

So if one night this week you order Chinese takeout (Thai takeout rice works as well. I don’t like to use the rice from Indian takeout because I find it’s too dry for this recipe), save a box or two of that fluffy white rice. A day or two later, when you are breaking the creamy yellow yolk over the richly flavored rice, scooping it up with bits of crispy garlic and ginger, you’ll be happy you didn’t throw the rice out along with the unopened fortune cookies and unused chopsticks.

IMG_2330

Fried Egg with Ginger Fried Rice – Adapted from the New York Times

1/2 cup canola or vegetable oil
2 tablespoons roughly chopped garlic
2 tablespoons roughly chopped ginger
1 very thinly sliced large onion (alternatively you can use leeks, white and light green parts only, rinsed and dried, about 2 cups thinly sliced)
4 cups day-old cooked white rice (don’t worry if you have a little less or more; use what you have)*
4 large eggs
2 teaspoons sesame oil
4 teaspoons soy sauce

The rice has to be at least a day old (keep it in the fridge). Fresh rice is too moist to work for making fried rice.

In a large skillet, heat 1/4 cup of the oil over medium heat. Add garlic and ginger and cook, stirring occasionally, until crisp and golden brown. Immediately, with a slotted spoon, transfer to paper towels and set aside.

Add onions and cook, stirring occasionally, until very tender and starting to brown at the edges. Add the rice. Cook, stirring well, until heated through, about 1-2 minutes. Divide the rice among four large soup bowls or plates.

Add the remaining oil in the skillet, and fry eggs sunny-side-up, until edges are set but yolk is still runny.

Top the rice in each bowl or plate with an egg and drizzle with 1/2 teaspoon sesame oil and 1 teaspoon soy sauce. Sprinkle crisped garlic and ginger over everything and serve immediately.

Makes: 4 servings

Cherry Cream Scones

When we lived in midtown, Steve would sometimes stop by Amy’s Bread Bakery on his way home from work and pick up a couple of cherry cream scones. I don’t want to say that I squealed from joy when he entered the apartment carrying the telltale brown bag, but it was pretty close. We loved (and still do) those cherry cream scones. They looked and tasted rustic. They were sweet but with serious tones of something darker. The dried cherries were just tangy enough to counterbalance the richness of the dough and the coarse sugar toping gave a satisfying crunch with every bite.

IMG_2298

Well, just like everything else I love to eat, I decided that I just had to figure out how to make them myself. Many tastings had given me clues to the ingredients but they weren’t enough. I had to get the recipe. A quick search online revealed an Amy’s Bread cookbook that was available on Amazon. But I didn’t want to buy it just for this recipe. So, I clicked on the “Click to look inside” link which shows a few pages from a book, so you can sample it before you buy it.

IMG_2285

And wouldn’t you know it, there it was: the recipe for cherry cream scones. Except for one problem: Amazon gave me only the first page. That included the ingredients and some of the steps. I decided I could figure out the rest of the steps on my own. Turns out I couldn’t. My first attempt didn’t turn out so good.

IMG_2286

So back to Amazon I went and started clicking on “Surprise Me!” which gives you a random page from the book. A good 15 minutes later I landed on the second page of the recipe. Since then, Amazon has changed the pages they show from this book and now the entire recipe is available to anyone that looks at the book on the site.

I have made these scones too many times to count. I have taken them to friends who invited us to their country house for the weekend and I have made them in the middle of nowhere in France where we were spending New Year’s with a group of friends. Every time, they are a hit. And when we moved away from midtown two years ago and had no Amy’s Bread Bakery nearby, we were ok with that. We knew how to make our own.

Cherry Cream Scones – Slightly adapted from The Sweeter Side of Amy’s Bread

These aren’t your typical british scones, all round and perfect, dry and crumbly. They are misshapen and soft inside with a crusty exterior. What gives them their unique taste is the use of only cream (no butter) and only brown sugar (no white sugar).

3 1/2 cups (510 gr) all purpose flour
1 tablespoon and 1 teaspoon (20gr) baking powder
1 1/2 teaspoons kosher salt
1 cup (200 gr) light brown sugar
1 1/4 (200 gr) cups dried cherries*
2 2/3 cups (630gr) heavy cream
1 egg and 1 tablespoon of water for egg wash
turbinado sugar (or other coarse sugar; if not, you can use regular sugar but you won’t get that nice crunch)

* I buy the apple juice infused dried cherries from Whole Foods. Don’t use dried cherries that have any artificial flavoring in them. If you find dried sour cherries, they would be ideal.

Put racks on top third and bottom third of oven and preheat to 400° F. Line two 12×17 or 13×18 sheet pans with parchment paper.

In large bowl, whisk together flour, baking powder, and salt. Stir in brown sugar till evenly distributed (use your fingers to break up any clumps of sugar), then add dried cherries and stir again. Make a well in the middle of the mixture and pour all the cream in the well. Stir carefully with a spatula first and then with your hands until a soft, shaggy, and slightly sticky dough is formed.

IMG_2288

Divide dough in 2 pieces. Gently shape each piece into a round disk, about 2 inches thick. It’s ok if the disks aren’t smooth or perfect. Using a knife or dough scraper cut each disk into 6 wedges. Again, don’t worry about the wedges being perfect. As soon as they hit the hot oven, they will start to melt and fall apart anyway (remember, these are rustic scones, not perfect looking ones). Arrange 6 wedges on each pan. Leave space between them because they will spread and rise.

IMG_2290

Mix egg and 1 tablespoon of water in a small bowl and brush the tops of the scones. Sprinkle the tops of the scones generously with turbinado sugar. Don’t be timid with the sugar. As the scones spread and rise, the sugar will disperse over their surface. You want lots of it to provide a nice crunch.

IMG_2291

Place the two pans on each of the two racks and bake for 7 minutes. Rotate top and bottom pans and reduce to 350° F. Bake for another 10 minutes. Rotate pans again, top to bottom, and bake 15-20 min more. They should be dark golden brown and firm to the touch. If you want, you can test with a toothpick, which should come out clean. If they’re browning too quickly, you can turn the oven down to 325 F. Cool on a wire rack.


IMG_2295

These scones freeze beautifully. Once completely cool, place them in ziploc bags and put them in the freezer. To have them for breakfast, take out of the freezer the night before and leave uncovered on the countertop overnight.

Makes: 12 scones

Roasted Vegetables

Why do people insist on boiling vegetables? Is it because they think it’s easier than cooking them any other way? Or is it because they can’t use their oven due to the shoes they keep in there (you’d be amazed the things people store in their unused ovens in New York apartments)? Why do we accept bland, boiled vegetables when there is a simple and easy way to make them delicious?

IMG_2215

Nothings makes a vegetable better than roasting it at high temperature. Whatever it is, cauliflower, brussel sprouts, butternut squash, asparagus, you name it. It will soften but its edges with crisp up and caramelize. It will become something you and your kids want to have more of, not something they have to negotiate over not eating it.

IMG_3233

It couldn’t be simpler. There’s no recipe here. Just high heat and a little olive oil.

Take the vegetable. Cut in roughly equally sized pieces and put in a large bowl. Add  a good amount of olive oil, some salt, some pepper. Toss with your hands until every piece is coated with oil. Spread on a baking sheet (don’t crowd the veggies because they’ll steam; use two sheets if you have too much) and cook in 425° F oven, tossing once or twice, until brown in spots and nicely roasted. Serve alone or with your favorite dressing (like thai chili vinaigrette or lime garlic vinaigrette). Alternatively, mash the vegetable (like roasted butternut squash) or blend it with some vegetable stock if you want soup (like roasted asparagus).

See? Super simple.


IMG_3259 IMG_3238

Wonder Cup

IMG_2251

Don’t you hate it when you have to measure something sticky, like honey or maple syrup, or something thick, like sour cream or yogurt? You always end up trying to scrape it off the measuring cup or spoon and you never feel like you really got the full amount the recipe calls for.

Well, the wonder cup comes to the rescue. Steve gave it to me one Christmas and I’ve used it countless times since. You just push the bottom part down to the measurement you desire, fill the top with whatever you need and then push everything out from the bottom up. It scrapes every little bit of the yogurt, or honey, or whatever you need into your bowl.

They sell these at Amazon in both yellow and white and in 1-cup or 2-cup sizes.

Upside-Down Apple-Molasses Cake

Do you have a cast iron skillet? It’s one of those things that everyone is “supposed” to have. Every time I see it mentioned in a cookbook or food article it’s referred to as “the only pan you’ll ever need.” You’re not really considered as someone serious about food unless you have one in your kitchen. Such pressure!

IMG_2233

Truth is, a cast iron skillet is a great pan. Not just because it retains heat well and is naturally non-stick (provided you season it appropriately) but also because it’s hefty and rugged. When you pull this hunk of iron out of the kitchen cabinet or drawer, it’s like you’re saying “now we’re in business.”

IMG_2224

Here’s the only problem, though. What if you bought one, all excited you joined the ranks of the so-called serious cooks, and then you never really used it? It’s just too heavy. The handle gets hot. You’re afraid to wash it afterwards – aren’t you supposed to just rub it with salt or something?

Well, that was me for a long time. I had a perfectly good cast iron skillet but the only thing it provided me with was guilt. It took me a while to accept the fact that this was not supposed to be a skillet I should use often because…this is not 1873. That this is more of a specialized tool, appropriate for certain recipes. That eased my guilt considerably, so now when I do use it, I love it, and when I don’t use it, well, I just forget about it.

IMG_2225

This recipe is one of those recipes that call for a cast-iron skillet. Though that’s not what made me try it out. The recipe had me at “upside-down.” Seriously. How could you say no to any upside-down cake when you know it means caramel(!) that soaks the bottom-then-top of the cake?

This cake is easy to make and it’s a little dangerous. It comes out dark and seductive looking. When you put your fork through it, it’s toffee-sticky but tender. And when you eat it, its rich, lightly spiced crumb sticks to the roof of your mouth, unwilling to let you go.

Like I said. It’s a little dangerous.

IMG_2221

Upside-Down Apple-Molasses Cake – Slightly adapted from Bonappetit.com

5 tablespoons unsalted butter
1 3/4 cups all-purpose flour
1 1/2 teaspoons kosher salt
1 teaspoon ground cinnamon
3/4 teaspoon baking soda
1/2 teaspoon baking powder
1/2 cup  molasses (you can use mild-flavored molasses if you prefer)
1/4 cup honey
1 large egg
2 teaspoons grated peeled ginger
1/2 cup sugar, divided
1/3 cup sour cream
1/4 cup whole milk
3-4 Honeycrisp or Pink Lady apples, (about 2 pounds), peeled

Preheat the oven to 350°. Melt butter in a 9-inch or 10-inch cast-iron skillet (you can use a different ovenproof skillet if you don’t have a cast-iron one). Take skillet off the heat and set it aside. Whisk the flour, salt, cinnamon, baking soda, and baking powder in a medium bowl.

Whisk the molasses, honey egg, ginger, and 1/4 cup of the sugar in a large bowl. Whisk in the sour cream, then the milk. Gradually whisk in the dry ingredients, then 3 tablespoons of the melted butter from skillet. Set aside. The batter will be thick.

Place a peeled apple on a work surface stem up. Cut a large piece of the apple from one side, leaving core behind. Rotate the apple and repeat twice for a total of 3 large pieces (a triangular core will remain). Repeat with remaining apples.

IMG_2228

Add the remaining 1/4 cup sugar to butter in skillet. Cook over medium-high heat until the sugar just begins to darken and caramelize, about 2-3 minutes. Be careful because the sugar can quickly burn.

IMG_2229

Add the apples flat side down and immediately turn them rounded side down. Cook the apples rounded sides down for 3 minutes, then turn over and cook flat sides down until beginning to soften, about 5 minutes longer.

IMG_2231

Space the apples evenly in skillet flat side down and pour the cake batter over. If the batter is too thick to pour, use a spatula to gently spread it evenly over the apples.

IMG_2232

Transfer the skillet to the oven. Bake until a cake tester inserted into the center comes out with a few moist crumbs attached, 30-40 minutes.

Let the cake cool in the skillet for 10 minutes, then carefully invert it onto a plate. If any of the apples stay in the skillet, just use a spoon to take them out and place them back on the cake.